Quickstart for Editors
Welcome to Nimbu. As a Content Editor, you're the architect of the student experience. You build the "blueprints" (Courses) and "building blocks" (Units) that Trainers use to deliver high-quality vocational education.
This platform is designed specifically for Registered Training Organisations (RTOs) to bridge the gap between complex compliance requirements and seamless digital learning.
What's Covered in This Article
This guide provides a rapid onboarding path to help you move from new user to confident content creator:
- Core concepts: Understanding Courses, Units, and Classes relationships
- Content Library: Managing your repository of learning materials and assessments
- Two workflows: Bottom-up (Unit to Course) and Top-down (Course to Unit) approaches
- Building your first Unit: Step-by-step creation process
- Key workflows: Publishing, versioning, and quality control
Core Concepts: The Nimbu Hierarchy
The system offers unique flexibility - build from the ground up (starting with Units) or from the top down (starting with Courses).
The Three Pillars of Training
- Course (The Master Blueprint)
- Top-level container defining the overall qualification
- Sets regulatory status and accreditation
- Contains the collection of Units required for completion
- Example: "Certificate III in Commercial Cookery"
- Unit (The Building Block)
- Houses the actual learning materials, assessments, and observations
- A single Unit can be used in multiple different Courses
- Ensures consistency across your RTO
- Example: "SITHCCC027 - Prepare dishes using basic methods of cookery"
- Class (The Live Instance)
- Created when you're ready to deliver training
- Generated from a Course blueprint
- Where you set specific dates, assign Trainers, and enrol students
- Example: "Commercial Cookery - January 2025 Intake"
Key Point: As a Content Editor, you create Courses and Units. Trainers and Administrators create Classes for delivery.
Building Your Way: Two Strategic Workflows
Nimbu supports both linear and creative workflows. Choose the method that fits your current project.
Option A: The "Bottom-Up" Approach (Unit to Course)
- Best for: RTOs with a pre-existing library of individual competencies
- How It Works:
- Create and publish your Units first in the Units page
- Once Units are ready, open a new Course
- Add existing Units to build your curriculum
- Advantages:
- Build reusable Unit library over time
- Mix and match Units across different Courses
- Ensure consistency in delivery
Option B: The "Top-Down" Approach (Course to Unit)
- Best for: Rapidly prototyping a new qualification or filling gaps while building
- How It Works:
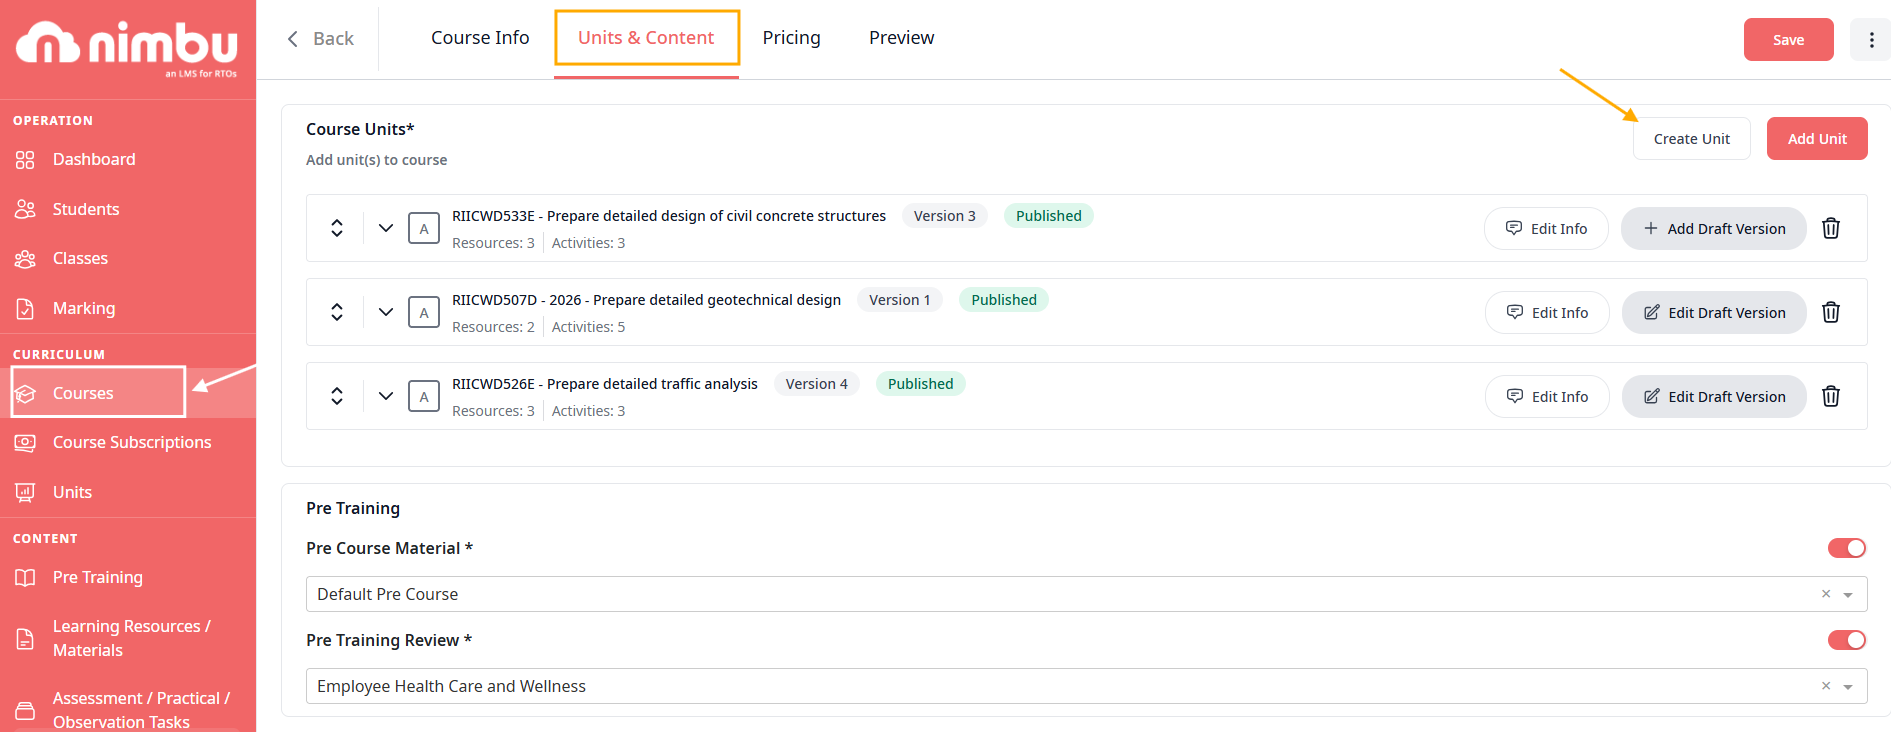
- Start in the Course Editor
- Click "Create Unit" directly from the Course Units section
- Choose unit type (Accredited, Non-Accredited, or Cluster)
- Unit is automatically linked to your Course
- Advantages:
- Faster workflow - no need to navigate away
- Automatic mapping to current Course
- See Course structure as you build
Key Point: Units created this way are automatically linked to your Course, saving you from having to search for them later.
Content Library Overview
The Content Library is your central repository for all training assets, divided into functional categories.
Pre-Training Content
- Location: Pre Training menu
- Purpose: Mandatory prerequisites for course entry
- Content Types:
- Pre Course Material - Mandatory reading (e.g., Student Handbooks, Course Guides, Complaints Policy)
- Pre-Training Review - Suitability assessments to gauge student readiness
Learning Resources & Materials
- Purpose: Study materials that support learning (non-graded content)
- Content Types:
- Documents & Media:
- PDF - Documents and workbooks
- Video - Embedded or linked video content
- Podcast - Audio learning materials
- Canva - Embedded Canva designs
- Interactive Content:
- SCORM - Interactive e-learning packages
- Quiz - Self-marking practice tests
- Article - Rich text learning content
- LTI - External learning tools
- Documents & Media:
Key Point: Learning Resources support student learning but don't require trainer marking (except Quiz which is self-marking).
Assessments & Observations
- Purpose: Graded content that determines competency (requires trainer marking)
- Content Types:
- Assessments:
- Digital knowledge-based evaluations
- Question types: Multiple Choice, True/False, Selection, Short Answer, Upload
- Used to assess theoretical understanding
- Observations:
- Practical tasks where a Trainer records student performance
- Used to assess demonstrated skills
- Can include checklists, evidence uploads, and observation notes
- Assessments:
Key Point: These are the Activities that contribute to unit results and require Satisfactory/Not Satisfactory decisions.
Quickstart: Building Your First Unit
Choose the workflow that fits your project.
Option A: The "Bottom-Up" Approach
Step 1: Create Your First Content Item
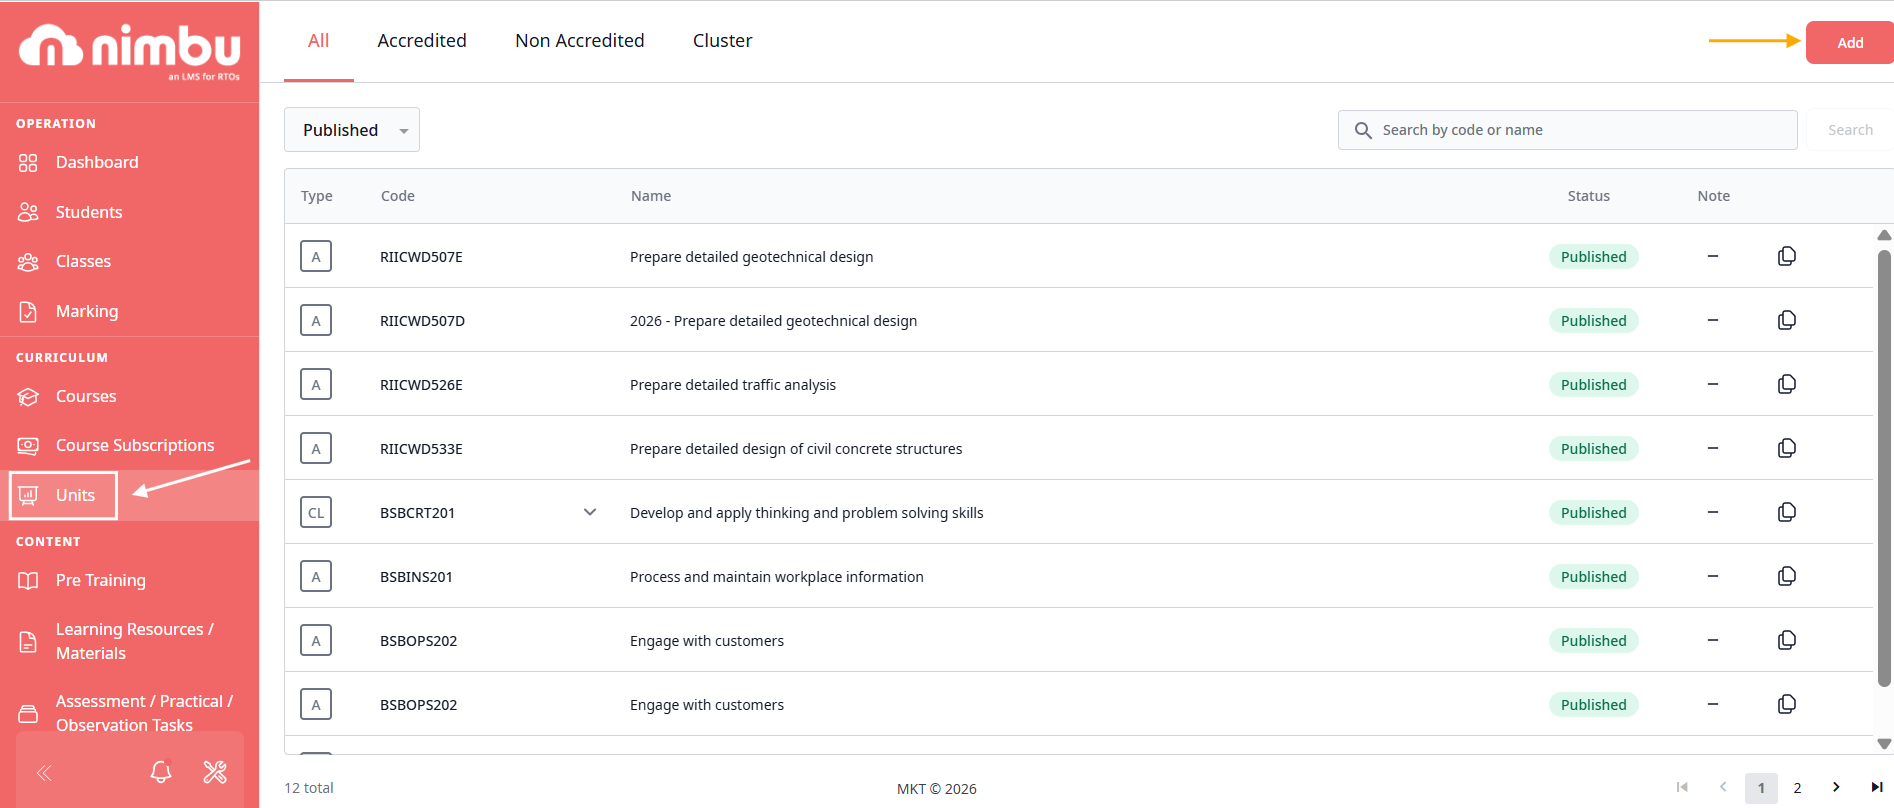
- Navigate to the Units page
- Select the Unit you wish to edit (or create a new Unit)
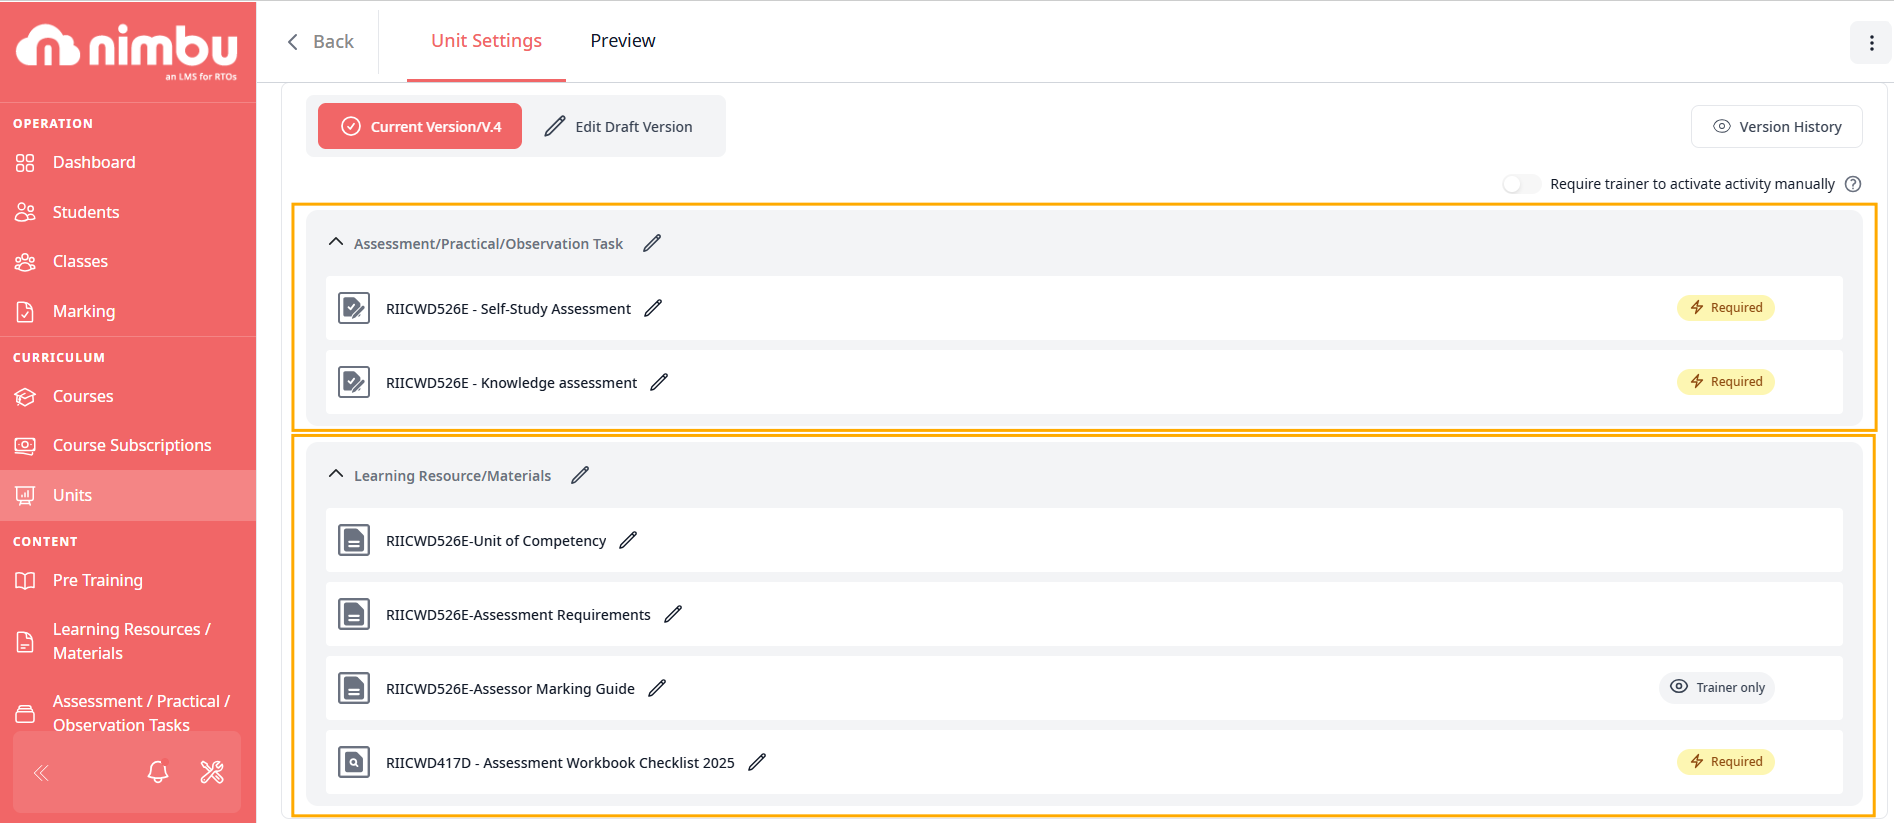
- Inside the Unit, you'll see sections for:
- Assessments/Observations
- Learning Resources
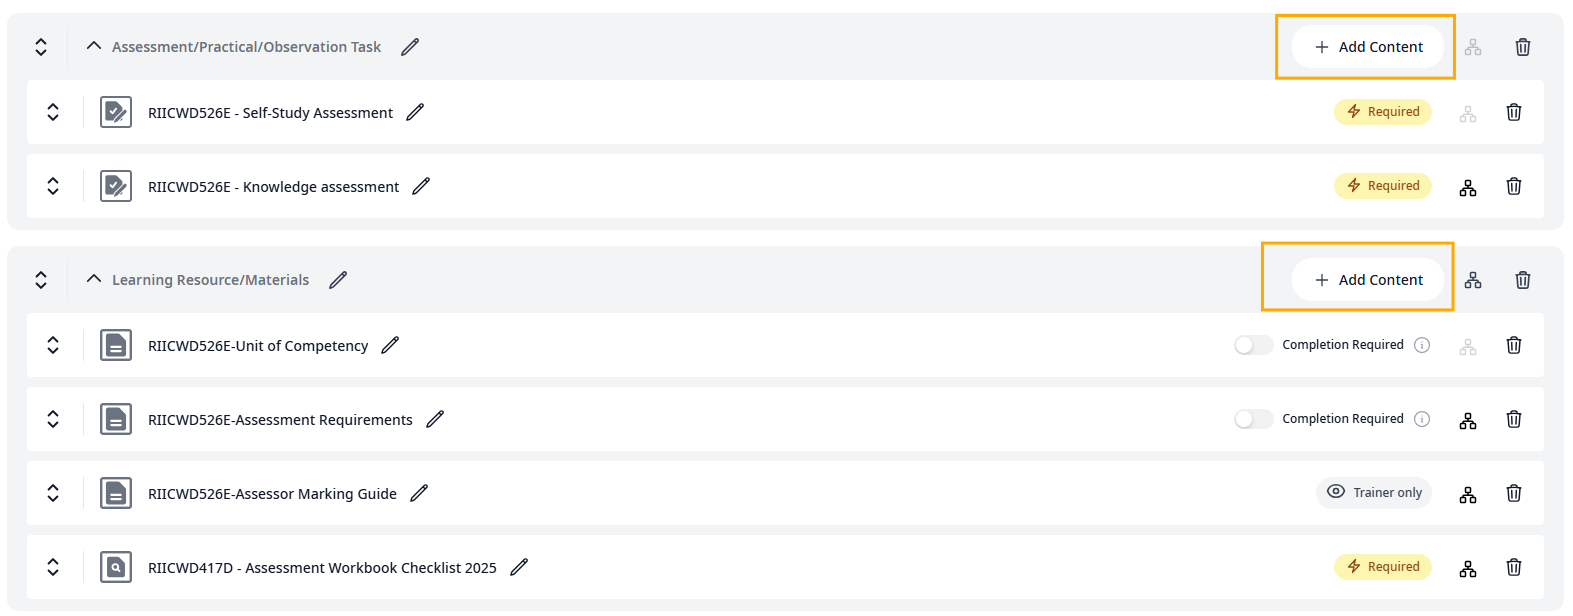
- Click the Add Content buttons within these sections to:
- Upload files (PDFs, videos, etc.)
- Create new digital activities (assessments, quizzes, articles)
Step 2: Assemble the Unit
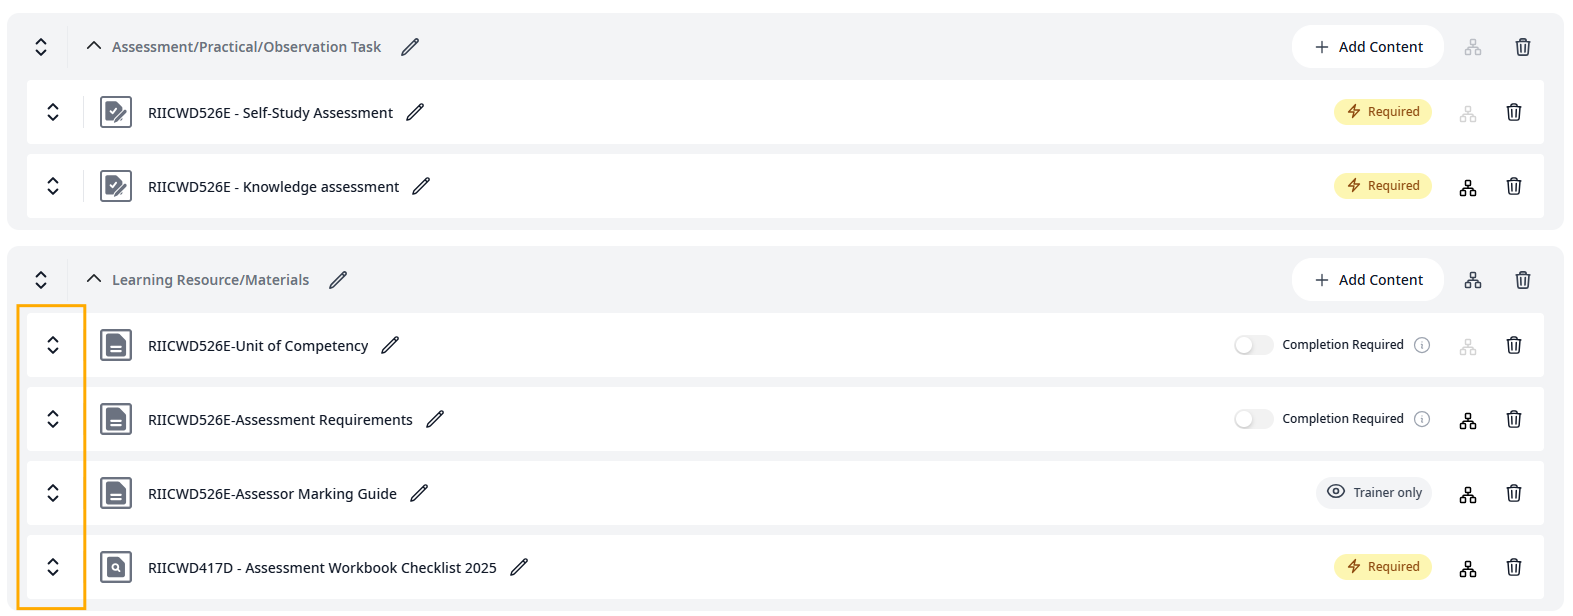
Organise Content:
- Drag and drop content items into the desired sequence
- Use the handles on the left of each item to reorder
- Group related content into sections
Configure Settings:
- Set items as "Completion Required" if needed
- Determine if an item requires Trainer Activation before students can access it
- Add due dates or time limits where appropriate
Set Prerequisites:
- Create rules so students must finish one item before the next unlocks
- Control the learning journey through your Unit
- Ensure foundational knowledge before advanced content
Step 3: Publishing
- Review your Unit using the Preview tab
- Check that all content displays correctly
- Verify prerequisites and settings
- Click Publish
Important: Published Units are locked to preserve evidence. If you need to make changes later, you must create a New Draft Version.
Option B: The "Top-Down" Approach
Direct Creation from Course
- Open your Course in the Course Editor
- Navigate to the Units & Content tab
- Click "Create Unit" directly from this section
Setup
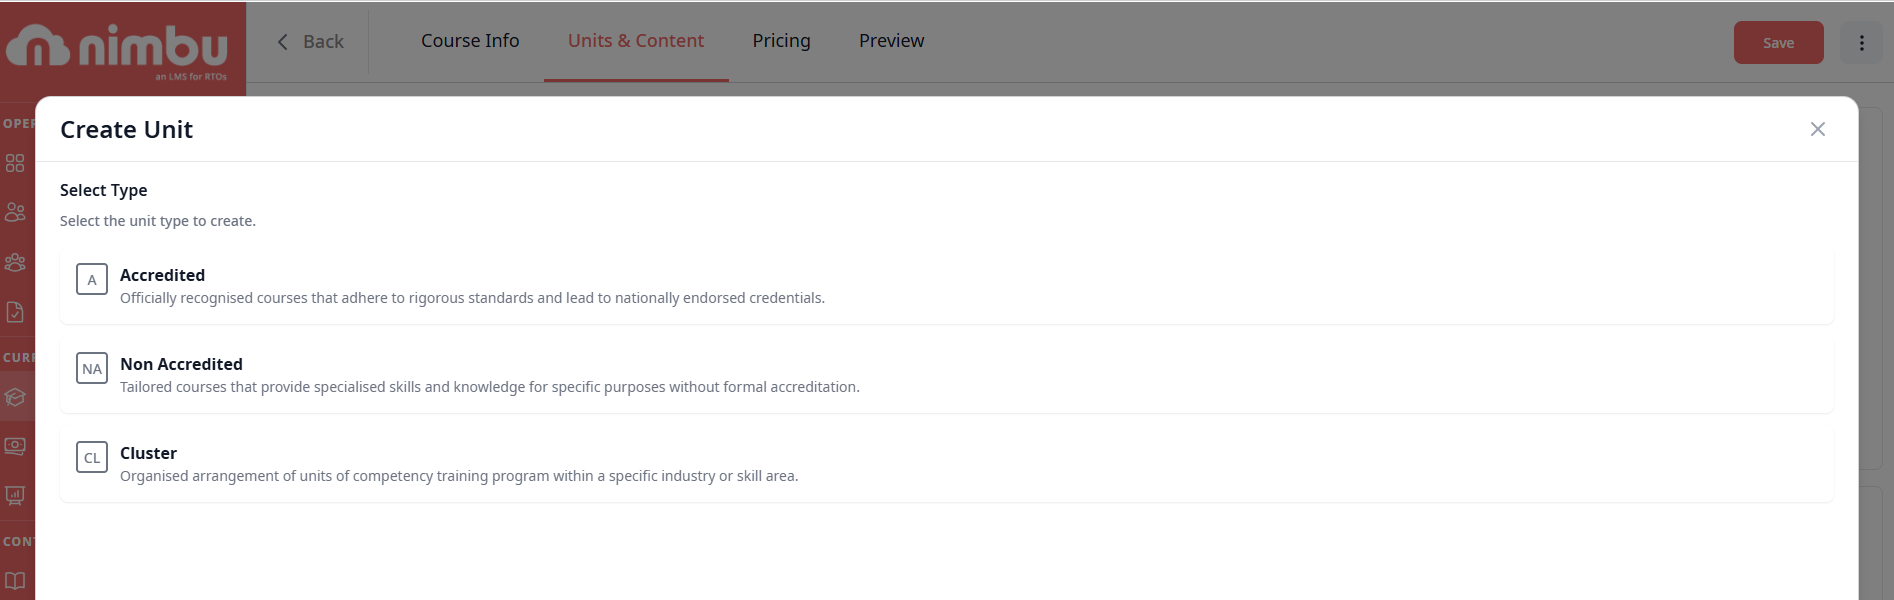
- Choose the unit type:
- Accredited - Nationally recognised, requires National Code
- Non-Accredited - Internal training, uses Internal Code
- Cluster - Group multiple competencies
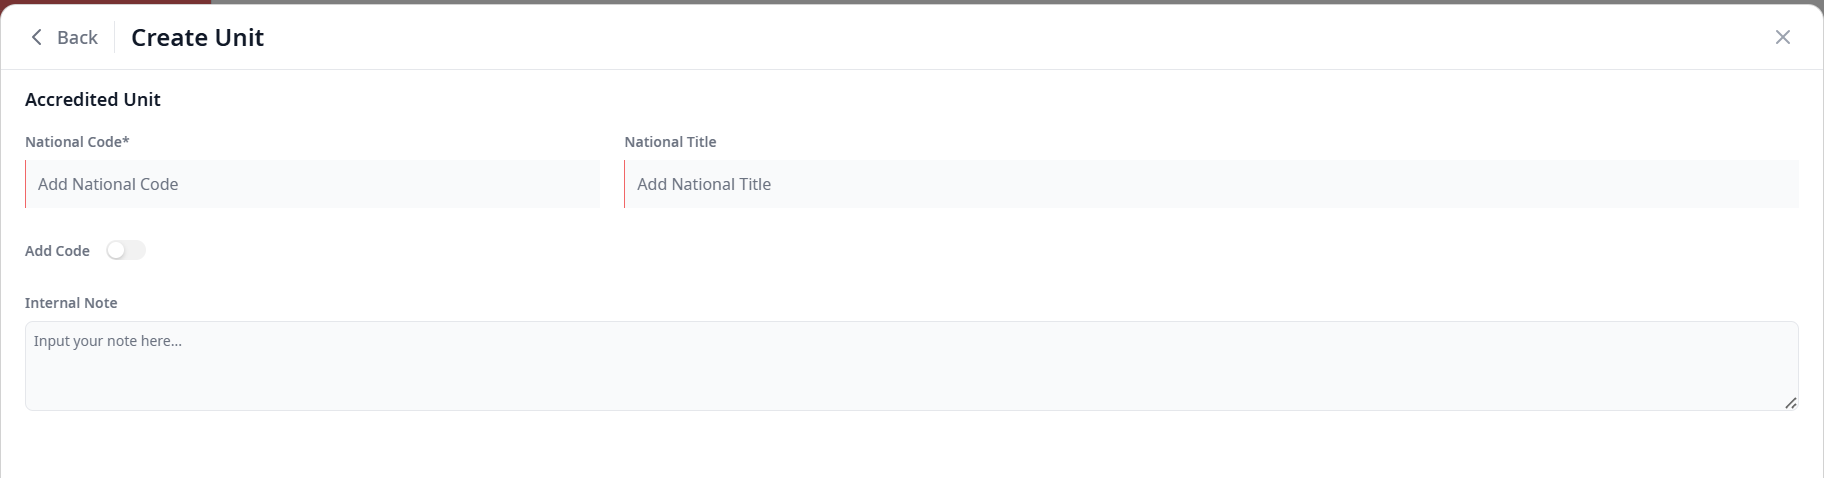
- Enter the National Code and Title (for Accredited)
- Add Unit content using the same process as Option A
Automatic Link: Units created this way are automatically mapped to your current Course template.
Complete and Publish
Follow the same assembly and publishing steps as Option A.
Key Editor Workflows
To maintain a high-quality curriculum, keep these standard workflows in mind.
Versioning
- When to Version:
- Updating compliance evidence
- Making significant content changes
- Revising assessment criteria
- How to Version:
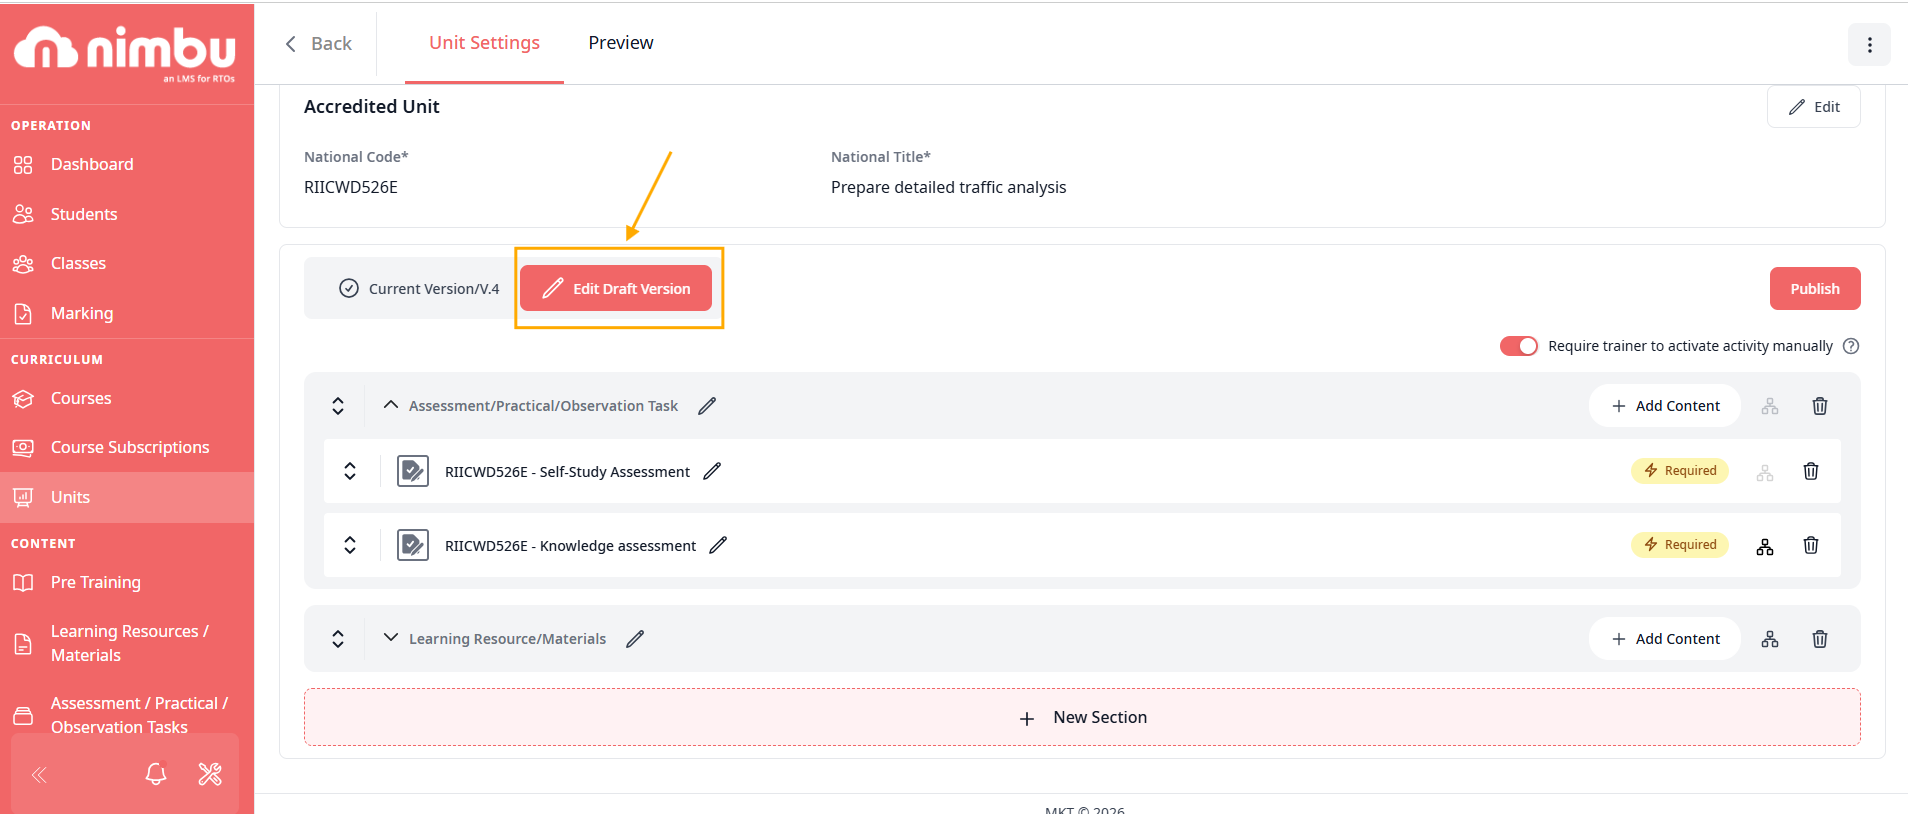
- Open a Published Unit
- Create a New Draft Version
- Make your changes in the Draft
- Publish the new version
Important: New versions only apply to new Classes created after publishing. Existing Classes continue using the version they started with, protecting active students from disruption.
Accreditation Checks
Before publishing Accredited Units:
- Verify the National Code is correct
- Ensure the Title matches the Training Package exactly
- Check that assessment criteria align with the unit of competency
- This ensures accurate AVETMISS reporting
Previewing
Always Preview Before Publishing:
- Click the Preview tab while editing
- View the Unit exactly as students will see it
- Test prerequisites and navigation
- Check that all media loads correctly
- Verify content displays properly on different screen sizes
Why this matters: Once published, making changes requires creating a new version. Previewing catches issues before they affect students.
Common Workflows
Creating a New Course from Scratch
- Navigate to Courses
- Click Create New Course
- Enter Course details (name, code, description)
- Add Units using either:
- Add existing Units from the Units library, or
- Create new Units directly in the Course
- Set Course-level settings
- Preview and Publish
Updating an Existing Unit
- Find the Unit in the Units page
- Click to open (if Published, you'll see the current version)
- Click Edit Draft Version
- Make your changes
- Preview the changes
- Publish when ready
Reusing Content Across Courses
- Create the Unit once in the Units library
- Publish the Unit
- Open each Course where you want to use it
- Click Add Units in the Course
- Select the existing Unit from the library
- The same Unit now appears in multiple Courses
Benefit: Update the Unit once, and all Courses using it can access the new version (for new Classes).