Creating a Unit
Units are the fundamental building blocks of your curriculum in Nimbu. They contain all the learning resources and activities students need to achieve specific competencies or learning outcomes. This guide walks you through creating a unit from scratch, adding content, organising materials into sections, and publishing your unit for delivery. Whether you're building an accredited unit of competency or a custom training module, this step-by-step process ensures your unit is structured, complete, and ready for students.
What's Covered in This Article
This guide walks through the initial creation of a unit and the process of mapping library content into its sections.
Before You Begin
Prerequisites
Before creating a unit, ensure you have:
- Content created: Assessments, observations, and learning resources should exist in your Content Library
- Learning outcomes defined: Clear understanding of what students should achieve
- Unit information ready: Unit codes, titles, and descriptions prepared
- Required permissions: Content editor role with unit creation permissions
Note: While you can create content "on the fly" whilst building your unit, having materials prepared in advance streamlines the process.
Configuration Guide: Step-by-Step
Step 1: Navigate to the Unit Page
From the Nimbu dashboard, click on Units in the left-hand menu under the Curriculum section. This opens the Units registry where all existing units are listed.
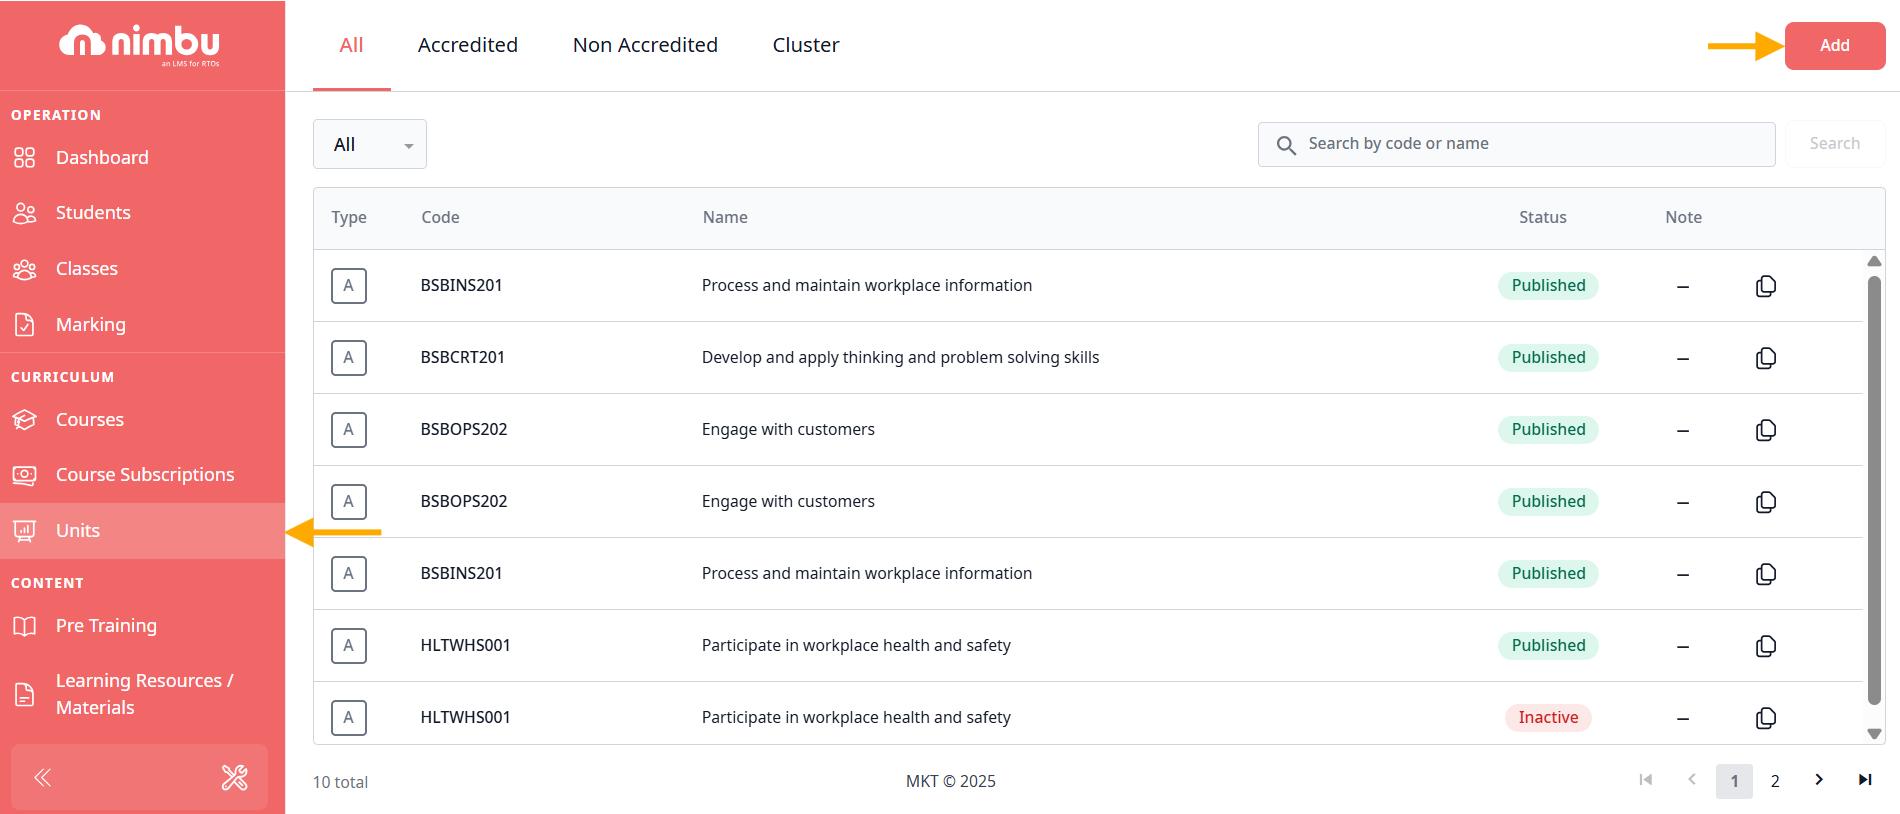
Step 2: Add a New Unit
In the top-right corner of the screen, click the red Add button. A pop-up window will appear requiring you to select the Unit Type based on your delivery strategy:
- Accredited: For Nationally Recognised Training (NRT) units.
- Non-Accredited: For internal modules or professional development workshops.
- Cluster: For grouping multiple units together for holistic delivery
Tip: If unsure, start with Accredited or Non-accredited. Cluster units require more advanced configuration and are typically created after gaining experience with standard units.
For detailed information on unit types, see: What is a Unit?
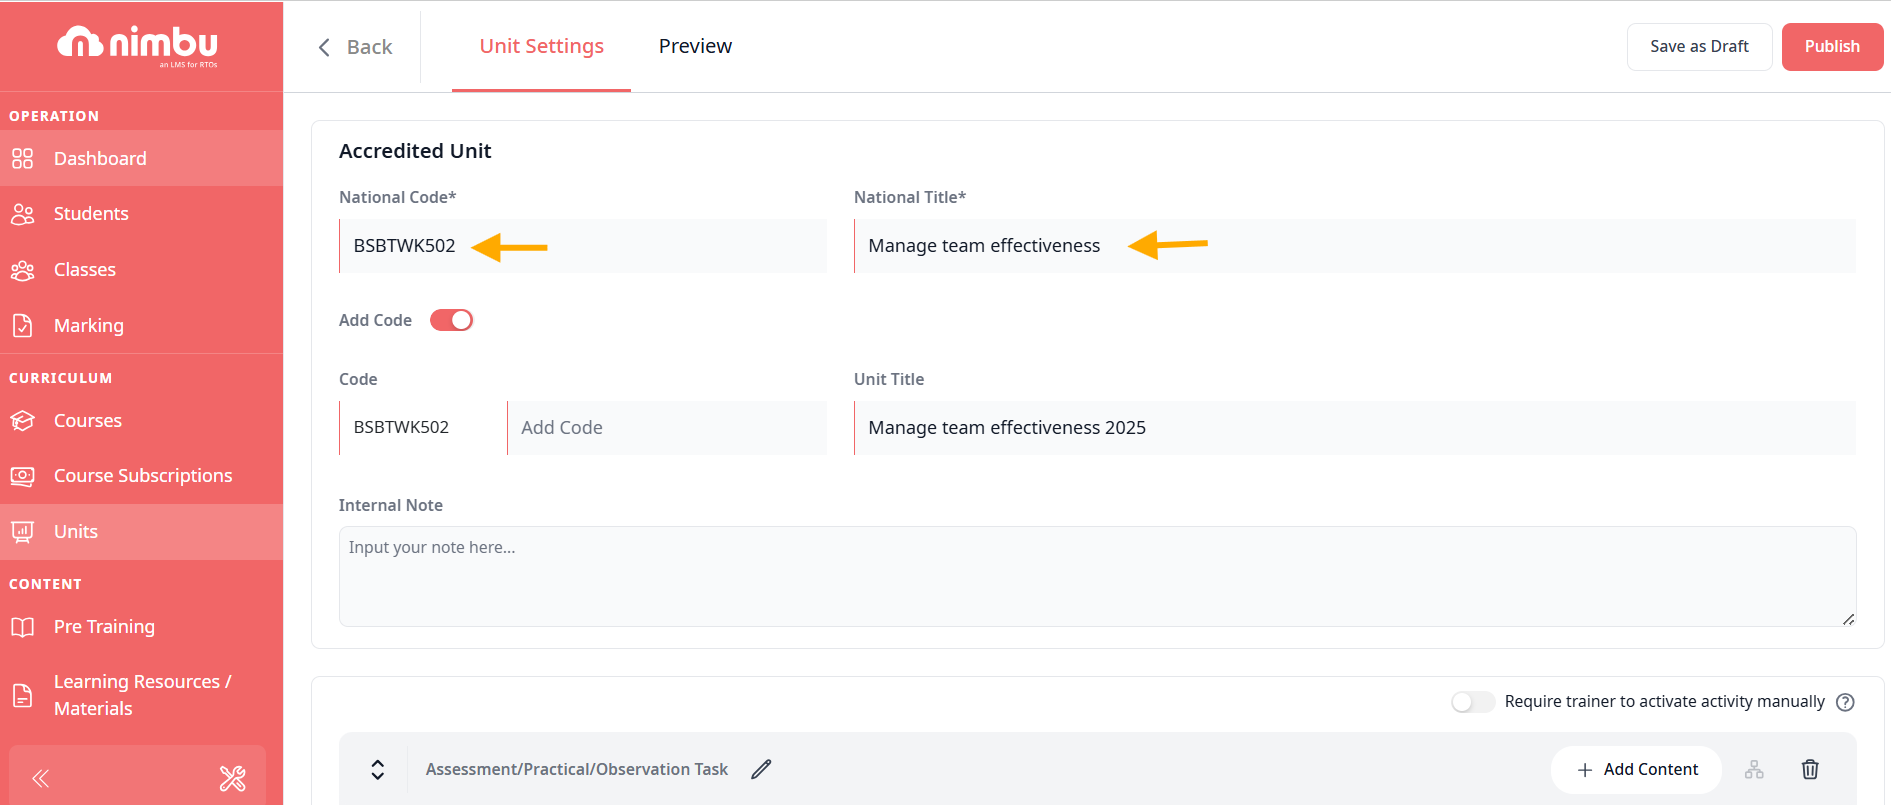
Step 3: Complete Required Fields
Enter the core details to match your Training Package requirements:
- For Accredited Units: Input the official National Code (e.g., BSBTWK502) and National Title.
- For Non-Accredited Units: Enter your internal Code and Title
- For Cluster Units: Cluster units require: Multiple National Codes for each unit in the cluster, Corresponding National Titles, A Cluster Name that describes the integrated assessment approach.
Step 4: Configure Additional Settings
Beyond the required fields, configure optional settings to customise your unit:
- Internal Notes: Add private notes visible only to content editors and trainers.
- Trainer Activation Required: Toggle this setting to control when students can access activities within the unit.

Step 5: Understand Default Sections
Once you save your initial unit details, Nimbu automatically creates two default sections to help you organise content:
Section 1: Assessment/Practical/Observation Task
Purpose: Houses graded activities that determine student competency
Default contents: Empty - you will add activities
Typical content:
- Assessments
- Observations
- Evokio Assessments

Section 2: Learning Resource/Material
Purpose: Contains non-graded materials for knowledge acquisition
Default contents: Empty - you will add resources
Typical content:
- PDFs
- Videos
- Podcasts
- Articles
- Quizzes
- SCORM packages
- Canva presentations
- External content/LTI

Customising Sections
You can modify the default structure:
- Rename sections: Click the section title to edit
- Add new sections: Use the "New Section" button
- Delete sections: Use the trash icon (with confirmation)
- Reorder sections: Drag and drop to rearrange

Best practice: Organise sections to match your teaching sequence (e.g., Theory → Practice → Assessment).
Step 6: Add Content to Sections
Now it's time to populate your unit with learning materials and activities.
Adding Content: Two Methods
Method 1: Add Existing Content
Add content that already exists in your Content Library:
- Navigate to the section where you want to add content
- Click the Add Content button
- Select Add Existing from the modal
- Browse or search for your content
- Select the items you want to add
- Click Add

Tip: Use the search and filter functions to quickly find content.
Method 2: Create New Content
Create new content directly from within the unit:
- Navigate to the section where you want to add content
- Click the Add Content button
- Select Create New from the modal
- Choose the content type:
- Assessment
- Observation
- Video
- Podcast
- Article
- Quiz
- SCORM
- Canva
- LTI/External Content
- Complete the content creation process
- The new content is automatically added to the section

Note: Content created this way is saved to your Content Library and can be reused in other units.
Step 7: Organise and Sequence Content
Once content is added, arrange it in the optimal learning sequence.
Reordering Content Within Sections
You can also move content from one section to another:
- Drag the content item to the edge of its current section
- Continue dragging into the target section
- Drop in the desired position
Use case: Move a practice quiz from the resource section to a dedicated "Knowledge Check" section.
Reordering Sections
Arrange sections in teaching order:
- Hover over the section header
- Click and hold the drag handle
- Drag the section up or down
- Release to drop in place

Step 8: Configure Section Settings
Sections can have settings that control student access and progression.
Section Prerequisites
Control when sections become accessible to students:
Options:
- None: Section is immediately accessible
- Required to complete previous section: Locks until the immediately preceding section is complete
- Select previous sections: Locks until specific chosen sections are complete

How to configure:
- Click the prerequisite icon (lock symbol) next to the section name
- Select your preferred option
- If "Select previous sections," choose which sections must be completed
- Click Confirm
Use case: Require students to complete all theory resources (Section 1) before accessing the assessment (Section 2).
Content Prerequisites
Individual content items can also have prerequisites:
Options:
- None: Content is immediately accessible within its section
- Required to complete previous activity/resource: Locks until the immediately preceding content in the same section is complete
- Select previous activity/resource: Locks until specific chosen content in the same section is complete
How to configure:
- Click the prerequisite icon next to the content item
- Select your preferred option
- If "Select previous," choose which content must be completed
- Click Confirm
Use case: Require students to watch a safety video and mark it complete before accessing the practical observation.
For comprehensive guidance on learning pathways, see: Content Prerequisites
Completion Required Settings
For learning resources, configure whether completion is mandatory:
Activities (Assessments/Observations):
- Always completion-required by default
- Cannot be changed
Learning Resources:
- Can be toggled as "Completion Required"
- When enabled, students must mark or complete the resource
- Can be used in prerequisites
How to enable:
- Click on the learning resource within the section
- Toggle "Completion Required" to ON
- Students will see a "Complete" button or automatic completion tracking

Use for:
- Critical safety videos
- Essential reading materials
- Prerequisite knowledge checks
- Resources that gate assessment access
Step 9: Preview Your Unit
Before publishing, always preview your unit to ensure everything displays correctly.
How to Preview
- Click the Preview tab at the top of the unit editor
- The unit displays as students will see it
- Navigate through sections and content
- Verify:
- All content displays correctly
- Sections are in the right order
- Prerequisites are configured as intended
- Instructions are clear
- Completion requirements are visible

Step 10: Publish Your Unit
Once you're satisfied with the unit structure and content, it's time to publish.
Save as Draft
Before publishing, you can save your work:
- Click Save as Draft in the top-right corner
- Your unit is saved but not yet available for use in courses
- You can continue editing at any time
- Draft units appear in your Units list with a "Draft" badge
Publish
To make your unit available for courses and students:
- Ensure all content is added and properly configured
- Click the Publish button in the top-right corner
- Review the confirmation message
- Click Yes to confirm publication

Post-Publication Management
Adding Units to Courses
Your published unit is now ready to be added to courses:
- Navigate to Units & Courses
- Select or create a course
- Click Add Unit
- Select your published unit
- The unit is now part of the course structure
One unit, many courses: The same unit can be added to multiple courses simultaneously.
For detailed guidance, see: Creating a Course
Delivering Through Classes
Units are delivered to students through classes:
- Create a class linked to a course
- Enrol students in the class
- Assign trainers
- Activate the class
- Students access the unit content through their student portal
For more information, see: Class Management
Creating Draft Versions
To make structural changes to a published unit:
- Open the published unit
- Click Create Draft Version
- Make your changes in the draft
- Preview thoroughly
- Publish the draft to create Version 2
Important: New versions only apply to new classes. Existing classes continue using the version they started with.
Related Articles
- What is a Unit?
- Unit Sections
- Publishing a Unit