Adding HTML Content
The Article resource type lets you write and format text-based learning content directly inside Nimbu using a built-in HTML WYSIWYG editor. No file upload or external account is required, content is authored and stored entirely within the platform.
Articles are well suited for study guides, summaries, procedures, and any text-based material that benefits from structured formatting such as headings, lists, tables, and embedded images. When Michi is enabled, students can also access AI-assisted summaries, flashcards, and practice quizzes based on the article content.
What's Covered in This Article
This article provides a step-by-step walkthrough for creating, formatting, and publishing an Article in Nimbu.
- Accessing the Article Editor: How to open the Article editor from Learning Resources/ Materials.
- Writing and Formatting Content: Using the editor toolbar to structure and style your content.
- Inserting Images and Tables: Adding visual elements to enrich your content.
- HTML Settings: Configuring visibility and completion options before publishing.
- Saving and Publishing: The difference between saving a draft and publishing, and what each means for student access.
Who can do this: Content Editors with Learning Resources / Materials permission.
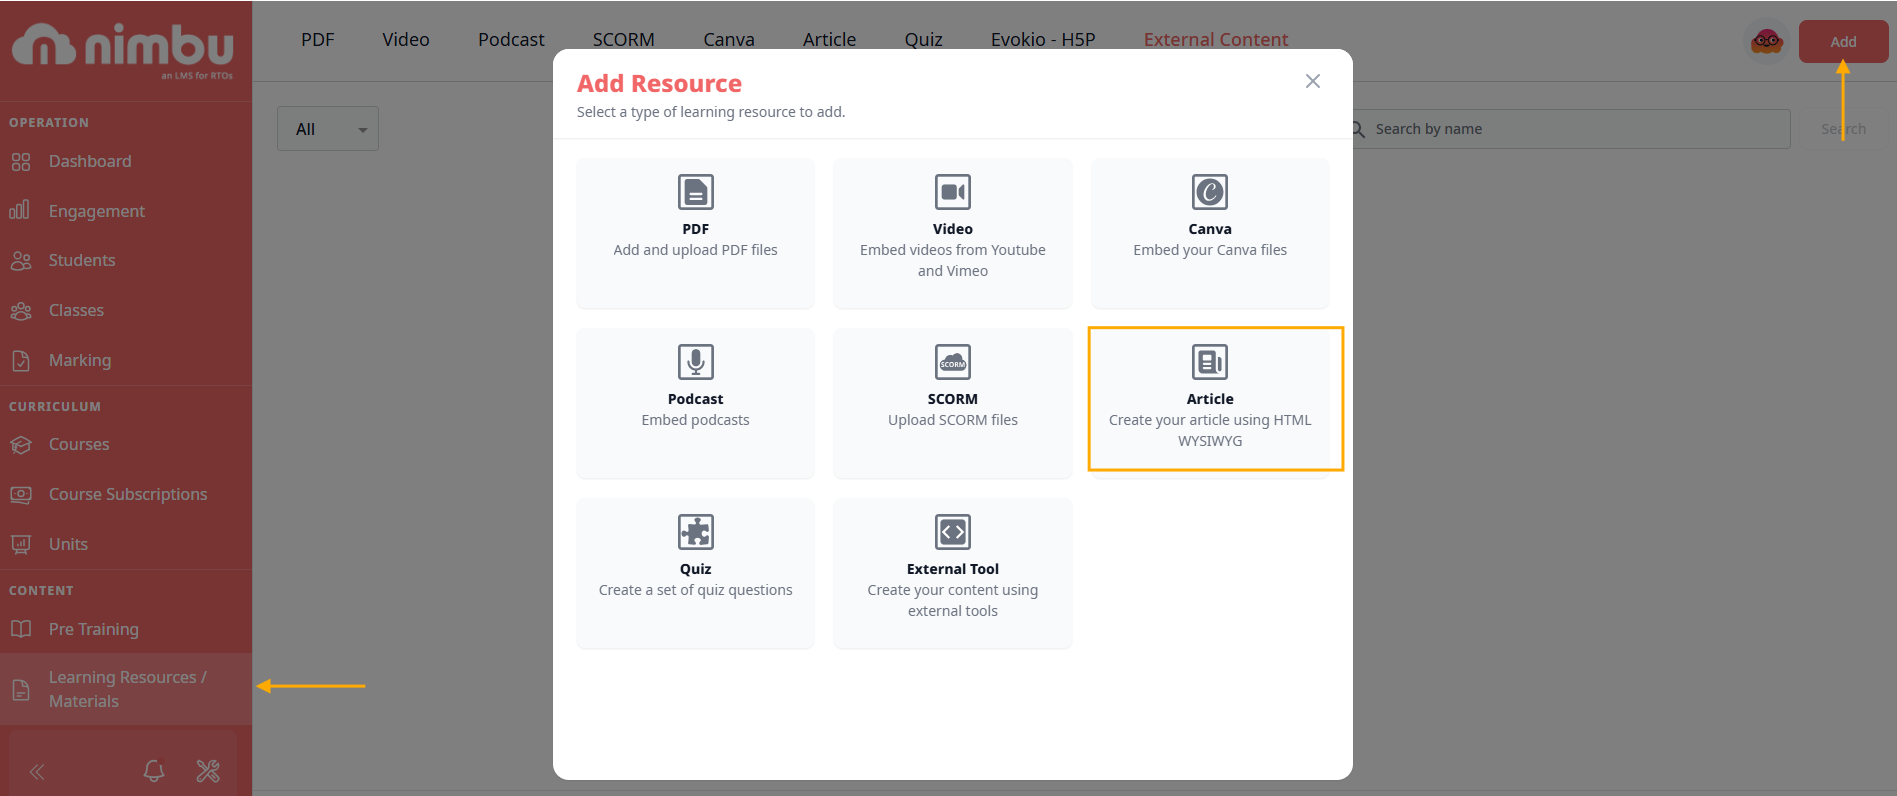
Accessing the Article Editor
- In the left navigation, click Learning Resources / Materials under the Content section.
- Click Add in the top right corner. The Add Resource modal will appear.
- Select Article. The description reads: Create your article using HTML WYSIWYG.
- The Article editor will open, ready for you to begin writing.
Writing and Formatting Content
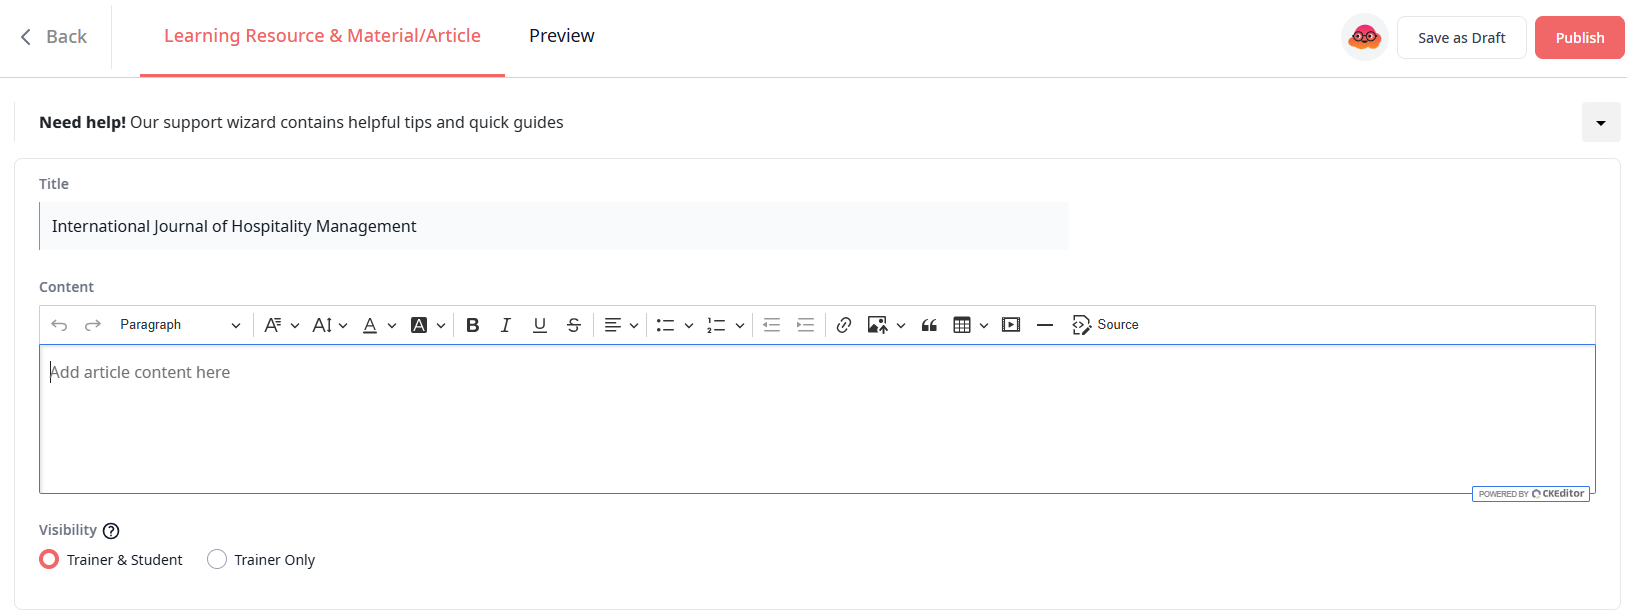
The Article editor uses a WYSIWYG (What You See Is What You Get) interface - what you see while writing is how the content will appear to students. No knowledge of HTML is required, though HTML can be entered directly if needed.
Enter a descriptive Title at the top of the editor. This is the name students will see when the Article appears in their unit. Then click into the body area to begin writing.
The toolbar provides the following formatting controls:
| Tool | Purpose |
|---|---|
| Heading styles (H1, H2, H3) | Structure content into sections and subsections |
| Bold/ Italic/ Underline | Emphasise key terms and phrases |
| Bullet and numbered lists | Present steps or grouped information clearly |
| Alignment | Left, centre, right, or justify text |
| Link | Insert hyperlinks to external URLs |
| Image | Upload and embed images into the content |
| Table | Insert a table with customisable rows and columns |
| Undo/ Redo | Step backwards or forwards through recent changes |
Tip: Keep Articles focused on a single topic or learning objective. Shorter, well-structured content is easier for students to navigate, and works better with Michi's summarisation and flashcard features.
Inserting Images and Tables
Images
- Place your cursor where you want the image to appear.
- Click the Image icon in the toolbar.
- Upload the image file or paste a URL.
- Adjust alignment and sizing as needed.
Tables
- Place your cursor at the insertion point.
- Click the Table icon in the toolbar.
- Select the number of rows and columns required.
- Click into each cell to enter content. Rows and columns can be added or removed using the table context menu.
HTML Settings
Before saving or publishing, configure the following settings.
Visibility
Set who can see the Article:
- Trainer & Student: the Article is visible for both.
- Trainer: the Article is visible to trainers only. Use this for trainer reference materials not intended for students.
Completion Required
When enabled, students must click a Complete button on the Article page before the item is marked as done. This is required if the Article is used as a prerequisite for other content in the unit.
Saving and Publishing
- Save as Draft saves your work without making it visible to students. Use this while the Article is still being written or reviewed. Draft Articles can be edited freely.
- Publish makes the Article available to be added to units and accessed by students. Once published, the Article appears in your Learning Resources / Materials library with a Published status.
Note: Publishing an Article does not automatically add it to a unit. You still need to add it to the relevant unit via the Unit editor.
Editing a Published Article
Published Articles can be edited at any time, there are no restrictions on changing content, title, or formatting. To edit, locate the Article in Learning Resources/ Materials, open it, make your changes, and click Publish again to apply them.
Note: Changes to a published Article take effect immediately. Students who access it after the update will see the revised version.