Microsite Settings
The Microsite acts as your digital storefront, a public-facing course catalog that allows prospective learners to explore your educational offerings without requiring an initial login. This interface is the primary tool for conversion, designed to showcase your brand and simplify the path from discovery to enrollment.
Microsite Settings is where you control everything about how that public presence looks and behaves, from your branding and layout through to which courses are displayed and how you communicate with visitors. This article walks through each area of the Microsite Settings configuration.
What's Covered in This Article
This article details all configurable areas within Microsite Settings in Nimbu.
- Access the Microsite: Turning on your public course catalog.
- Using the Microsite as Your Homepage: Setting the microsite as the default landing page for your Nimbu domain.
- Theme Settings: Configuring your logo, colours, fonts, and layout.
- Course Selection: Choosing which courses appear and how they are ordered.
- Announcements Board: Displaying public-facing notices and updates to site visitors.
- Footer and Contact Information: Adding organisational details visible at the bottom of every page.
Accessing Microsite Settings
Note: Microsite Settings is accessible to Administrators only. Trainers and Content Editors do not have access to this area.
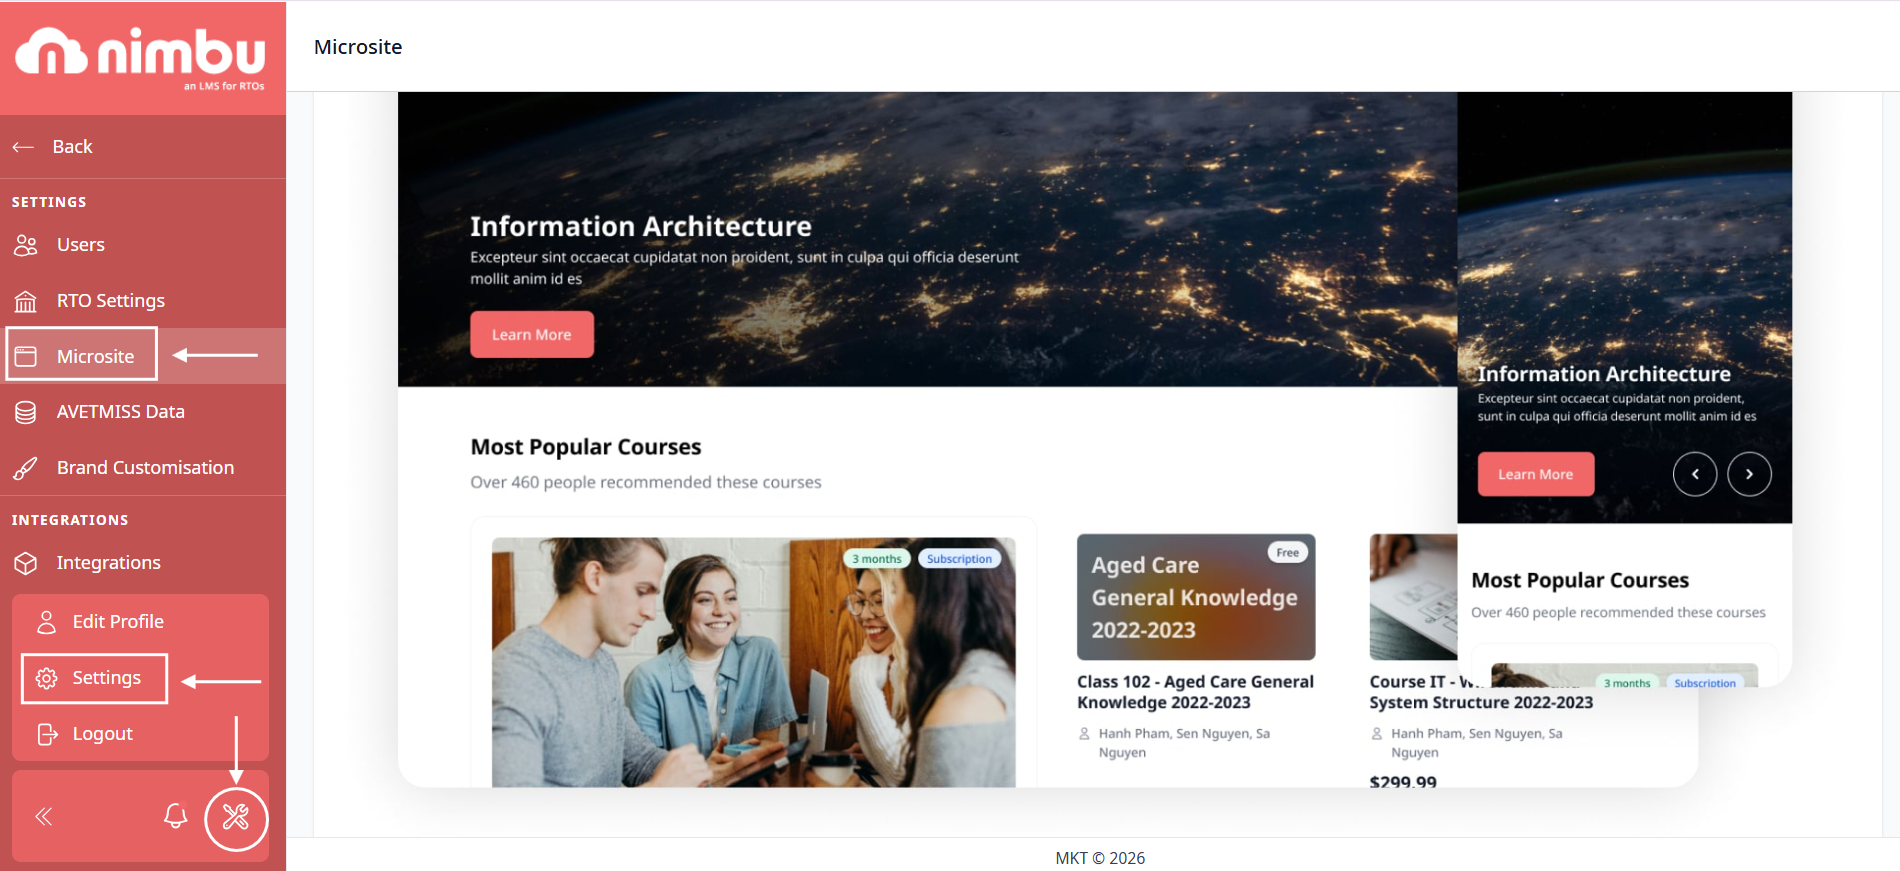
- In Nimbu, navigate to Settings in the left-hand sidebar.
- Under the Settings section, select Microsite.
- The Microsite Settings panel will open, organised into tabs for each configuration area.
Enabling the Microsite
Before your public course catalog is visible to anyone outside your organisation, the microsite must be enabled and configured by an Admin with the appropriate permissions.
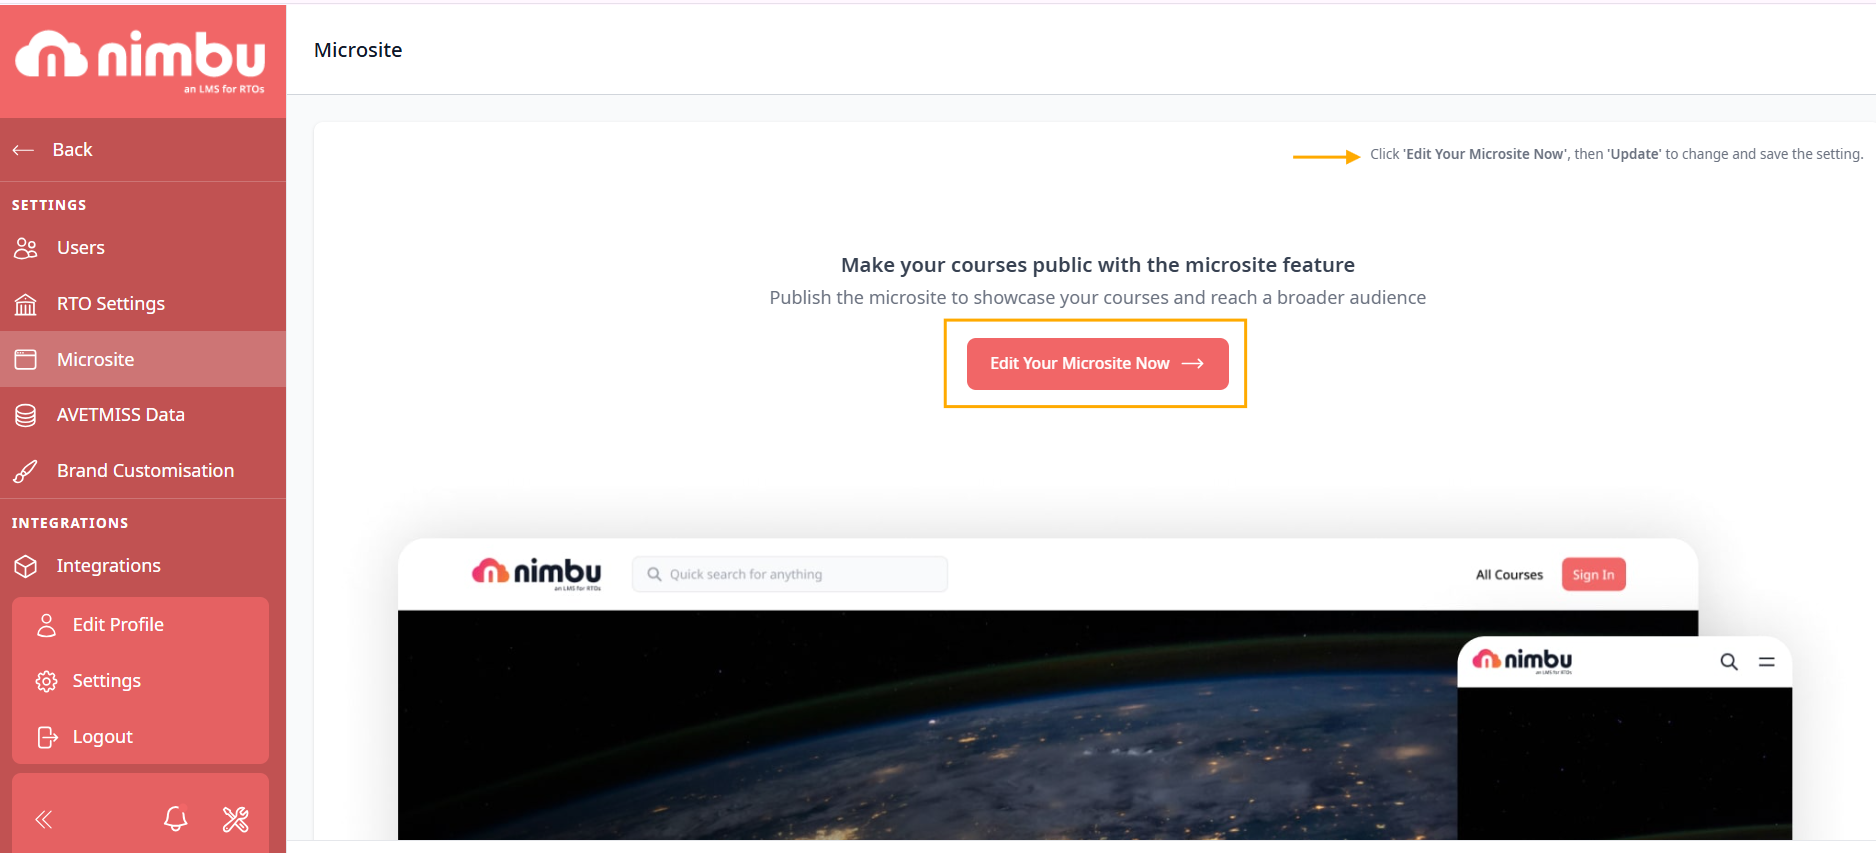
- Navigate to Settings > Microsite.
- Click Edit Your Microsite Now to open the microsite editor and begin configuring your settings.
- Make your desired changes across the available configuration tabs.
- Click Update to save your settings and publish the microsite.
Once enabled, your prospective students can browse available courses and register without needing an existing Nimbu account.
Important: See the Adding a Course to the Catalog article for guidance on preparing individual course listings.
Using the Microsite as Your Homepage
To have prospective students see the course catalog when they visit your domain, you can set the microsite as your homepage at the point of publishing.
- Navigate to Settings > Microsite and click Edit Your Microsite Now.
- When you are ready to go live, click Publish in the top-right corner.
- An Update & Publish Microsite modal will appear with a Set as Homepage toggle and the description: "Shows Microsite instead of login page to visitors."
- Toggle Set as Homepage on, then click Publish Now to confirm.

Theme Settings
The Theme settings allow you to apply your organisation's branding to the microsite, ensuring the public-facing catalog is consistent with your RTO's visual identity.
Logo
Upload your organisation's logo to display in the microsite header.
- Navigate to the Theme tab within Microsite Settings.
- Locate the Logo upload field.
- Click to upload or drag and drop your logo file. Recommended formats are PNG or SVG for best quality at different screen sizes.
- Save your changes.

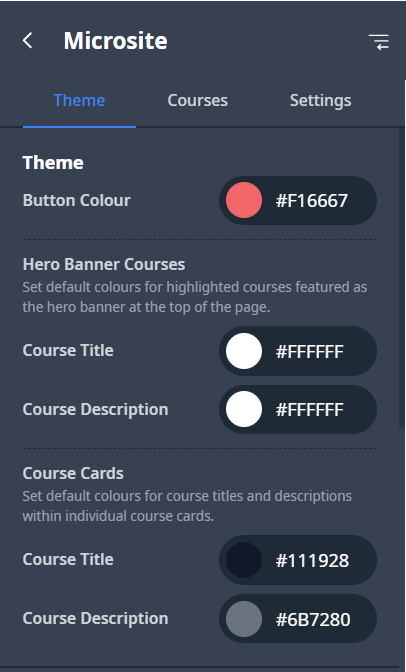
Colours
Configure the primary and accent colours used across the microsite to match your brand palette.
- In the Theme tab, locate the Colours section.
- Enter your brand colour values using hex codes, or use the colour picker to select them visually.
- The system automatically assigns colors to the primary background, buttons, and decorative elements like headings and links.
- Save your changes.
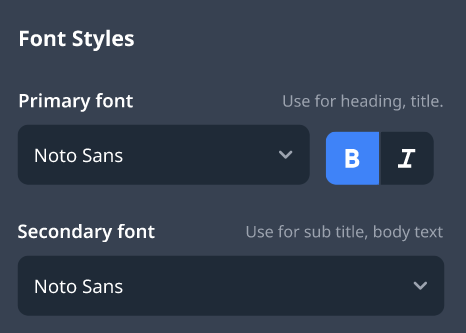
Fonts
Select the typeface used for headings and body text on the microsite.
- In the Theme tab, locate the Fonts section.
- Select from our curated list of web-safe and hosted fonts. Your choices are optimised for public-facing displays and will save automatically as you make changes.
- Save your changes.
Course Selection
The Courses tab within Microsite Settings controls which courses appear on the public catalog and the order in which they are displayed to visitors.
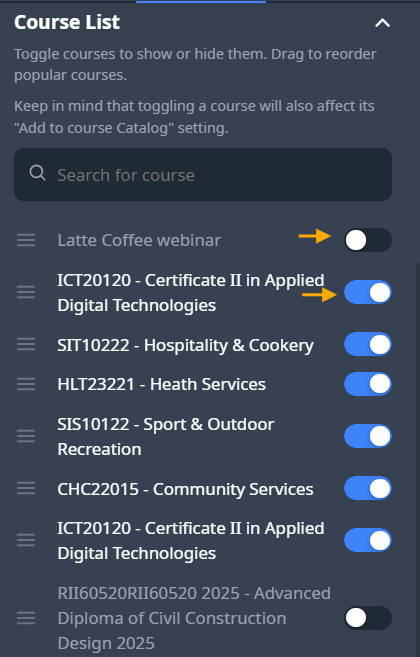
Managing Course Visibility
Each course in your Nimbu registry has a visibility toggle in the Microsite Settings Courses tab. This toggle is synced with the Add to Course Catalog setting within each individual course - enabling or disabling it in either location updates both.
To manage course visibility from Microsite Settings:
- Navigate to the Courses tab within Microsite Settings.
- Locate the course you want to show or hide
- Toggle its visibility on or off as required.
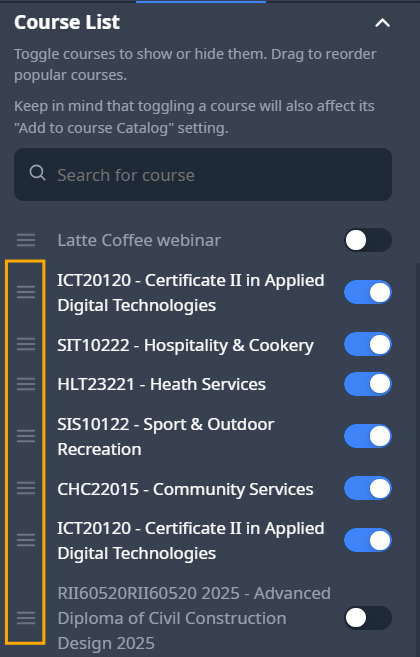
Display Order
The sequence in which courses appear on the public catalog is configured here, independently of how courses are ordered in your Courses registry.
To adjust the display order:
- Navigate to the Courses tab within Microsite Settings.
- Use the drag-and-drop handles next to each course to reorder them.
- Position your most in-demand or high-priority programs at the top for maximum visibility.
- Save your changes.
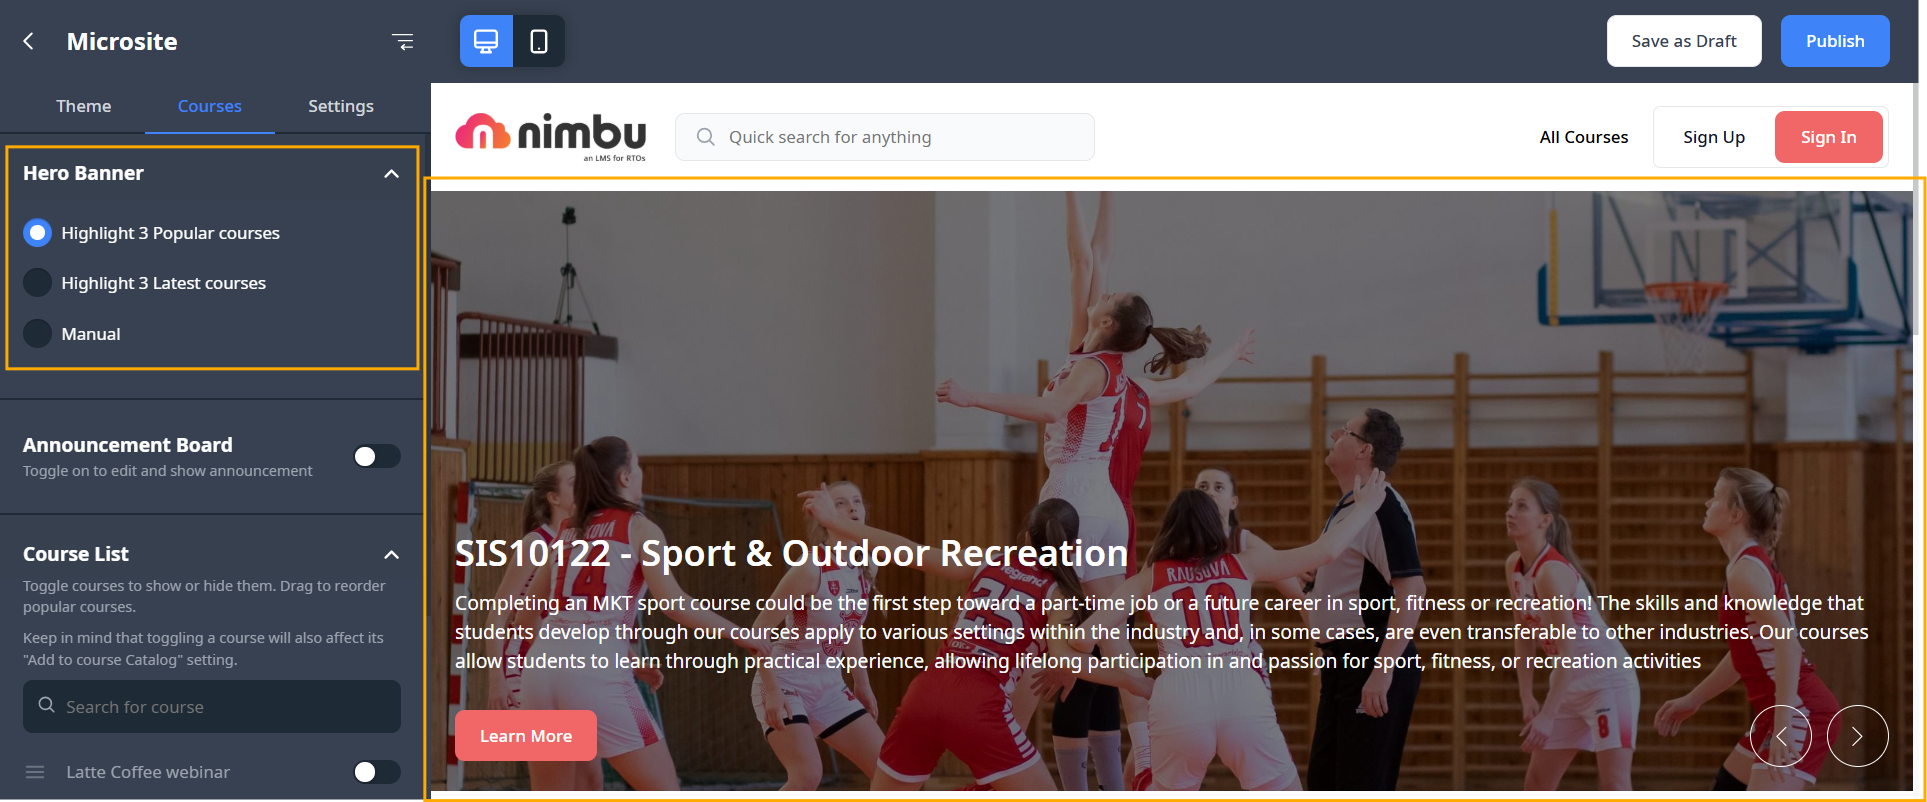
Hero Course Display Mode
Depending on your Microsite configuration, you can select which courses are surfaced to visitors in the Hero Banner section of your microsite. This setting ensures that your most relevant or newest content receives maximum visibility. Under the Courses tab in the Microsite editor, you can choose from the following display modes:
- Highlight 3 Popular courses: Automatically displays the three courses with the highest enrolment volume, surfacing your most sought-after training prominently.
- Highlight 3 Latest courses: Automatically displays the three most recently added or updated courses, ensuring your catalogue always feels current to returning visitors.
- Manual: Provides full control over the sequence. You can choose specific courses to feature in the banner by using the Course List selection and drag-and-drop reordering tools provided below the banner settings.
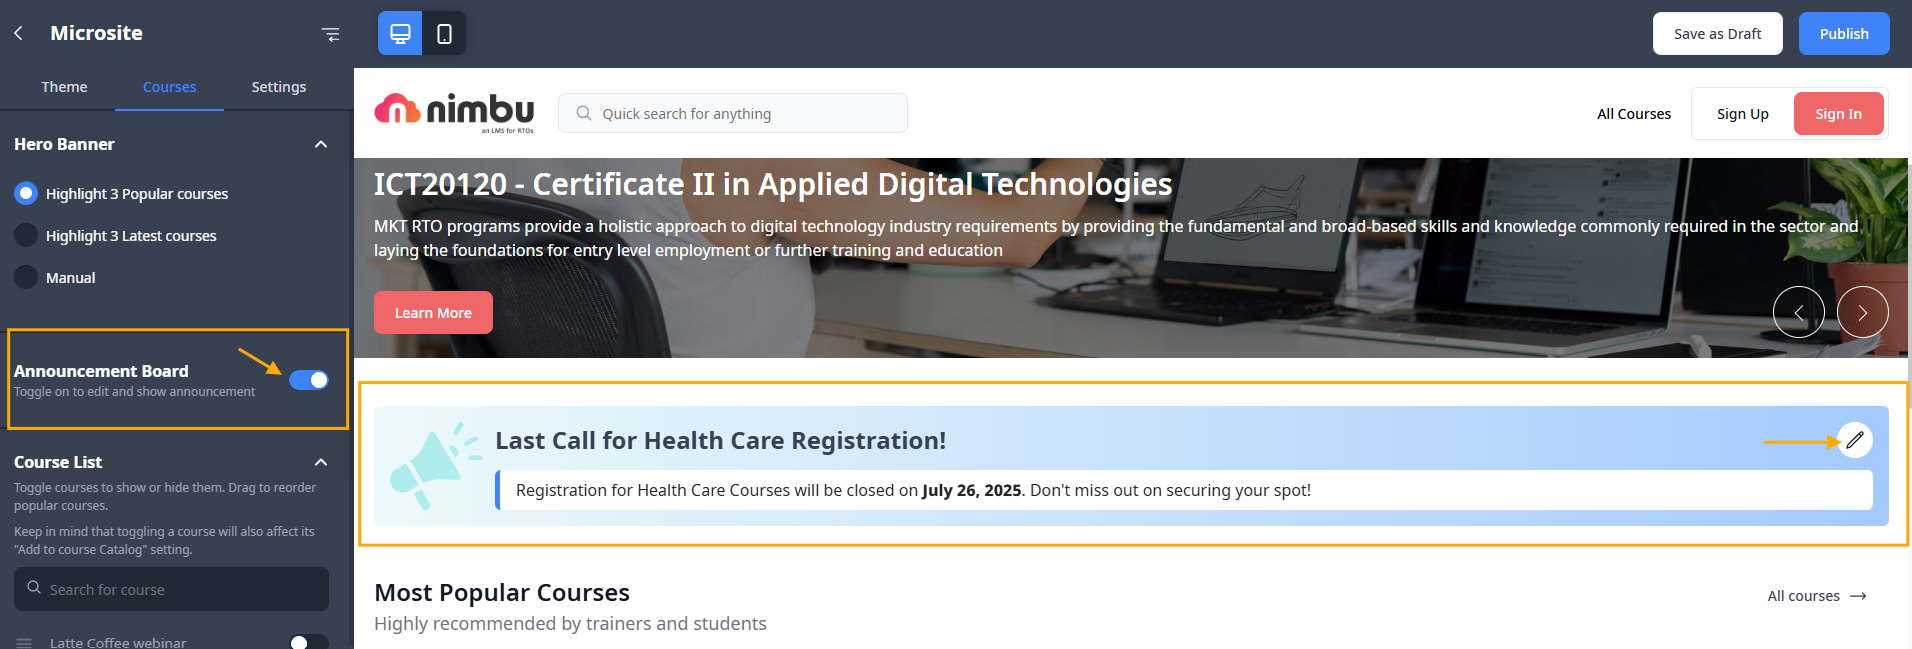
Announcements Board
The Announcements Board allows you to display public-facing notices, updates, or messages directly on your microsite. This is useful for communicating important information to prospective or current students who visit the catalog, such as upcoming intake dates, operational notices, or special offers.
To manage your announcements:
- Navigate to Courses: Open the Courses tab within the Microsite editor.
- Enable the Board: Toggle the Announcement Board switch to the "on" position (blue) to make the board visible on your site.
- Edit Content: Click the pencil (edit) icon on the announcement banner in the live preview to open the editor.
- Enter Message Details:
- Headline: Enter a bold title for your announcement (e.g., "Last Call for Health Care Registration!").
- Body Text: Provide the specific details of your message, such as dates or instructions.
- Finalise:
- Save as Draft: Click Save as Draft to keep your changes private while you continue editing.
- Publish: Click Publish to push the announcement live to the public microsite immediately.
To remove an announcement, simply toggle the Announcement Board switch to the "off" position
Note: Announcements are visible to all visitors to your microsite, including unauthenticated users who have not yet registered. Keep the content professional and appropriate for a public audience.
Footer and Contact Information
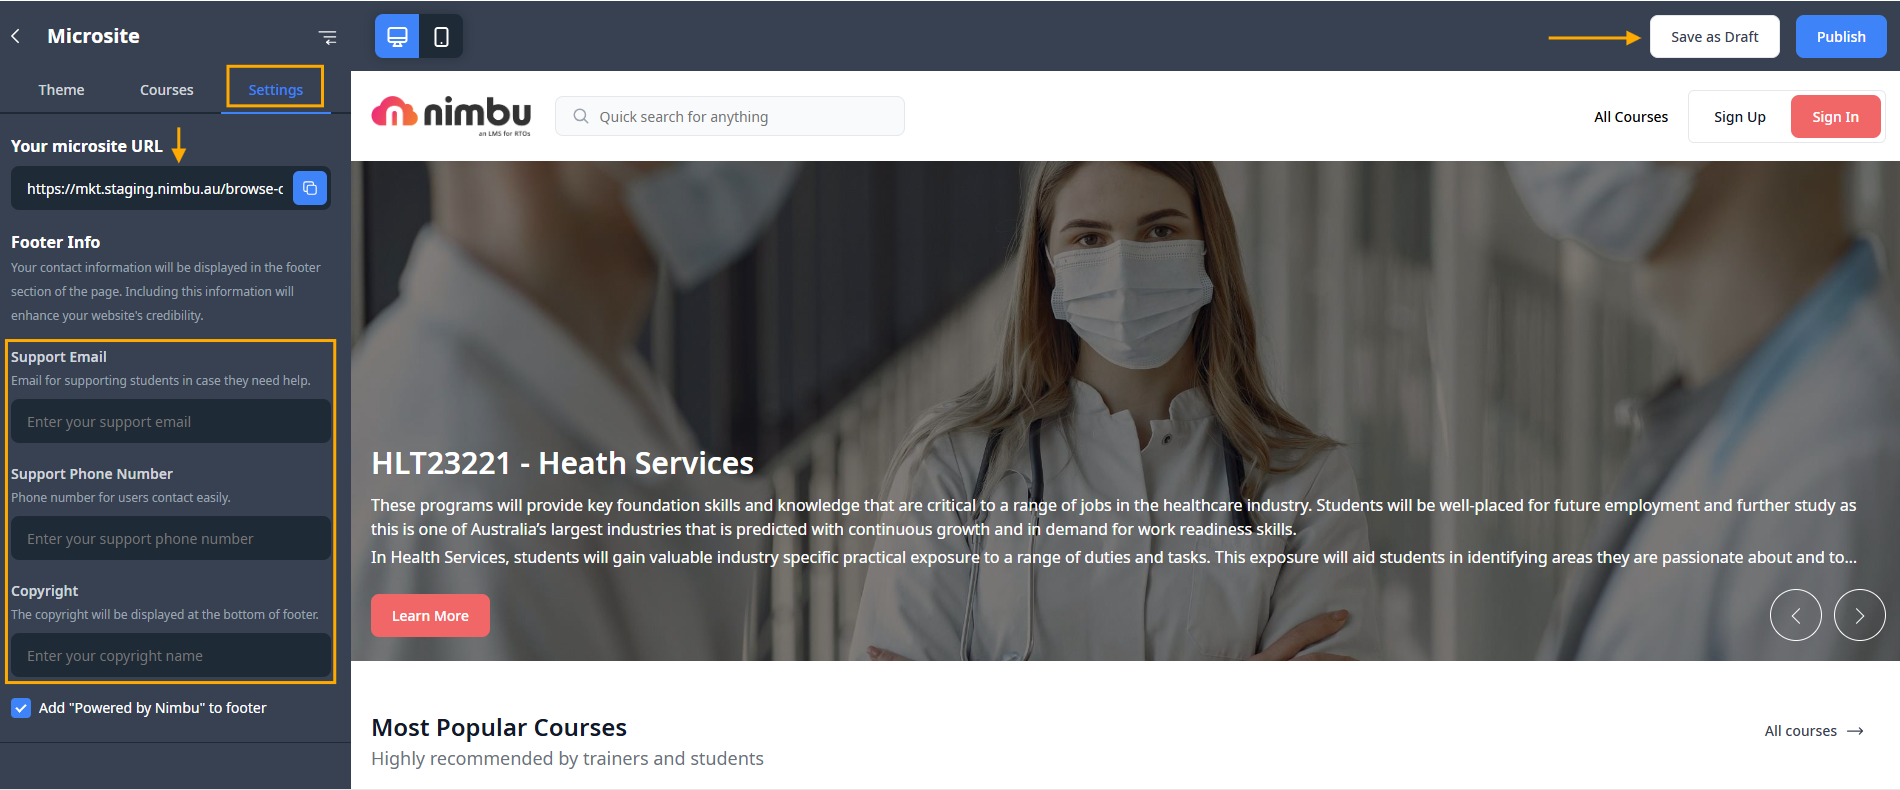
The footer appears at the bottom of every public microsite page and is a key location to display your RTO's official contact details. Including this information is essential for building credibility and ensuring prospective students can reach you easily. To configure your footer and contact information:
- Navigate to Settings: Go to the Settings tab within the Microsite editor.
- Verify Your Microsite URL: Review your public site address at the top of the screen to ensure students are directed to the correct portal.
- Enter Footer Info: Fill in the dedicated fields to provide clear support channels:
- Support Email: Provide a primary email address for supporting students in case they need help.
- Support Phone Number: Enter a contact number where users can reach your team easily.
- Copyright: Enter your organisation's name or copyright text as it should appear at the very bottom of the footer.
- Save or Publish: Click Save as Draft to keep your changes private, or Publish to push the updated contact information live immediately.
Note: Keeping your contact information current in the footer ensures that prospective students can reach your RTO if they have questions before enrolling. It also supports your obligations as an RTO to make contact details readily accessible to students and the public.