Quickstart for Admins
Welcome to Nimbu. As an Administrator, you're the foundation of your RTO's digital training ecosystem. You configure the platform, manage users and permissions, oversee integrations, and ensure the entire system runs smoothly while maintaining compliance standards.
This guide provides the essential knowledge to get your RTO up and running on Nimbu efficiently and securely.
What's Covered in This Article
This guide helps you move from first login to confident platform management:
- First login and dashboard: Navigating the admin interface and understanding key areas
- Setting up your organisation: Configuring RTO details, settings, and compliance requirements
- Managing users: Inviting staff and students, assigning roles and permissions
- Admin responsibilities: Understanding your ongoing platform management tasks
- Key workflows: Essential processes for effective administration
First Login and Navigating the Dashboard
Accessing Nimbu
- Open your web browser and navigate to your Nimbu URL (typically
yourorganisation.nimbu.au) - Enter your administrator credentials provided during setup
- You'll arrive at your Dashboard
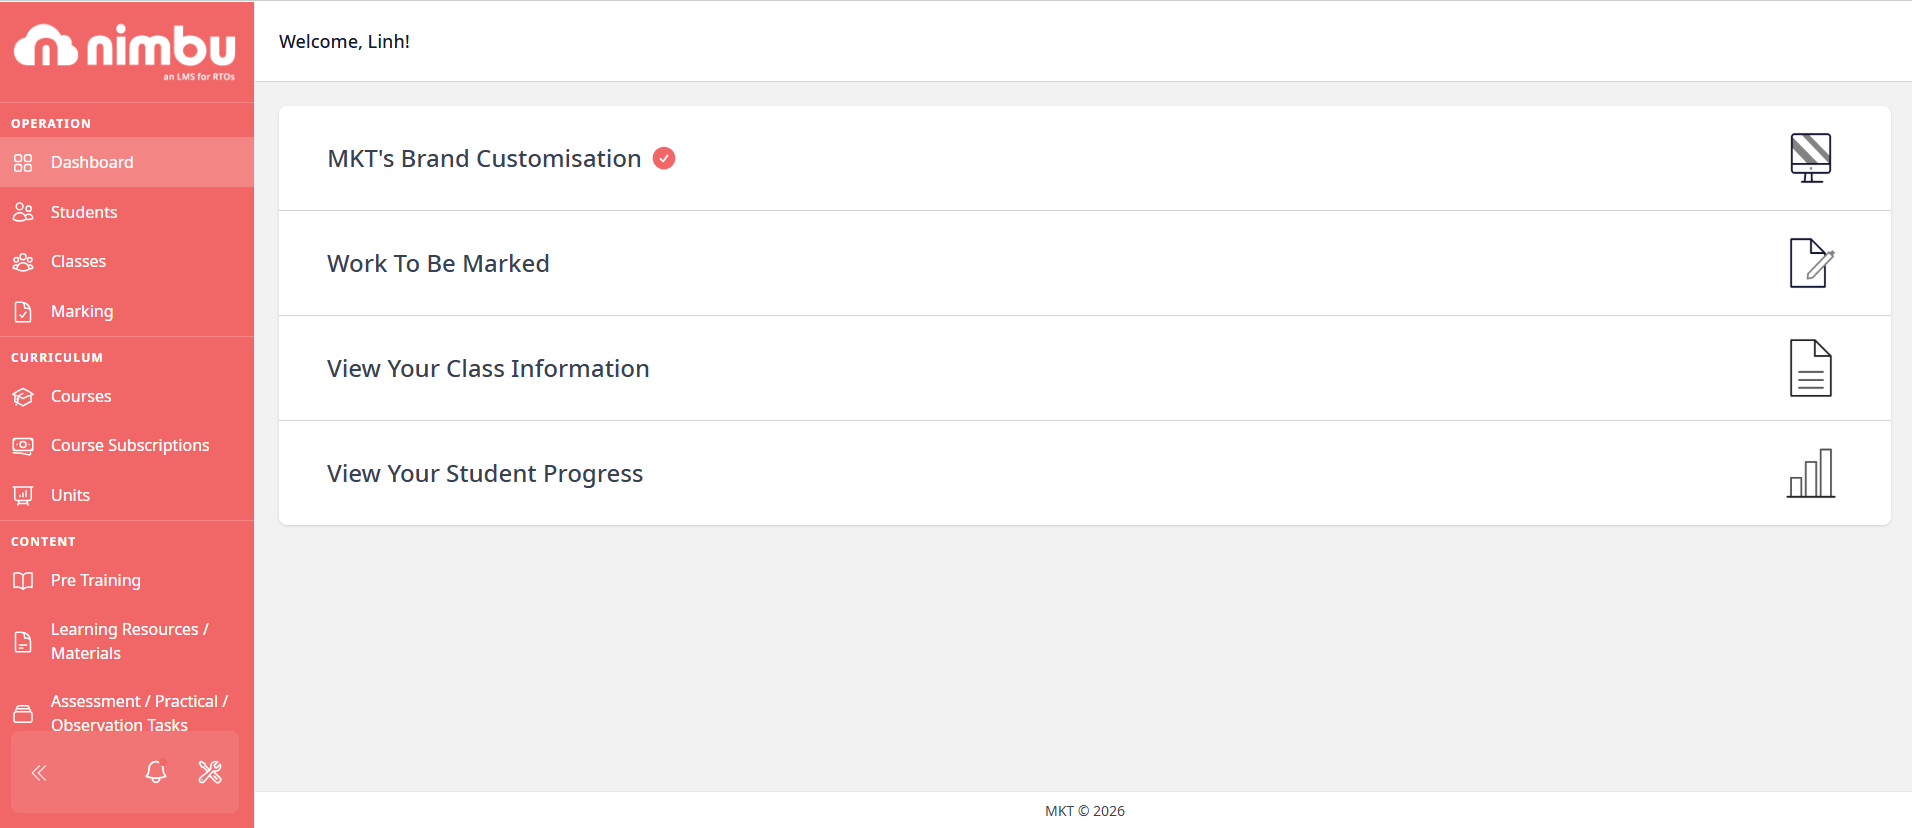
Your Main Navigation:
The left sidebar organises the platform into functional sections:
OPERATION Section:
- Dashboard - Overview and activity summary (where you are now)
- Students - Student records and management
- Classes - Delivery management and class administration
- Marking - Assessment workflow (if you also mark student work)
CURRICULUM Section:
- Courses - Course blueprints and templates
- Course Subscriptions - Course availability and access management
- Units - Unit library and content structure
CONTENT Section:
- Pre Training - Pre Course Material and Pre-Training Reviews
- Learning Resources / Materials - Study materials library
- Assessment / Practical / Observation Tasks - Graded activities library
SETTINGS Section:
To access and manage the settings section, users must first click the gear (settings) icon located at the bottom of the left-hand navigation sidebar.
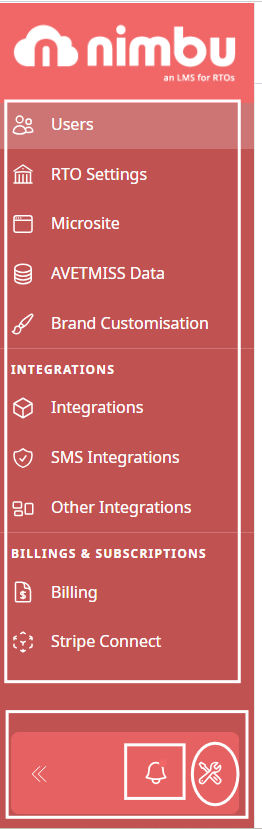
Clicking this icon will open the full settings screen, allowing you to continue editing the following functional areas:
- Users - Staff and student user management
- RTO Settings - Organisation configuration and compliance settings
- Microsite - Public-facing course catalogue
- AVETMISS Data - Compliance reporting and exports
- Brand Customisation - Logo, colours, and appearance
INTEGRATIONS Section:
- Integrations - LTI connections
- SMS Integrations - Student management system integrations
- Other Integrations - Additional platform connections
BILLINGS & SUBSCRIPTIONS Section:
- Billing - Payment and subscription management
- Stripe Connect - Payment processing configuration
Bottom Navigation: the primary actions for account management and system configuration are located at the very bottom of the left-hand navigation sidebar
- Profile Menu: By clicking on your profile or the Edit Profile link, you can manage your personal account settings, security preferences, and logout of the system.
- Notifications (Bell Icon): Located next to the settings gear, this icon displays activity alerts and system messages to keep you updated on student progress or platform changes.
- Settings (Gear Icon): This is your gateway to the global configuration area. Click this icon to open the sub-menus for Users, RTO Settings, Integrations, and Billing
- Sidebar Toggle (Double Arrow): Allows you to collapse or expand the navigation bar to maximise your workspace while maintaining quick access to all sections.
Setting Up Your Organisation
Before inviting users and delivering training, configure your RTO's foundational settings.
Step 1: Configure RTO Settings
Navigate to Settings > RTO Settings
Essential Configuration:
General Information:
- RTO/Organisation name
- RTO number (optional identifier)
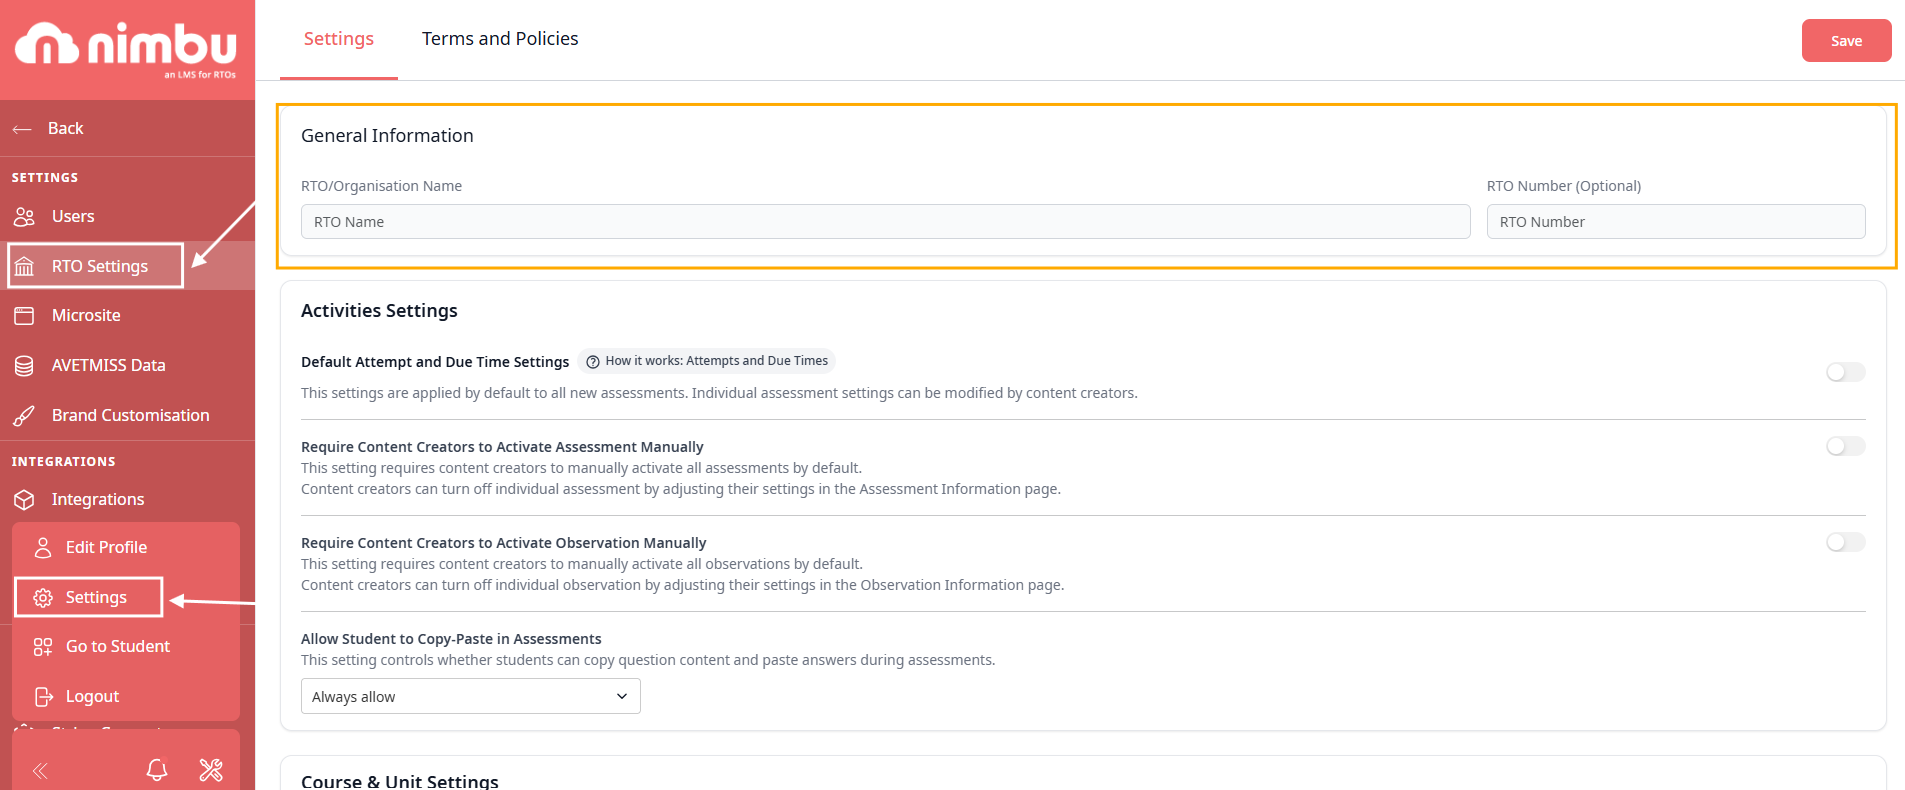
Activities Settings:
- Default Attempt and Due Time Settings - Applied by default to all new assessments (can be modified by content creators per assessment)
- Require Content Creators to Activate Assessment Manually - Requires content creators to manually activate all assessments by default
- Require Content Creators to Activate Observation Manually - Requires content creators to manually activate all observations by default
- Allow Student to Copy-Paste in Assessments - Controls whether students can copy question content and paste answers during assessments
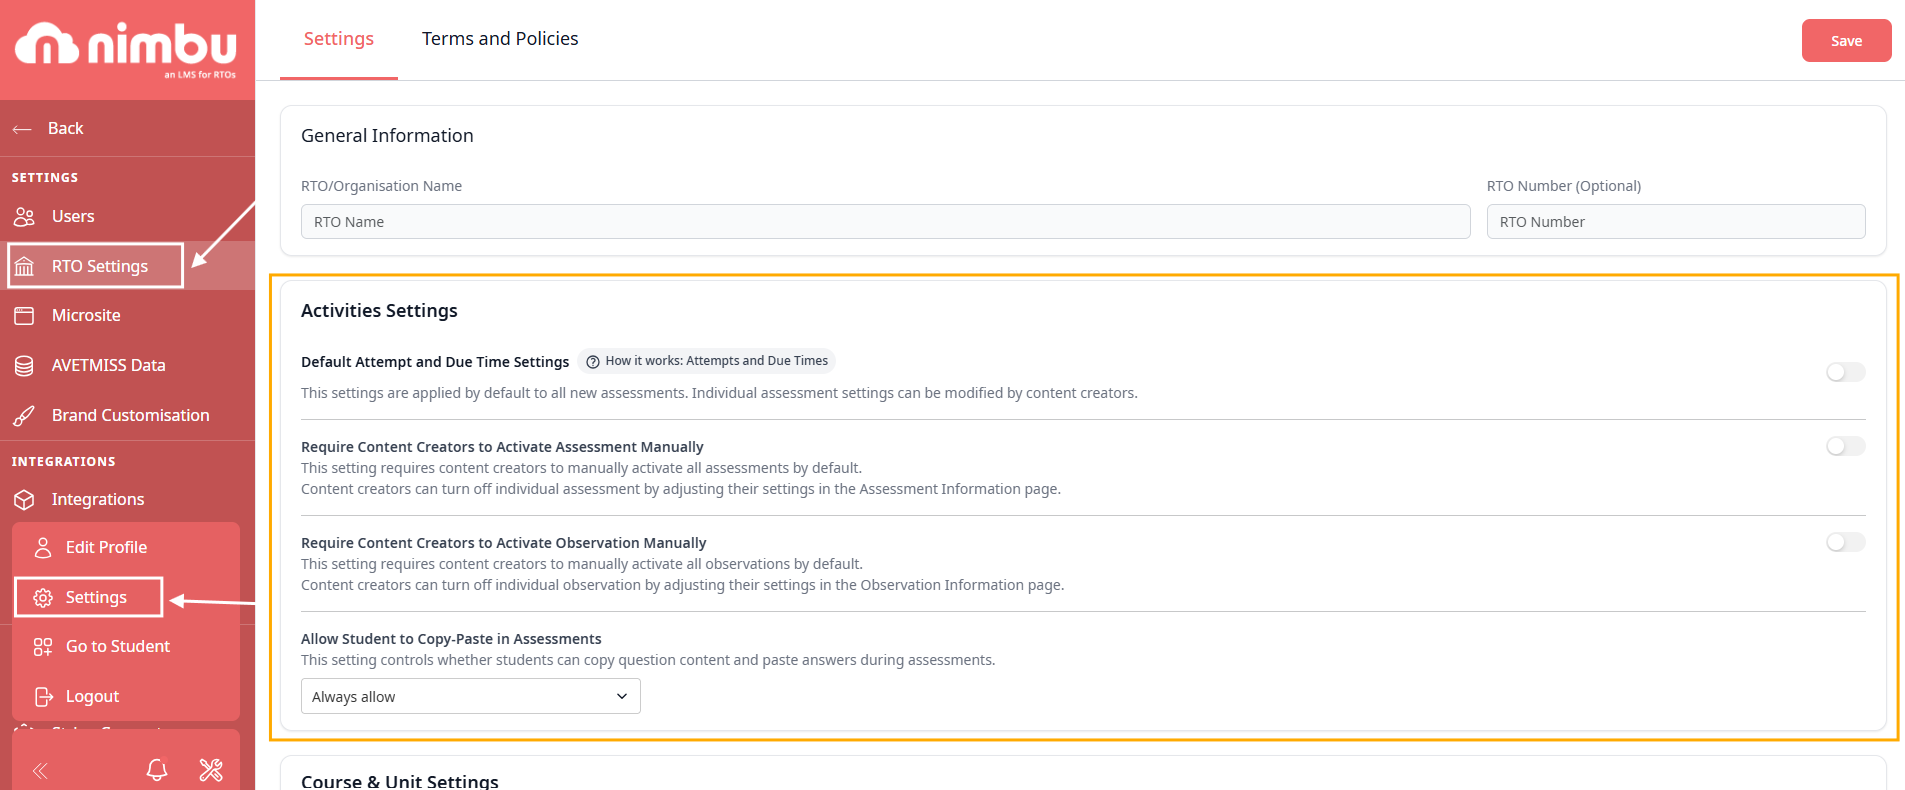
Course & Unit Settings:
- Require Trainer to Set Unit Final Result Manually - Controls whether a trainer is required to evaluate the final results of the student's unit to ensure they meet the required standards and learning objectives (does not apply to self-serve courses)
- Require Student to Accept Unit Result - Controls whether students are required to accept their final unit results. When enabled, students must accept unit results once available. When disabled, students will not have the option to accept unit results.

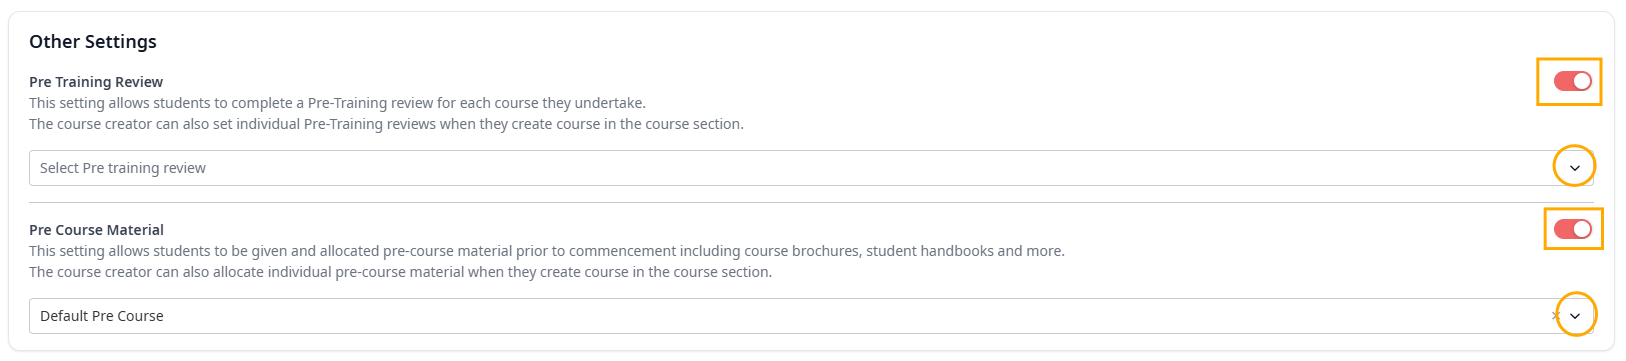
Other Settings:
- Pre Training Review - Allows students to complete a Pre-Training review for each course they undertake (course creator can also set individual reviews when creating courses)
- Pre Course Material - Allows students to be given and allocated pre-course material prior to commencement including course brochures, student handbooks and more (course creator can also allocate individual pre-course material when creating courses)
Step 2: Configure Integration Settings
Navigate to Settings > Integrations
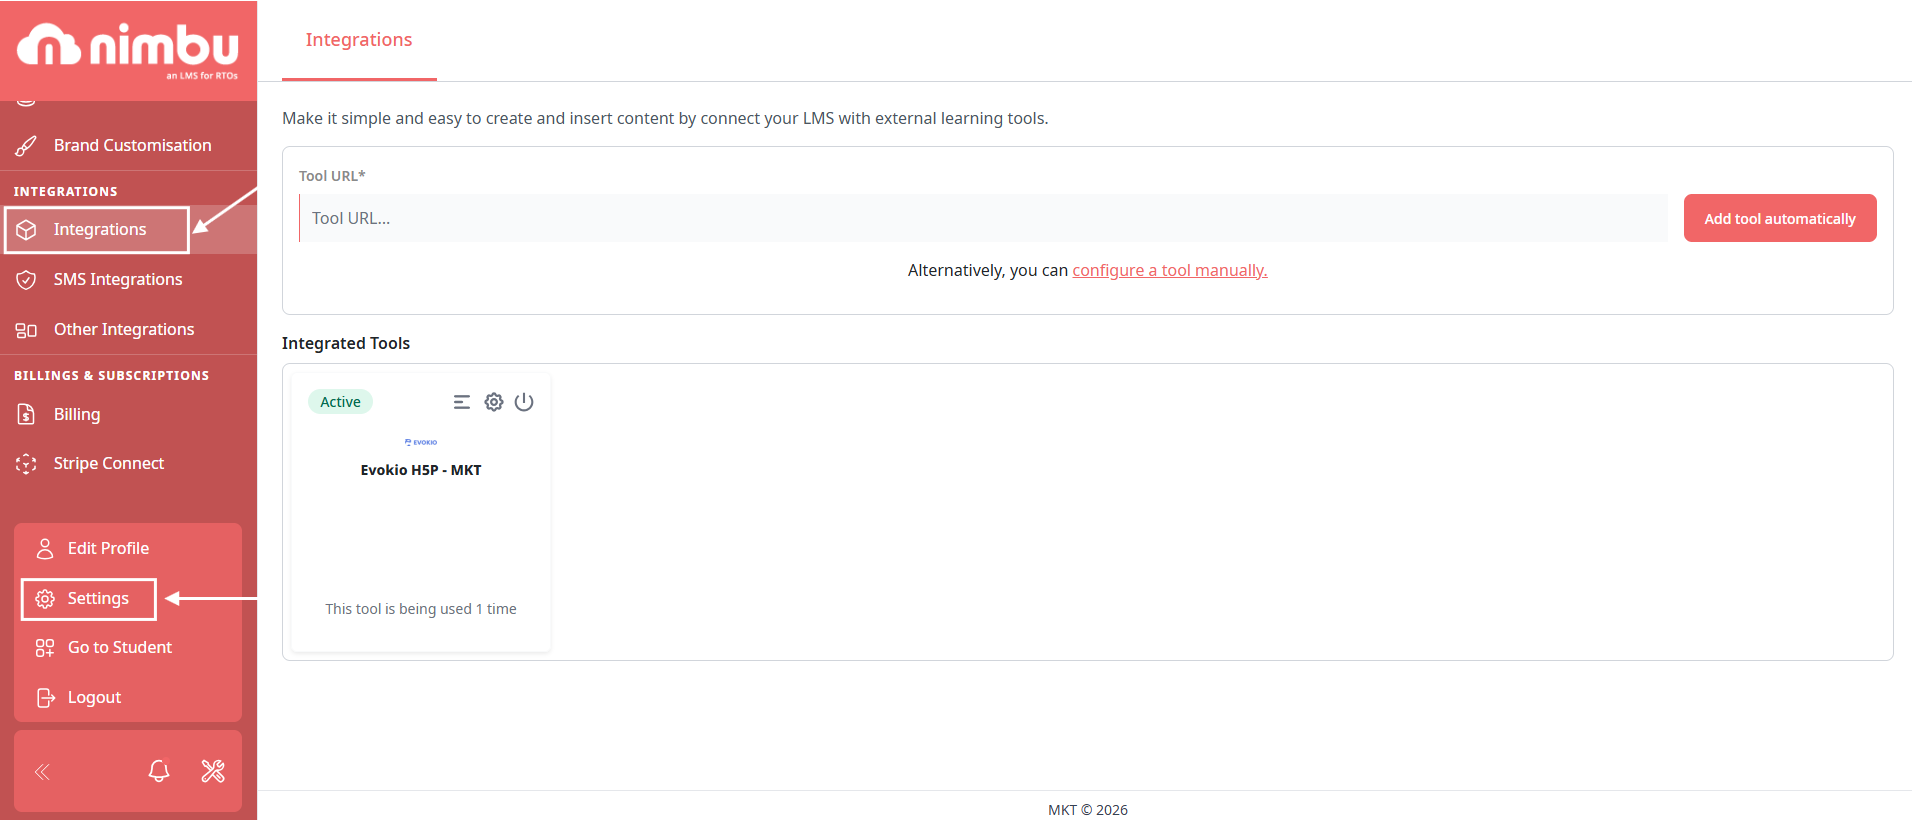
Connect Your Existing Systems:
- Available Integrations:
- Wisenet - Student Management System sync
- Stripe - Payment processing
- Zoom - Virtual classroom integration
- MagicMAP - Compliance mapping
- Evokio - H5P Authoring platform
- LTI - External learning tools
- Configuration:
- Enter API keys or credentials for each integration
- Test connection before saving
- Configure sync frequency and settings
- Map fields between systems
Important: Only enable integrations you actively use. Each integration should be tested before relying on it for live operations.
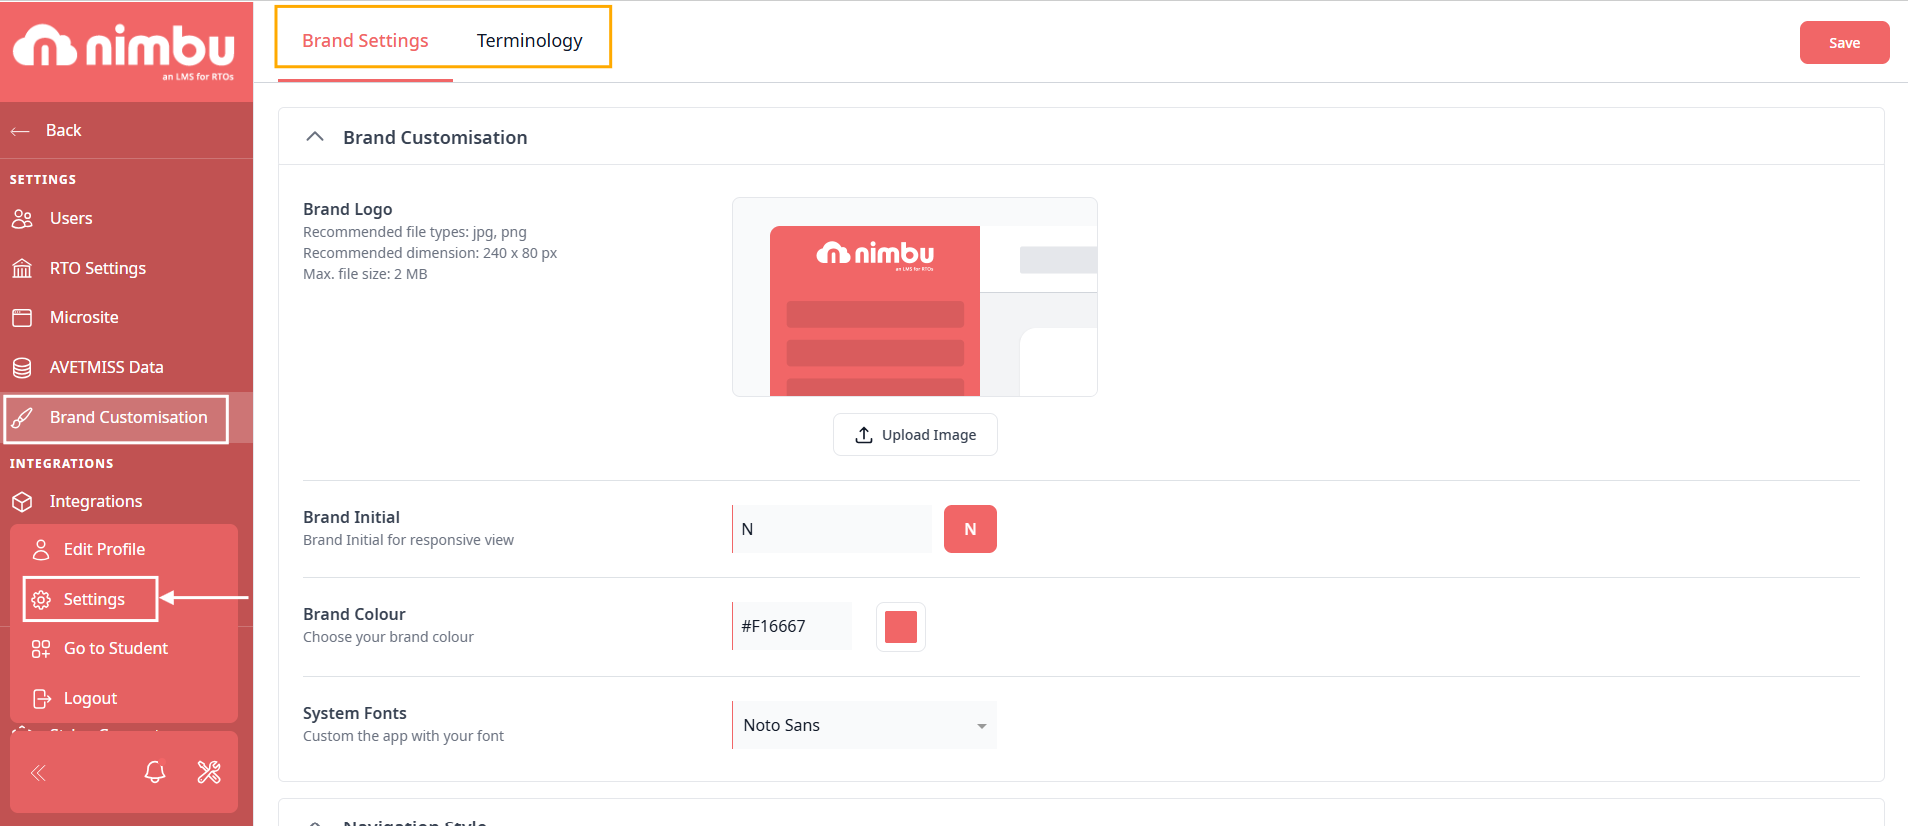
Step 3: Navigate to Settings > Brand Customisation
Navigate to Settings > Brand Customisation
Within the Brand Customisation dashboard, you have access to two primary areas of configuration:
Brand Settings:
Here you can upload your organisation's logo and define the primary and secondary colour schemes for the interface.
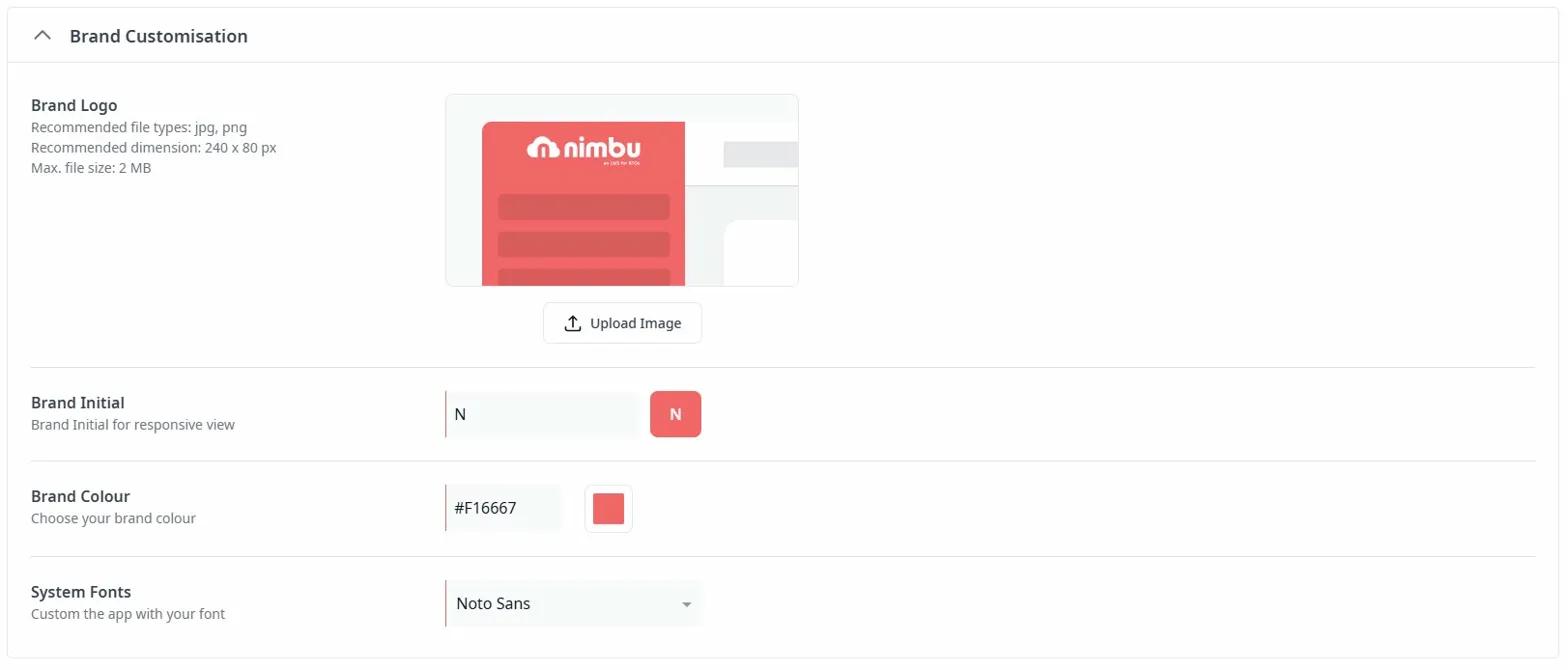
- Brand Customisation Section:
- Brand Logo:
- Upload your organisation's logo
- Recommended file types: jpg, png
- Recommended dimension: 240 x 80 px
- Max. file size: 2 MB
- Appears in header and student communications
- Brand Initial:
- Set a single letter for responsive view (when logo is too small)
- Displays as a branded icon on mobile and compact views
- Brand Colour:
- Choose your primary brand colour (hex code format, e.g.,
#F16667) - Applies to buttons, highlights, and branding elements throughout the platform
- Choose your primary brand colour (hex code format, e.g.,
- System Fonts:
- Select your preferred font for the platform
- Customises the appearance of text across the system
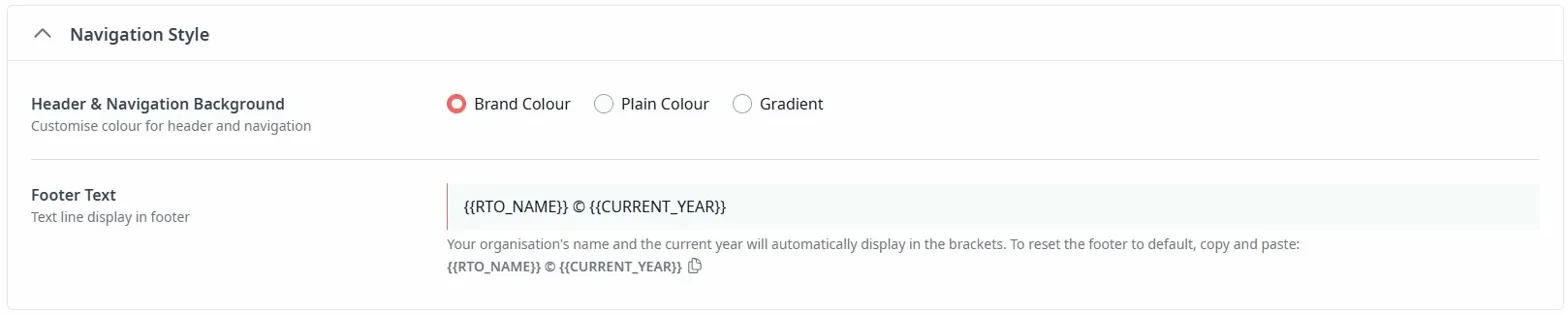
- Navigation Style Section:
- Header & Navigation Background:
- Choose from three options:
- Brand Colour - Uses your brand colour
- Plain Colour - Select a custom colour
- Gradient - Create a gradient effect
- Choose from three options:
- Footer Text:
- Customise the text displayed in the footer
- Default format:
{{RTO_NAME}} © {{CURRENT_YEAR}} - Your organisation's name and current year automatically display in the brackets
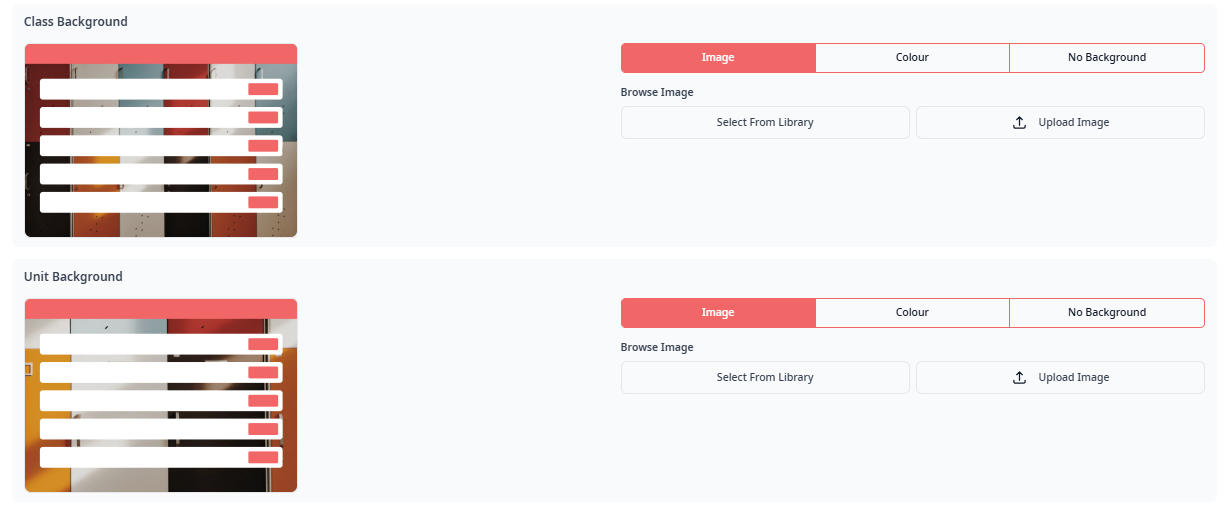
- Background Customisation Section:
Customise page backgrounds for different areas:
- Login Background:
- Choose between Image, Colour, or No Background
- Upload custom image or select from library
- Creates branded login experience
- Dashboard Background:
- Customise the main dashboard appearance
- Upload custom image or select from library
- Choose solid colour or no background

- Class Background:
- Set background for Class pages
- Upload custom image or select from library
- Maintains brand consistency in delivery areas
- Unit Background:
- Customise Unit page backgrounds
- Upload custom image or select from library
- Creates cohesive learning environment
Why This Matters: Consistent branding creates professional student experience and reinforces your RTO identity.
Terminology:
This tab allows you to customise the internal language of your LMS to match your RTO's specific nomenclature.
- Course/Unit: Replace standard terms like "Course" or "Unit" with alternatives like "Program" or "Module".
- Resulting Statuses: Customise the final end result terms, such as changing "Competent" to "Pass" or "Not Competent" to "Not Yet Competent".
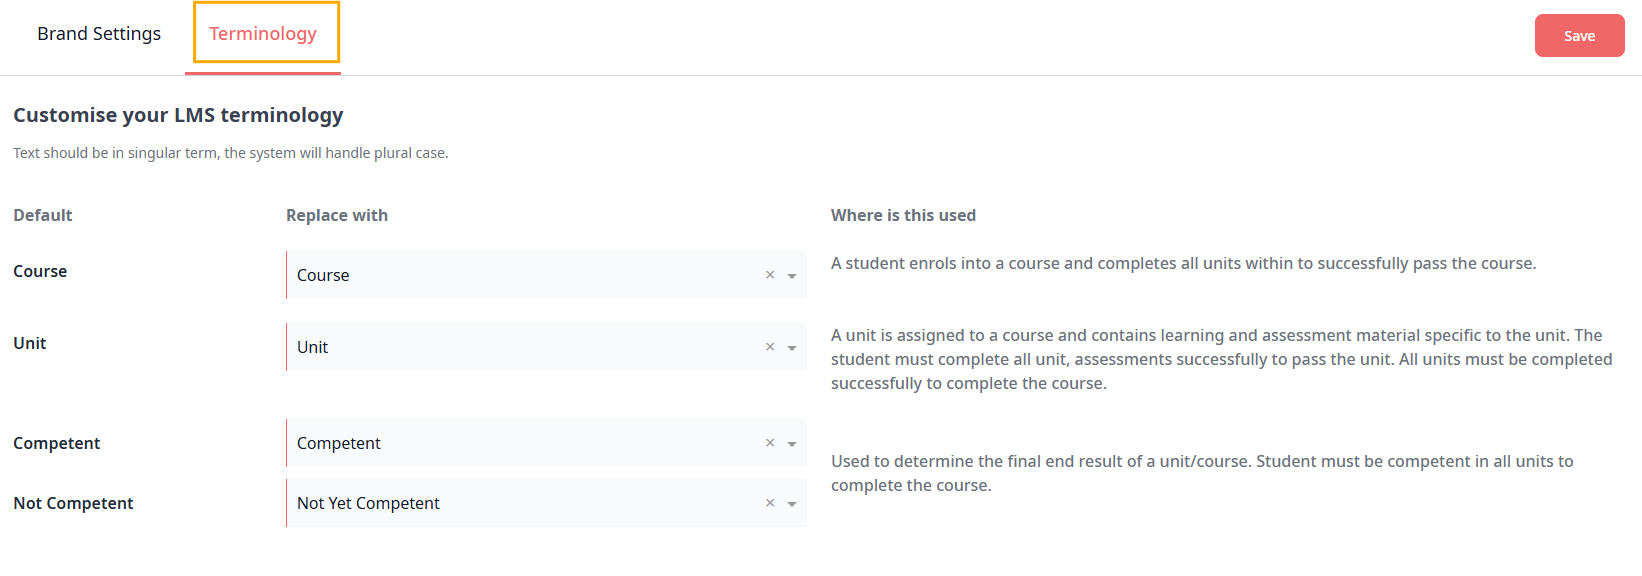
Note: The system automatically handles plural cases for any custom singular terms you input.
Save Your Changes
Once you have finalised your visual and terminology updates, click the Save button in the top right corner to push these changes live across your platform.
Inviting Users and Assigning Roles
Your platform is now configured. Time to invite your team and students.
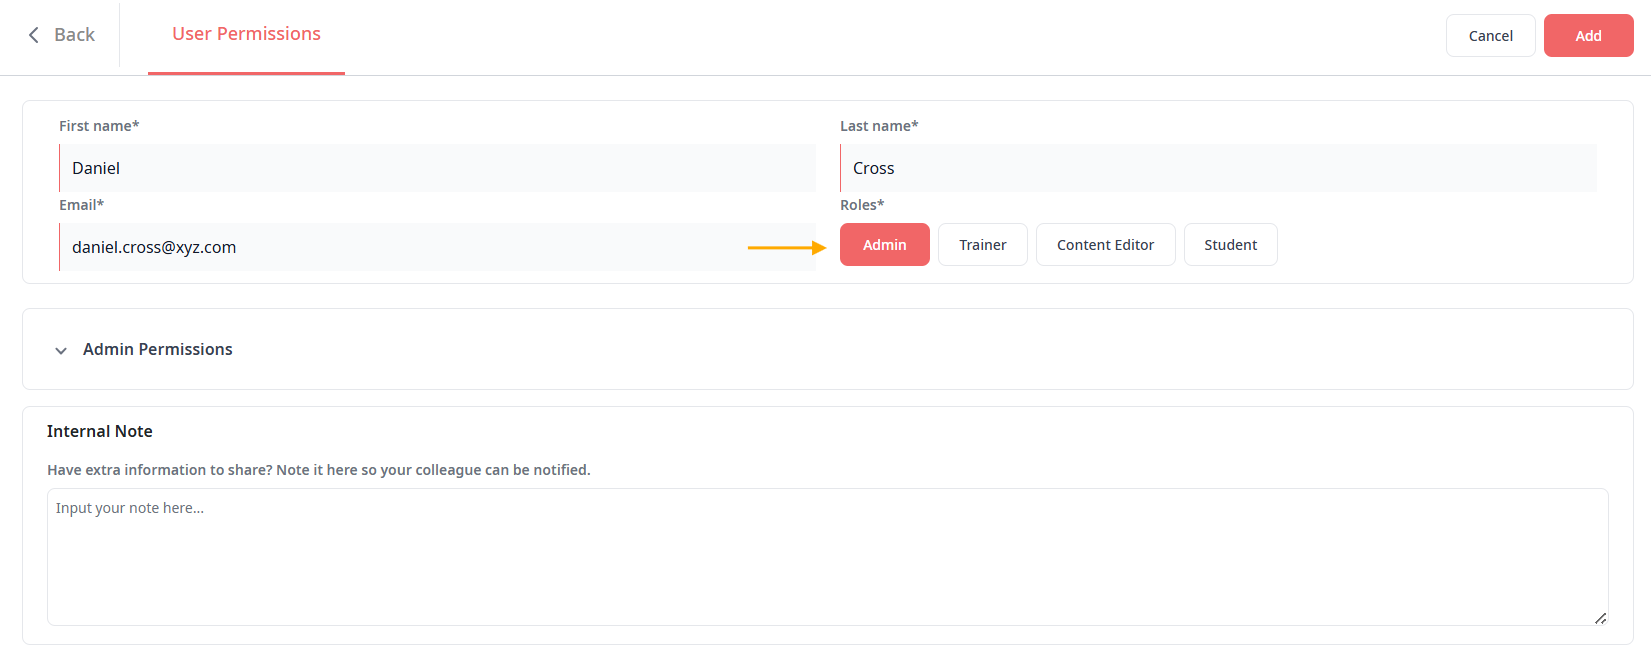
Understanding Roles and Permissions
Nimbu uses role-based access control. Each role has specific permissions.
Common Staff Roles:
Admin:
- Full platform access
- Can manage all settings, users, and content
- Can view all reports and audit trails
- Can override system restrictions when necessary
Content Editor:
- Creates and manages Courses, Units, and Content
- Cannot manage users or system settings
- Can publish content but not delete Published items
- Focuses on curriculum development
Trainer:
- Manages Classes and student delivery
- Marks assessments and observations
- Can activate content for students
- Cannot edit Course/Unit blueprints
Student:
- Accesses enrolled Courses and Units
- Completes learning resources and activities
- Views own progress and results
- Cannot access admin areas
Custom Roles: Your organisation may have custom roles with specific permission combinations. Check with your Nimbu implementation team.
Overview of Admin Responsibilities
As an Administrator, you're responsible for the ongoing health and efficiency of your Nimbu platform. Your specific responsibilities depend on the permissions enabled for your admin role.
User Management
Access and Permissions:
- Access the Users Index to view all staff and students
- Add and edit user accounts
- Activate and deactivate user accounts
- Log in as another user (when troubleshooting or providing support)
Staff Management:
- Process new staff onboarding
- Assign and update roles and permissions
- Deactivate accounts for departed staff
- Manage user groups and access control
- Reset passwords when requested
- Troubleshoot access and login issues
Student Management:
- Review new registrations (if manual approval enabled)
- Verify student information accuracy
- Monitor enrolment status
- Process student transfers and withdrawals
- Resolve student access issues
RTO Settings and Configuration
Platform Configuration:
- Access and manage RTO Settings
- Configure organisation details and compliance settings
- Set up Activities Settings (assessment and observation defaults)
- Configure Course & Unit Settings
- Manage Pre Training Review and Pre Course Material settings
Brand Customisation:
- Edit brand customisation settings
- Upload and update logo and brand colours
- Customise navigation and background styles
- Maintain consistent branding across the platform
Integration Management:
- Edit and configure integrations
- Connect third-party systems (Wisenet, Stripe, Zoom, MagicMAP, Evokio, LTI)
- Monitor integration connection status
- Review and resolve sync issues
- Update integration configurations as needed
Compliance and Reporting
AVETMISS Management:
- Export AVETMISS data for reporting periods
- Review audit trails for compliance evidence
- Prepare compliance documentation
- Conduct internal audit readiness checks
- Verify settings align with regulatory requirements
Microsite Management:
- Manage Microsite settings and content
- Configure public-facing course information
- Update registration and enrolment portals
Engagement Metrics:
- Access Engagement Metrics dashboard
- View class and student engagement data
- Identify at-risk students or Classes
- Analyse platform usage statistics
- Monitor course and unit performance
Billing and Subscriptions
Financial Management:
- Access and manage billing information
- Manage subscriptions and payment plans
- Configure Stripe Connect for payments
- Monitor payment processing
- Review subscription status
Content and Delivery Oversight
Content Lifecycle:
- Review and archive completed Classes
- Set unused content to Inactive status
- Monitor content versions and updates
- Ensure content meets compliance standards
Delivery Support:
- Create and configure Classes for course delivery
- Monitor class progress and completion
- Coordinate with Trainers on delivery needs
- Ensure timely activation of content
- Support Content Editors with curriculum needs
Platform Monitoring and Support
System Health:
- Monitor Dashboard for unusual activity or issues
- Review notifications and system alerts
- Respond to urgent platform issues
- Monitor system performance
- Coordinate with Nimbu support on technical issues
User Support:
- Answer questions about platform functionality
- Resolve login and permission problems
- Provide technical assistance to staff and students
- Troubleshoot access issues
Communication and Coordination
Stakeholder Communication:
- Send platform updates to users
- Coordinate with Content Editors on curriculum needs
- Collaborate with Trainers on delivery requirements
- Address escalated issues and concerns
- Share reports and insights with leadership
Training and Development:
- Organise staff training on new features
- Update internal documentation
- Share best practices across teams
- Provide onboarding for new staff members
Continuous Improvement
Strategic Oversight:
- Review platform adoption and effectiveness
- Identify improvement opportunities
- Plan new courses or program launches
- Evaluate need for additional features or integrations
- Implement feedback from staff and students
- Update policies and procedures as standards change
Key Admin Workflows
Adding a Staff Member
- Navigate to Users
- Click Add Staff or Invite User
- Enter name and email address
- Select role (Administrator, Content Editor, Trainer)
- Click Send Invitation
- Staff member receives email and sets up their account
Adding a Student
Option 1: Individual Student
- Navigate to Students
- Click Add Student
- Enter student details
- Click Save
Option 2: Bulk Import
- Navigate to Students
- Click Import Students
- Download CSV template
- Complete student details
- Upload file and confirm
Creating a Class
- Navigate to Classes
- Click Create Class
- Select Course to deliver
- Enter Class name and dates
- Assign trainers
- Activate the Class
- Enrol students
Enrolling Students in a Class
- Open the Class
- Click Enrol Students
- Search and select students
- Click Confirm
Generating AVETMISS Report
- Navigate to AVETMISS Data
- Select reporting period
- Choose export type
- Click Generate
- Download and verify files
Related Articles: