[refined] How to create a New Unit
Feature Overview
Nimbu’s Unit Creation workflow is designed to be "Compliance Friendly," giving RTOs the structural tools they need to maintain accurate records and streamlined delivery.
Whether you are setting up individual Units of Competency or building complex delivery Clusters, our system ensures your curriculum is organised, and ready for enrolment. With manual trainer-release toggles, you maintain full control over when students access their learning materials and assessments.
Article Summary
This guide outlines the standard operating procedure for configuring a Unit within the Nimbu LMS.
By the end of this article, Administrators/ Trainers will be able to:
- Access the Unit management area within the Curriculum dashboard.
- Correctly classify units as Accredited, Non-Accredited, or Clusters.
- Map Learning Resources and Assessment Tools to specific units.
- Publish units for immediate delivery or save drafts for internal validation
Configuration Guide: Step by step
Step 1 - Navigate to the Unit Page
From the Nimbu dashboard, click on Units in the left-hand menu under the Curriculum section.
- Note: This will display your current register of active and drafted units.
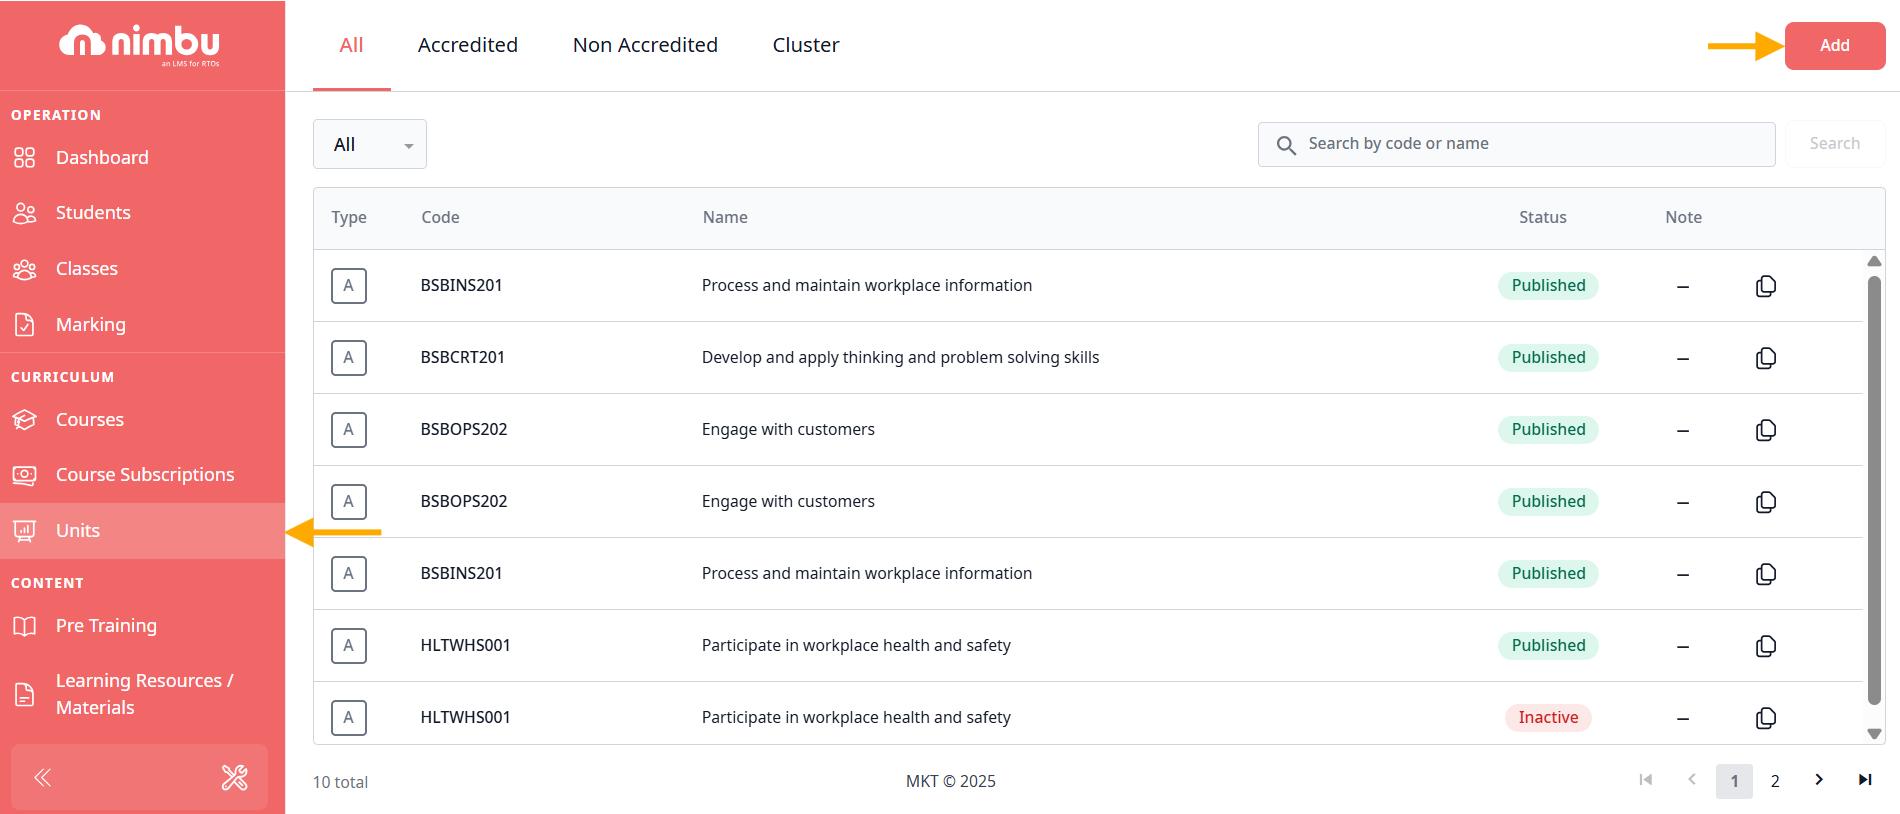
Step 2 - Add a New Unit
In the top-right corner of the screen, click the red Add button. A pop-up window will appear requiring you to select the Unit Type based on your delivery strategy:
- Accredited: For Nationally Recognised Training (NRT) units.
- Non-Accredited: For internal modules or professional development workshops.
- Cluster: For grouping multiple units together for holistic delivery
Step 3 - Input Unit Specifications
Enter the core details to match your Training Package requirements:
- For Accredited Units: Input the official National Code (e.g., BSBTWK502) and National Title.
- For Non-Accredited Units: Enter your internal Code and Title
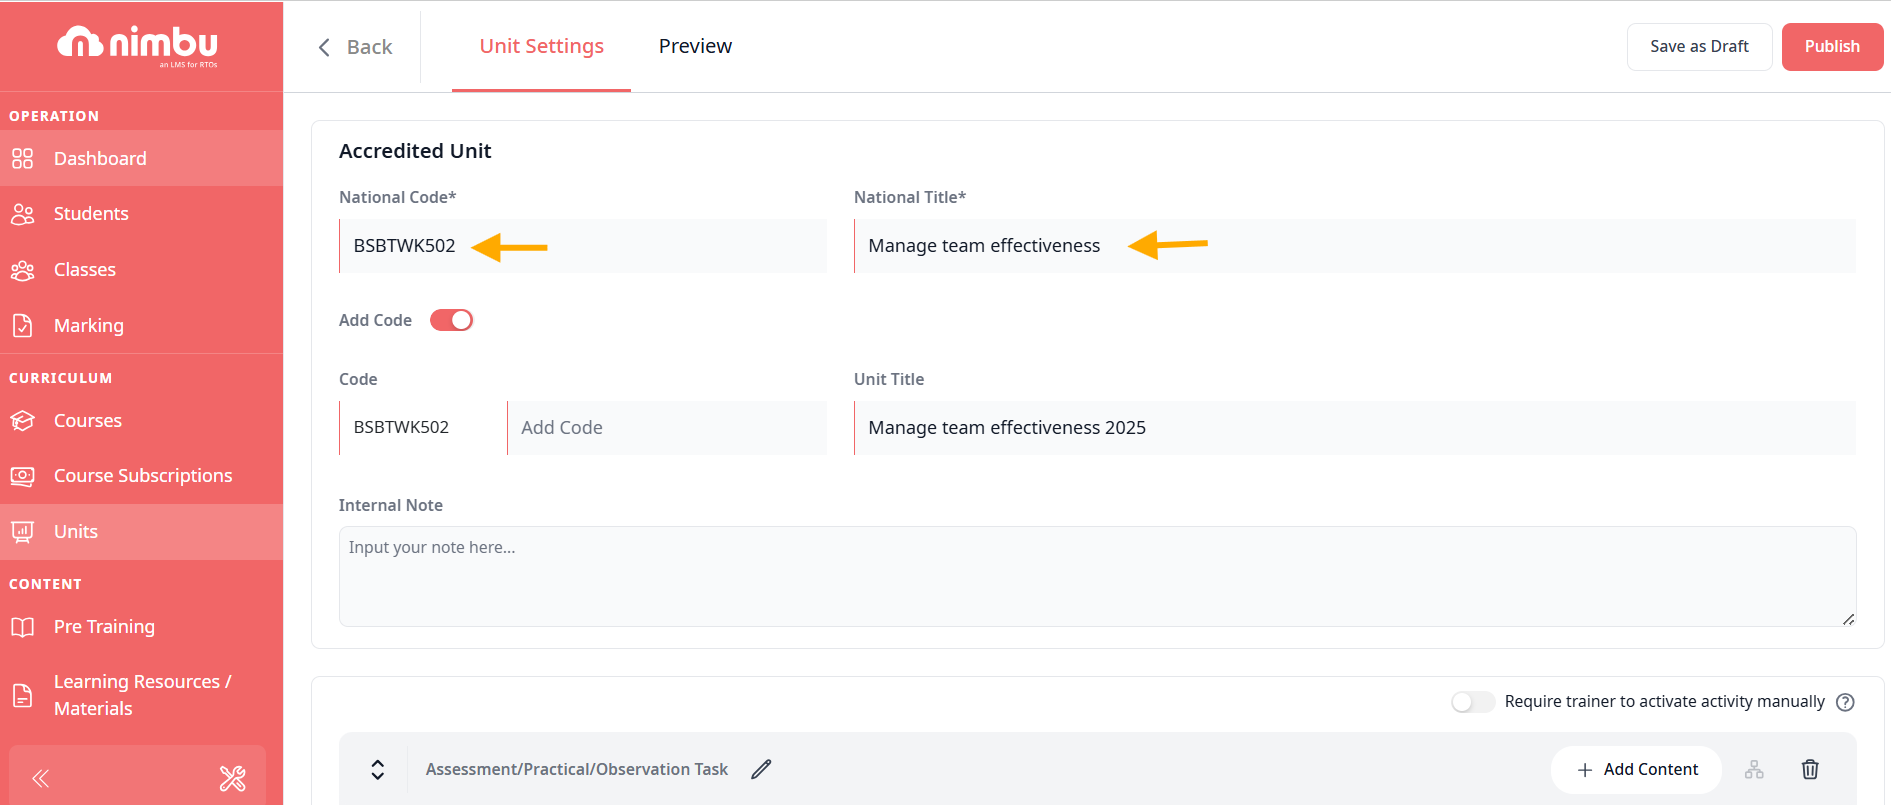
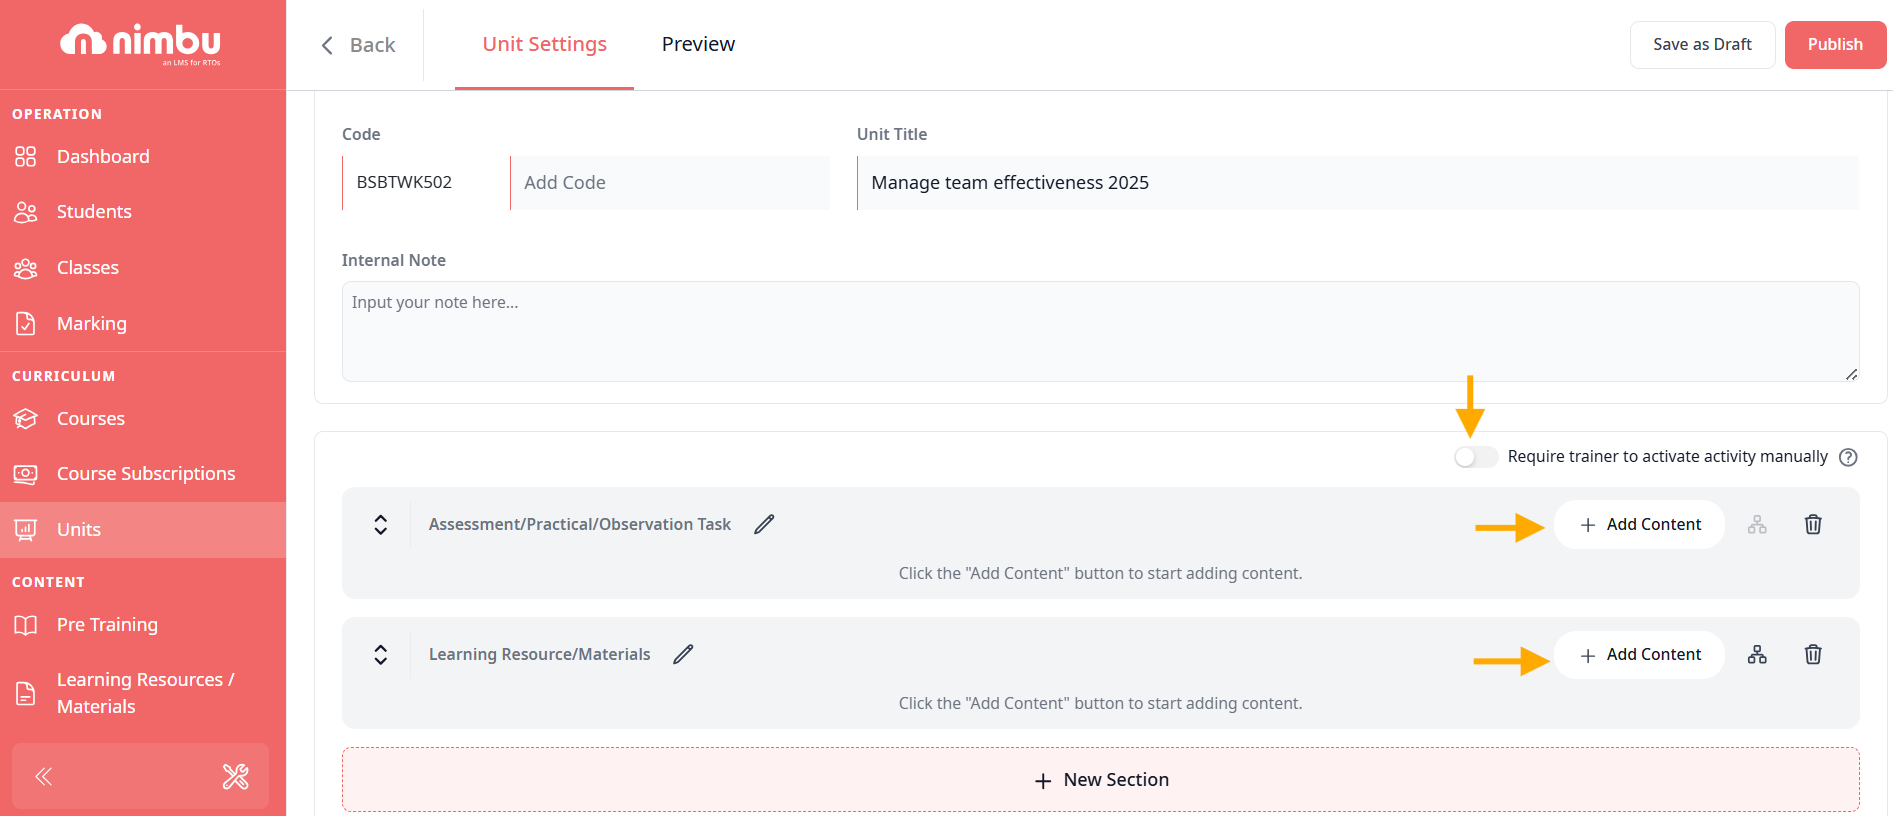
Next, Click to the "Add Content" to select the existing content or create new one. You can switch the togle to turn on/ off option require trainer to activate manually
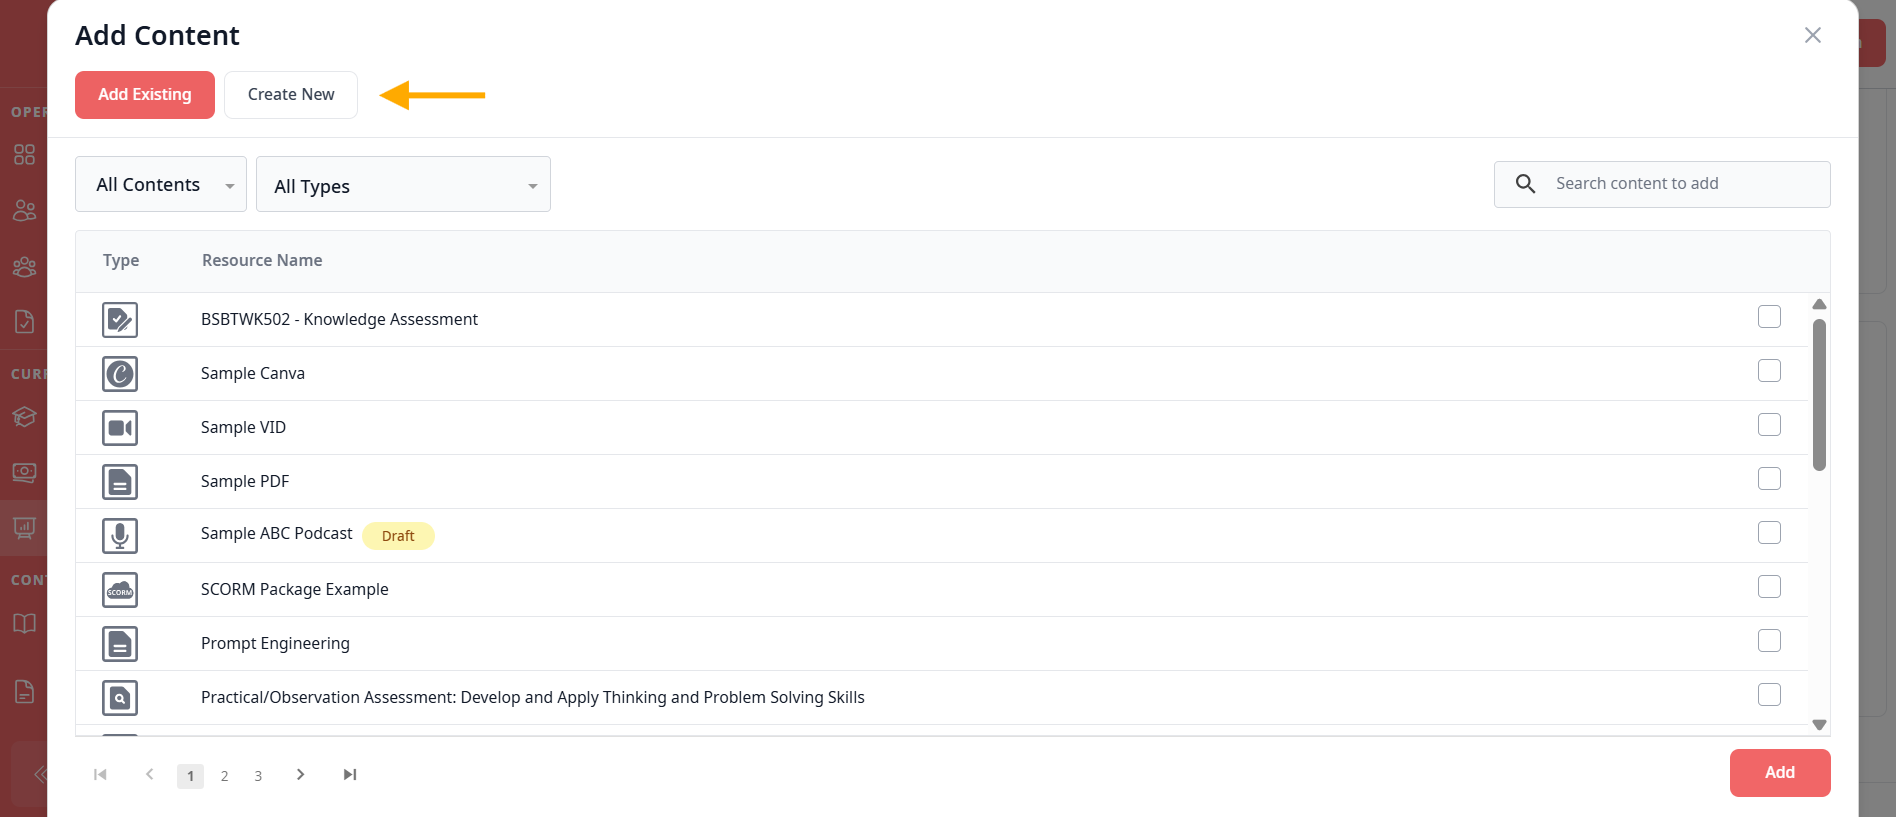
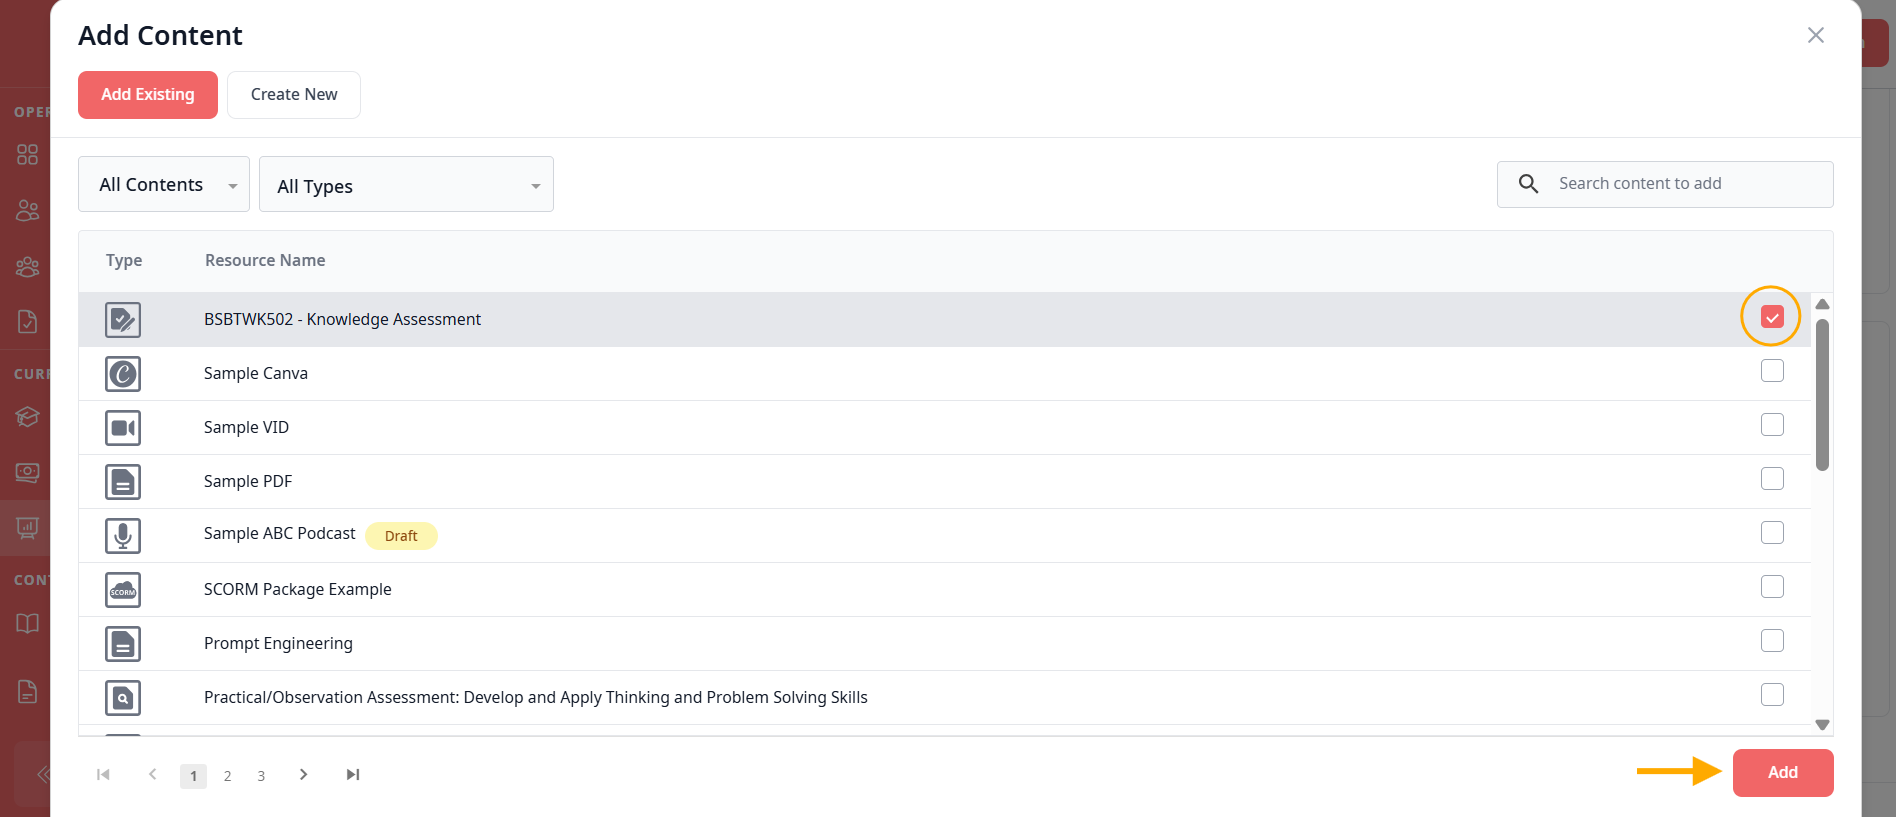
If you choose "Add Existing": All the created Contents are ready, simply tick to the box your choice and Press "Add" to finish your selection
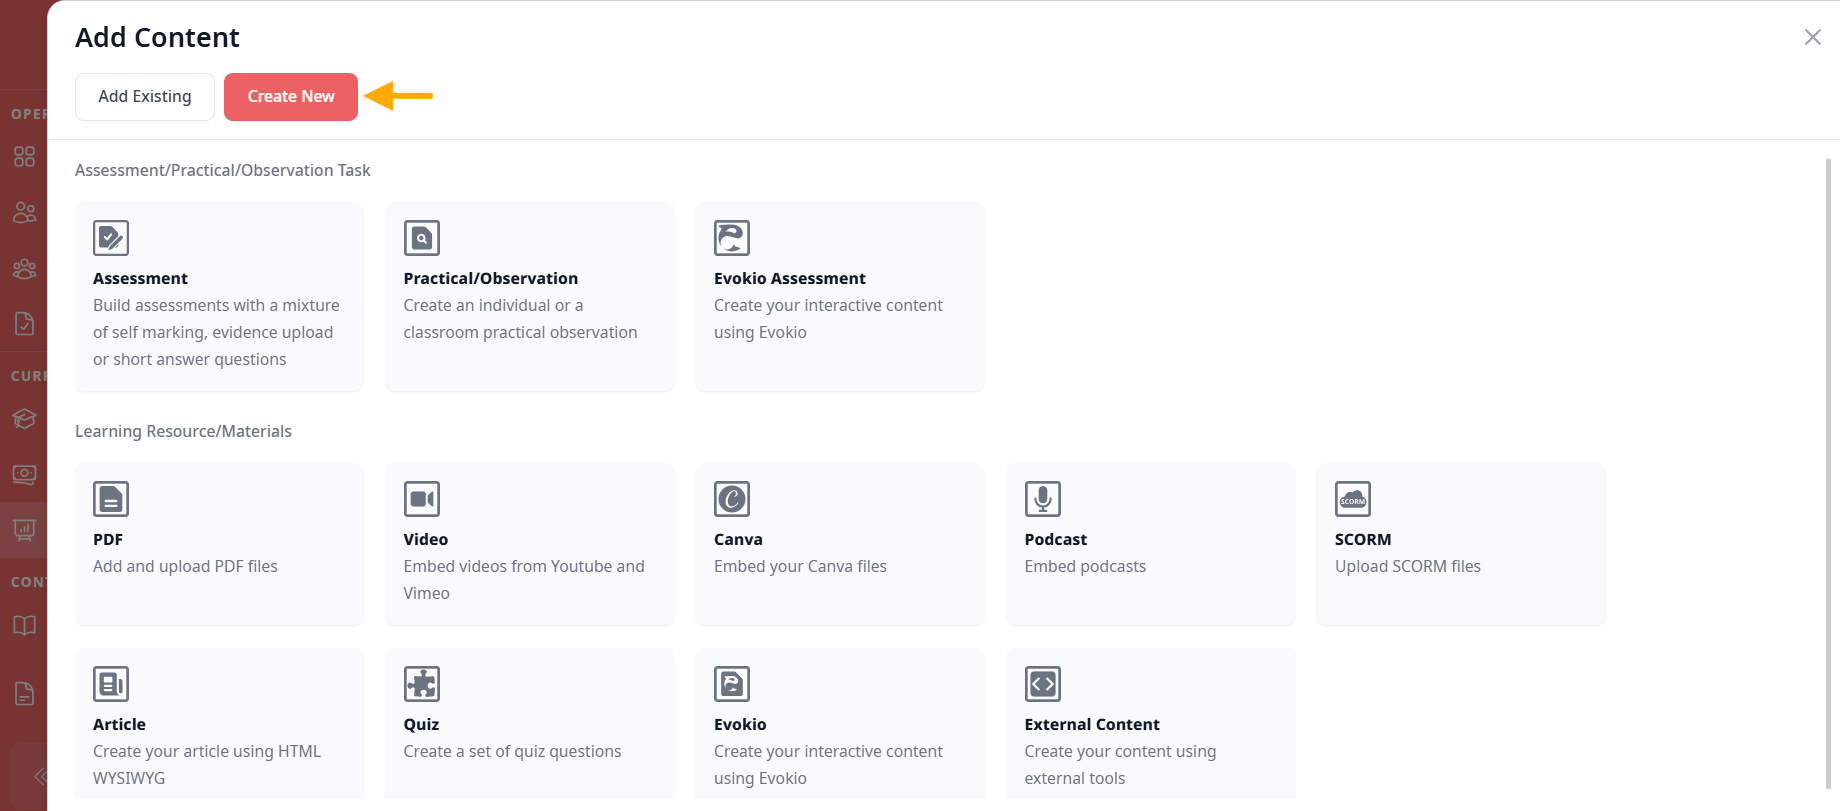
Other hand, if you choose "Create New": It will take you to a new screen where you can continue working with a list of options, including: Assessment/ Practical/ Observation Task and Learning Resourse/ Materials
For more detail of each, read more at series of "How to Add/ Edit Learning Resource/ Materials"
Same with the section "Learning Resource/Materials", it's similar with the "Assessment/Practical/Observation Task"
- Click to the "Add Content" to select the existing content or create new one. You can switch the togle to turn on/ off option require trainer to activate manually
- If you choose "Add Existing": All the created Contents are ready, simply tick to the box your choice and Press "Add" to finish your selection
- If you choose "Create New": It will take you to a new screen where you can continue working with a list of options, including: Assessment/ Practical/ Observation Task and Learning Resourse/ Materials
Step 4 - Save as Draft and Publish
Once you have completed all the details, click the Publish button in the top-right corner to make the course live.
You can also click Save as Draft if the unit requires internal moderation or validation before release, click Save as Draft.
If you have any further questions about adding, editing or configuring pre course material, please don't hesitate to contact us. Our support team will happily assist you with all your concerns.