Admin Account Settings Overview
Nimbu admin users have a range of settings allowing them to tailor their account to their specific requirements. This includes editing account user profiles, configuring brand settings, payment methods, and certain RTO settings - everything can be done with just a few clicks.
In this article, we will cover the following points.
The steps to quickly access various elements of settings.
Steps to follow for accessing various elements of settings.
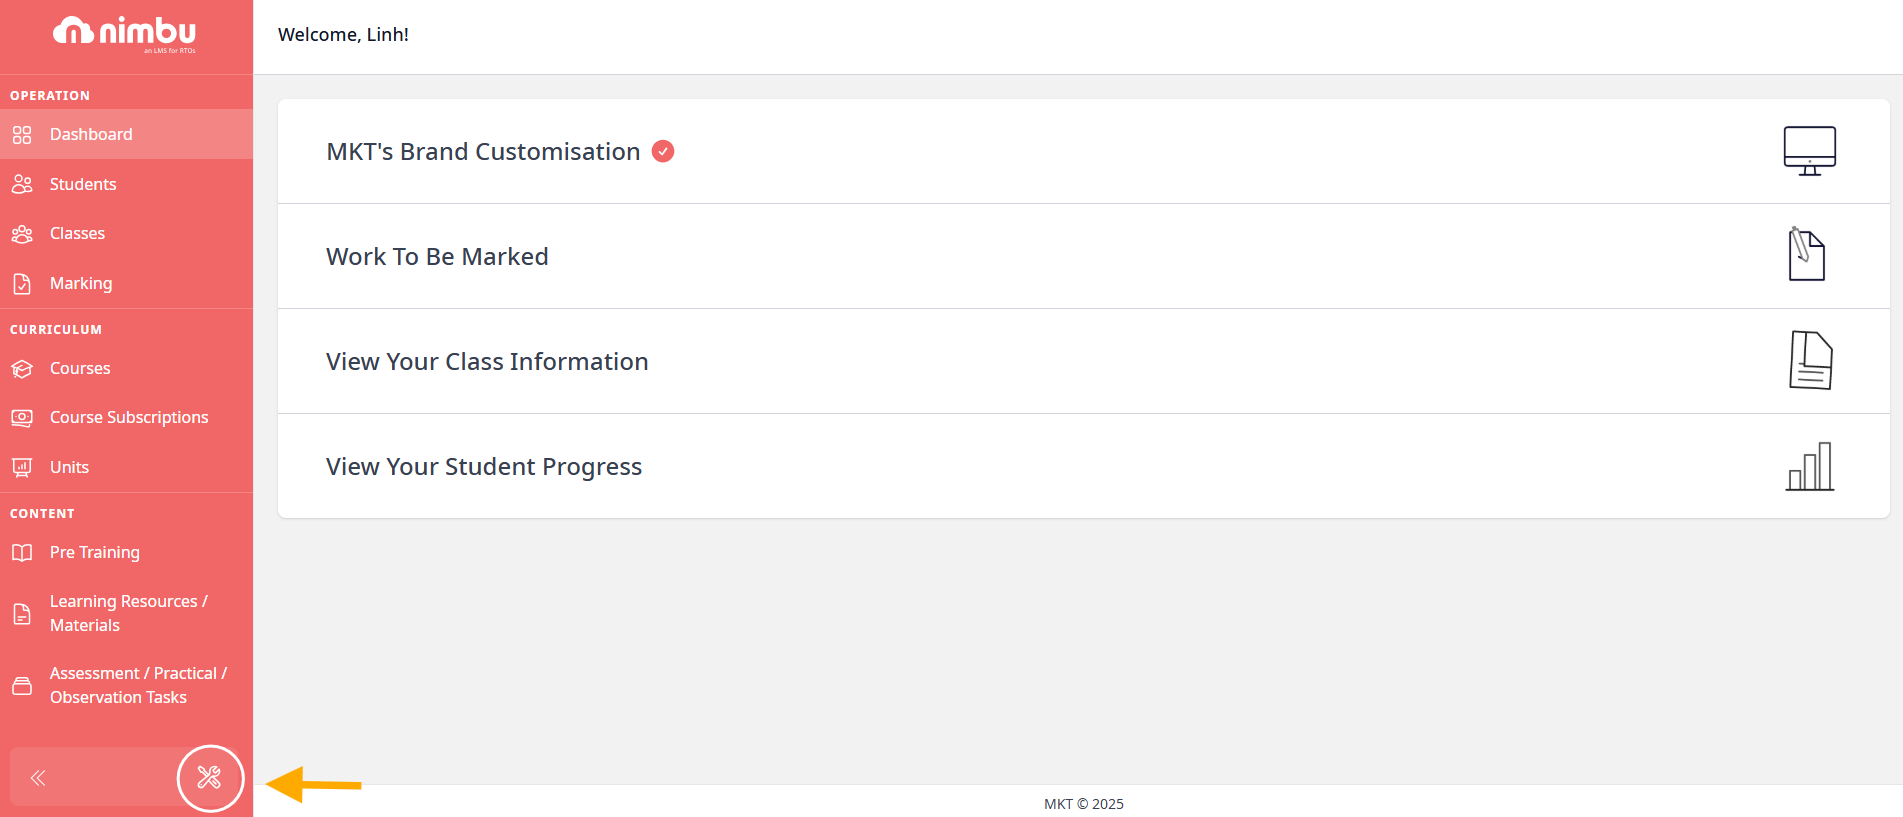
Step 1 - Sign in to your Nimbu account.
Step 2 - From your dashboard, at the bottom of the left sidebar, click on the setting icon to display a pop-up menu.
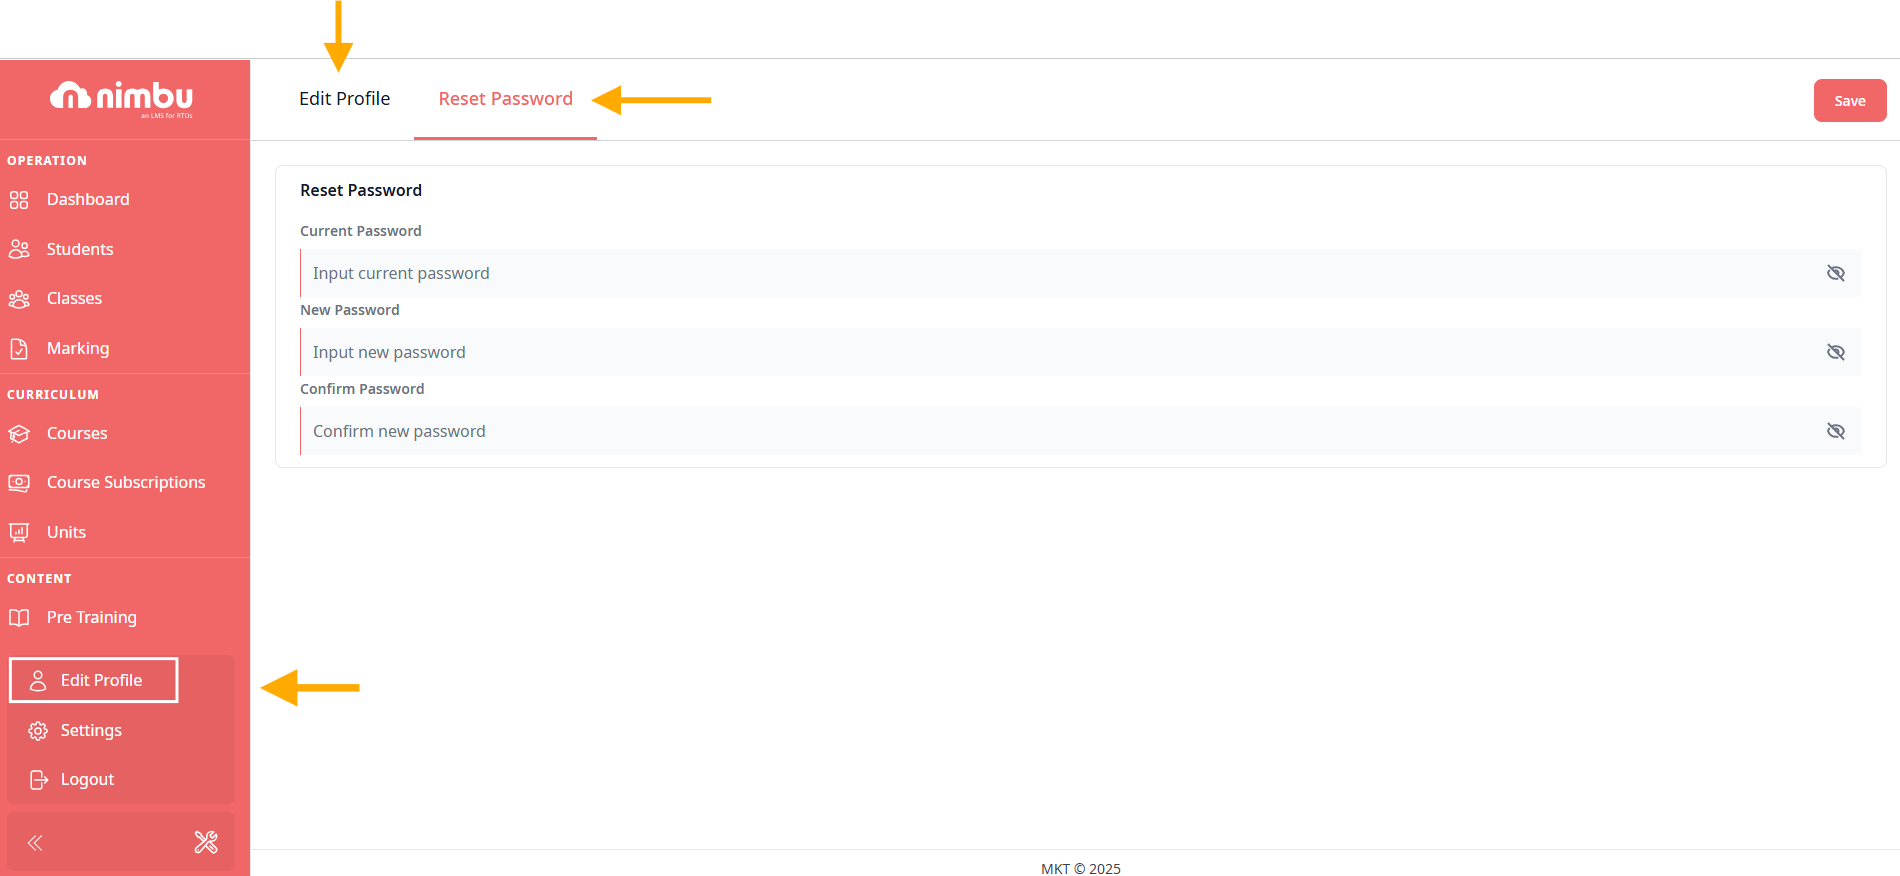
For password and profile settings:
Click on the Edit Profile option from the pop-up menu to Edit your profile and Reset your Password.
For RTO settings:
From the left side navigation panel, click on the Settings, then RTO Settings option to set RTO.
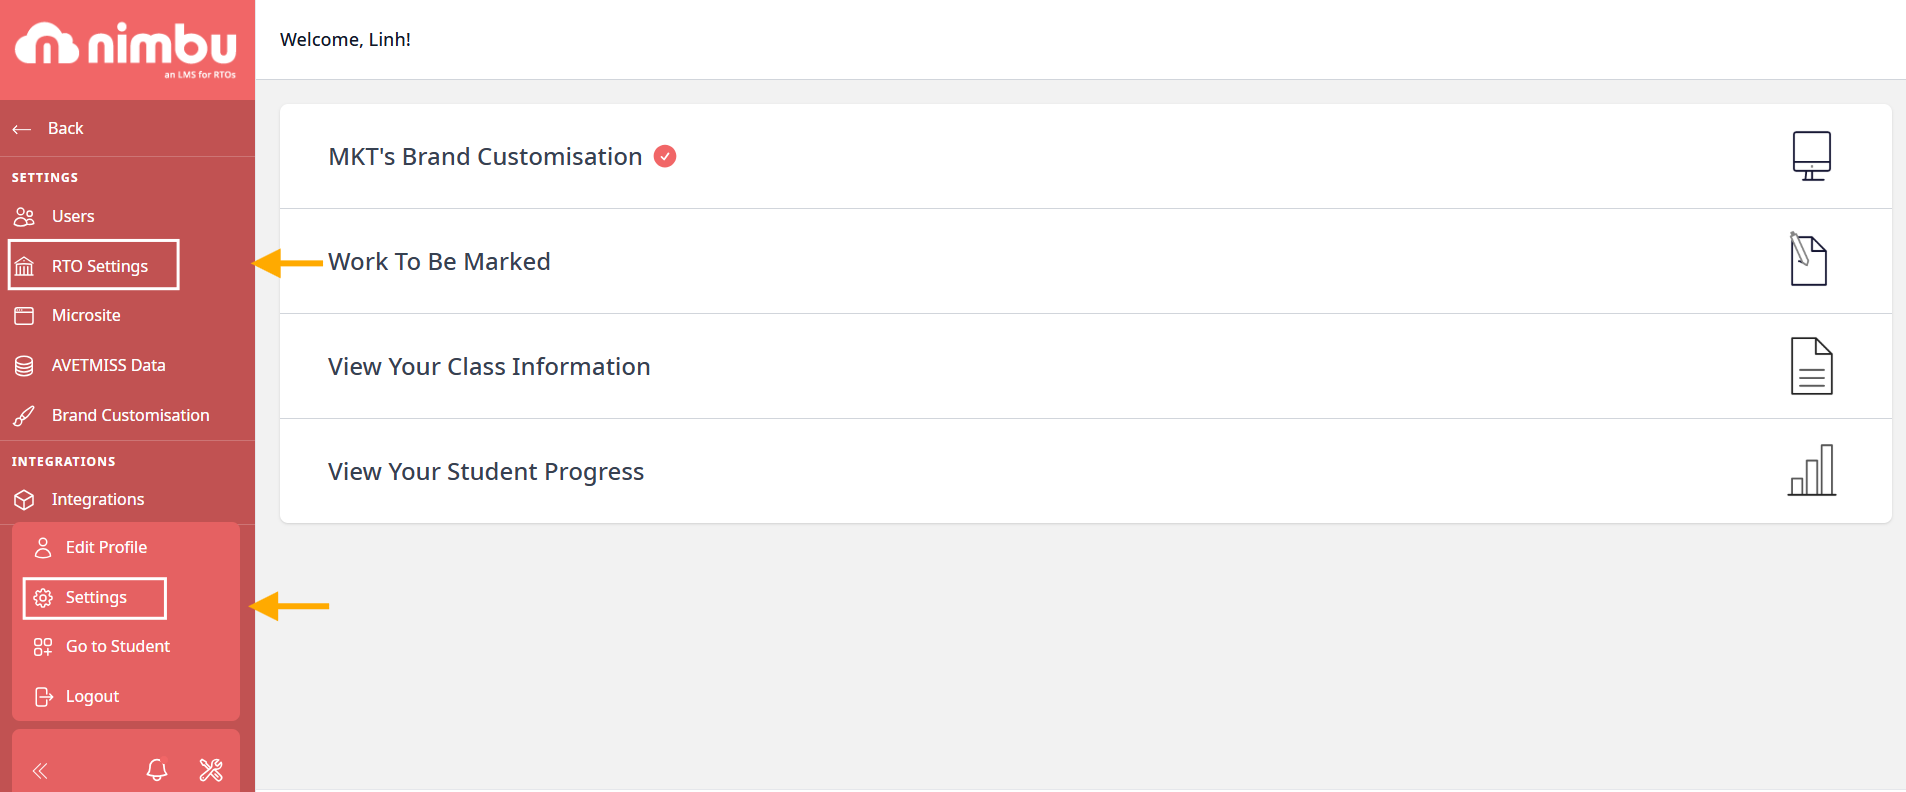
For Microsite settings:
From the left side navigation panel, click on the Settings, then Microsite option to edit, set up, showcase your courses
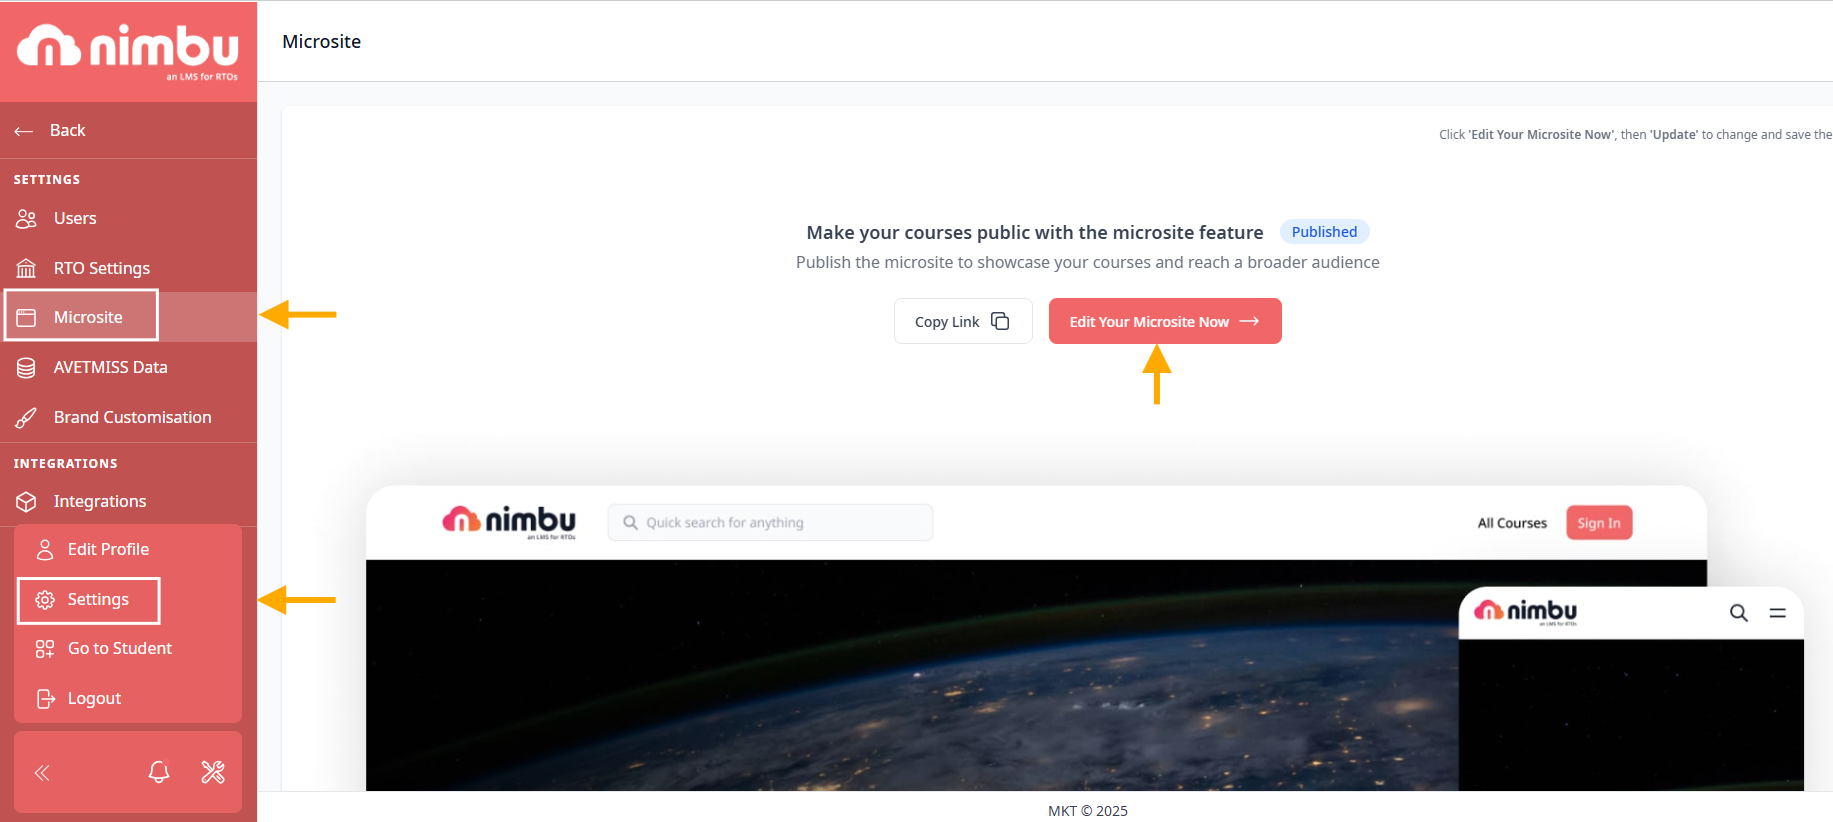
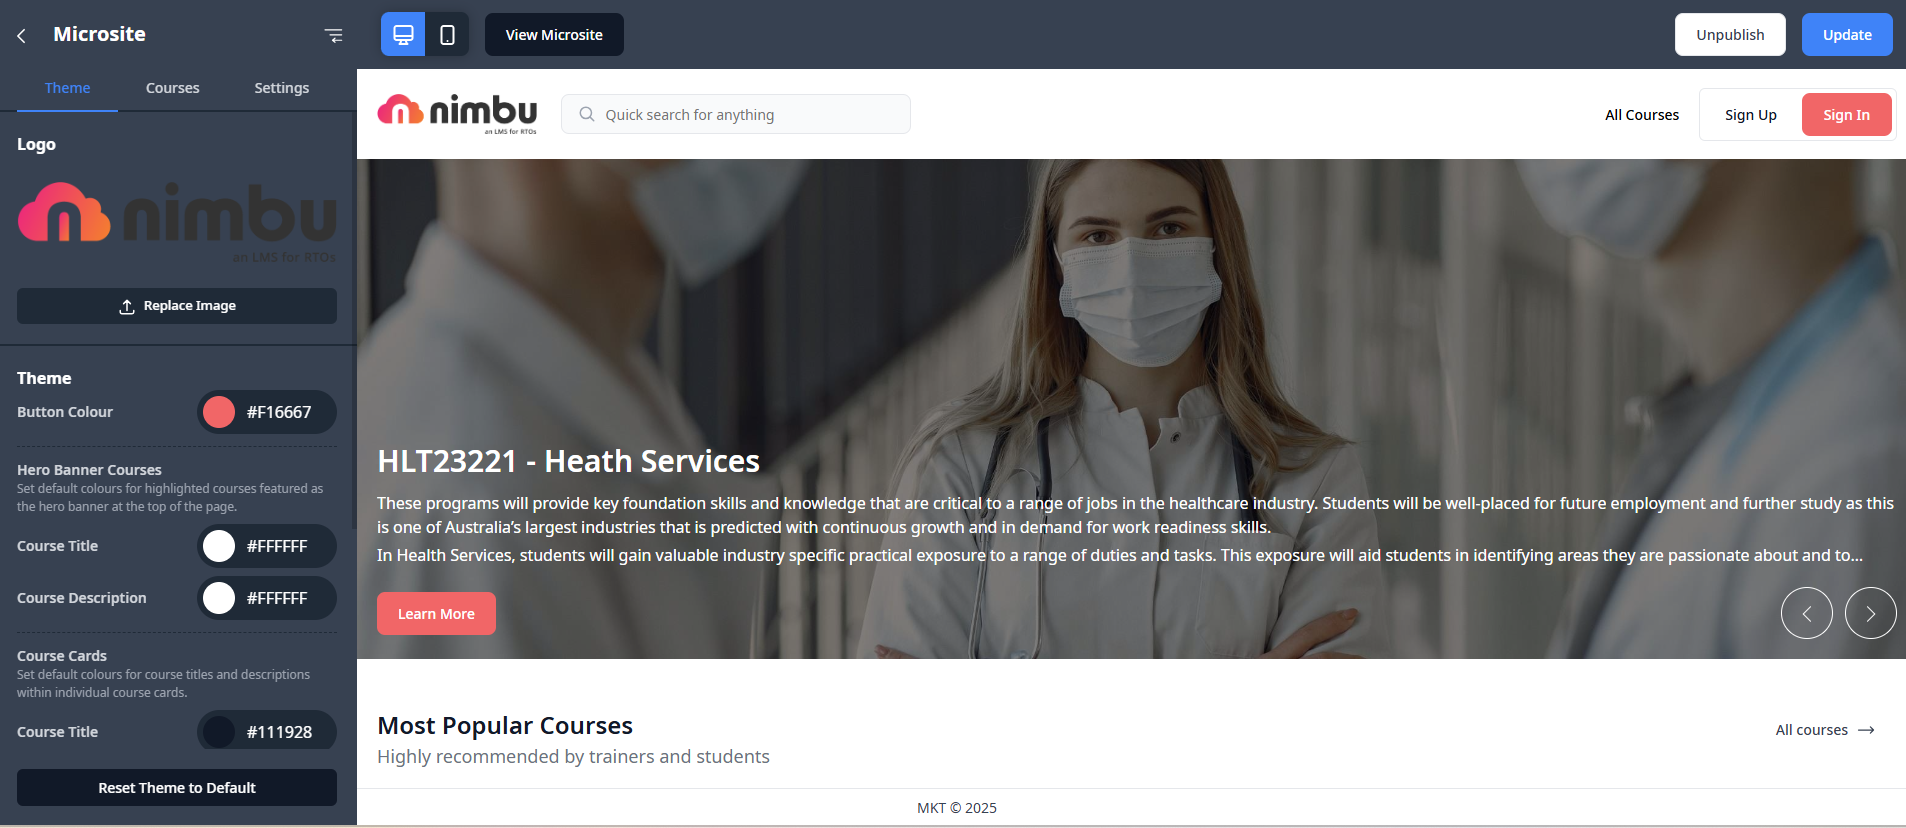
When clicking into Edit Your Microsite Now, you will land to Microsite dashboard where you can customise your Course's Theme:
- Logo upload
- Button Colour
- Hero Banner courses: Set default colours for highlighted courses featured as the hero banner at the top of the page.
- Course Cards: Set default colours for course titles and descriptions within individual course cards.
- Font Styles
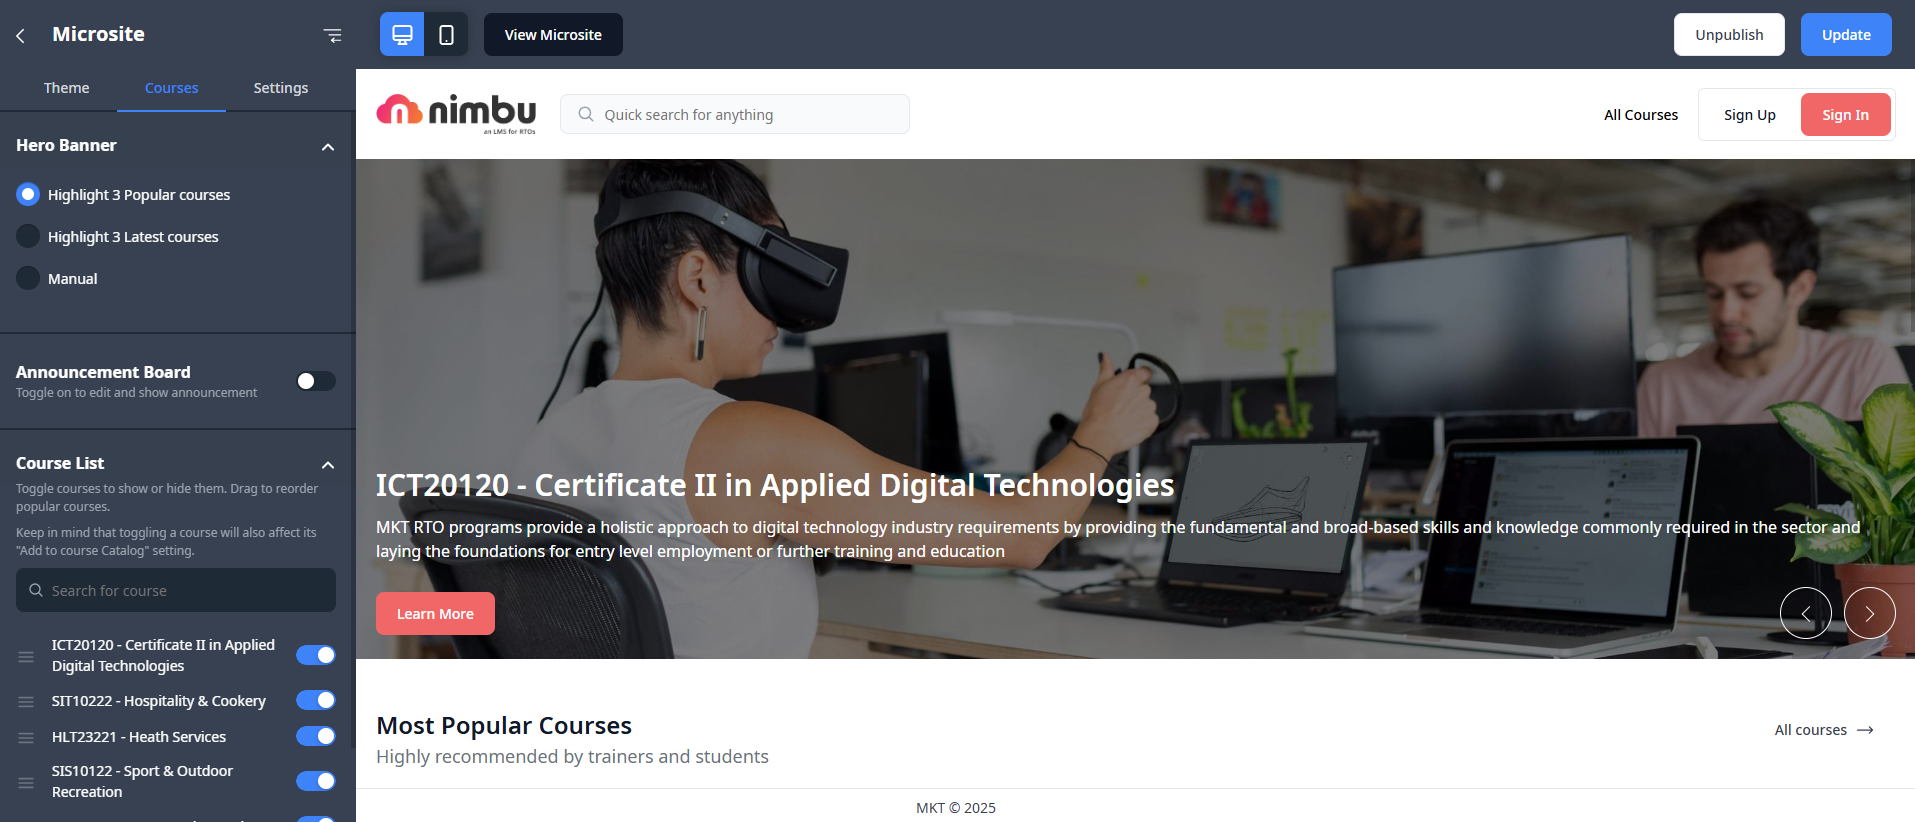
The Courses tab (located next to Theme) is where you control the content and layout of your public microsite page. Here you can:
- Modify Course Display: Select which courses are featured prominently in the hero banner options at the top of the page.
- Manage Announcement Board: Toggle the Announcement Board on or off to showcase important updates to your students and visitors.
- Show or Hide Courses: Easily control which specific courses are visible or hidden on the public microsite by toggling them on or off.
- Reorder Popular Courses: Drag and drop courses to reorder how they appear in the popular courses section
Click into Setting Tab next to Course, where you can find the url of your Microsite, input support email, phone number and copywrite of your RTO.
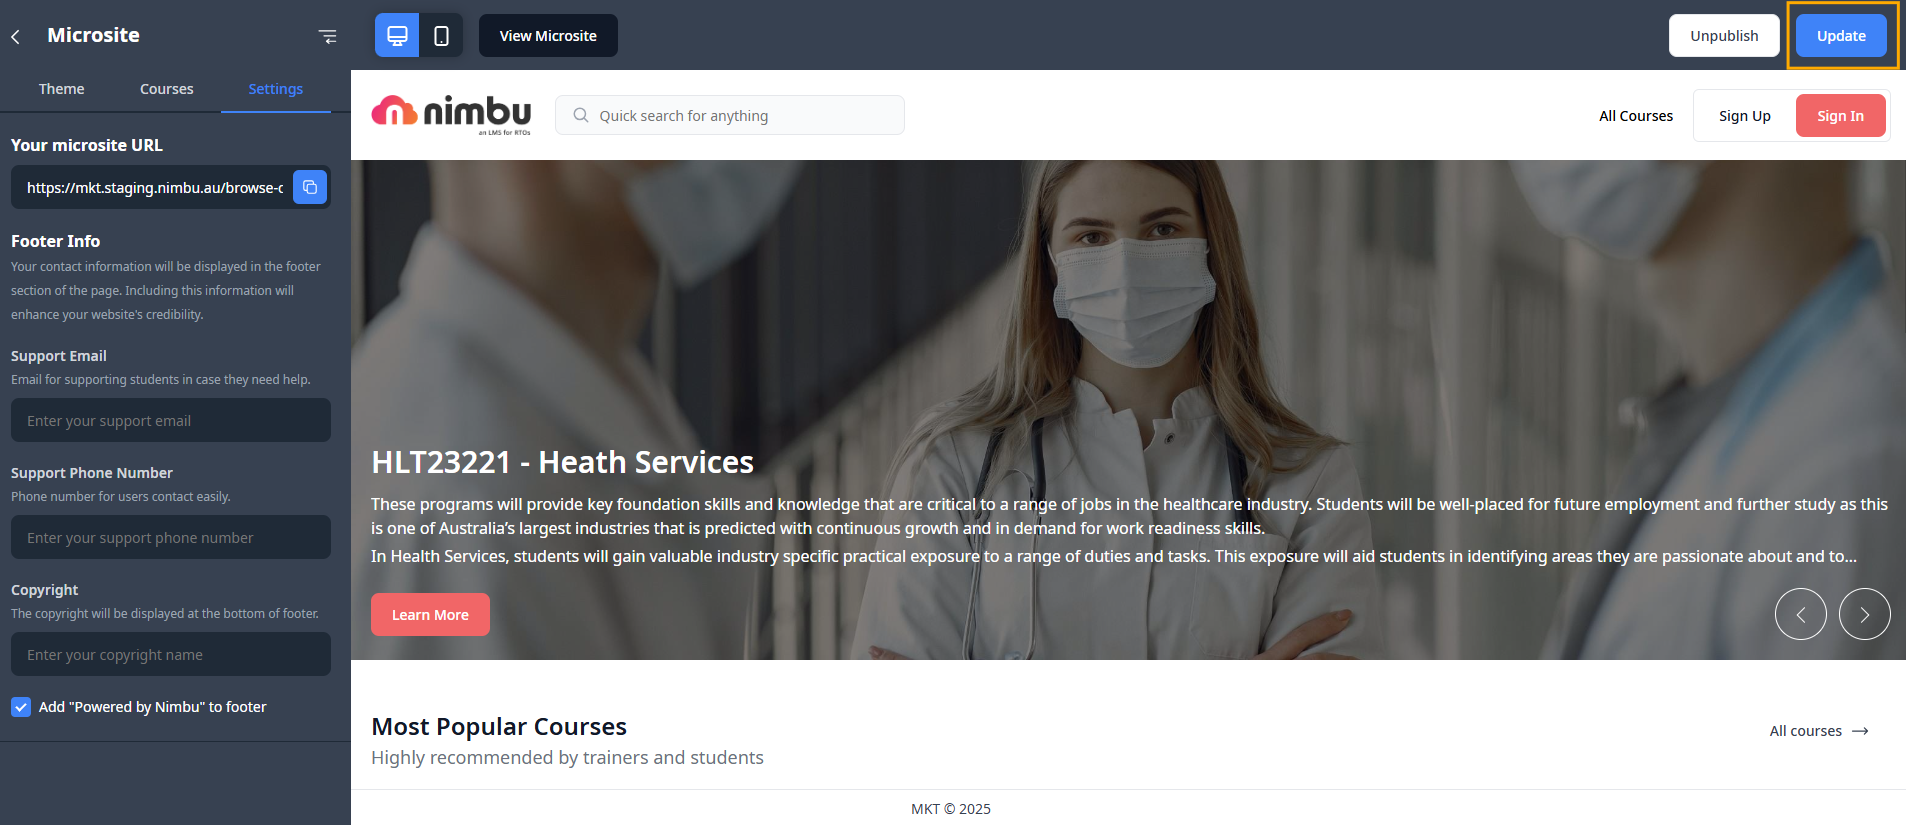
Click the Update button in the top right corner of the page to save your setting up of microsite.
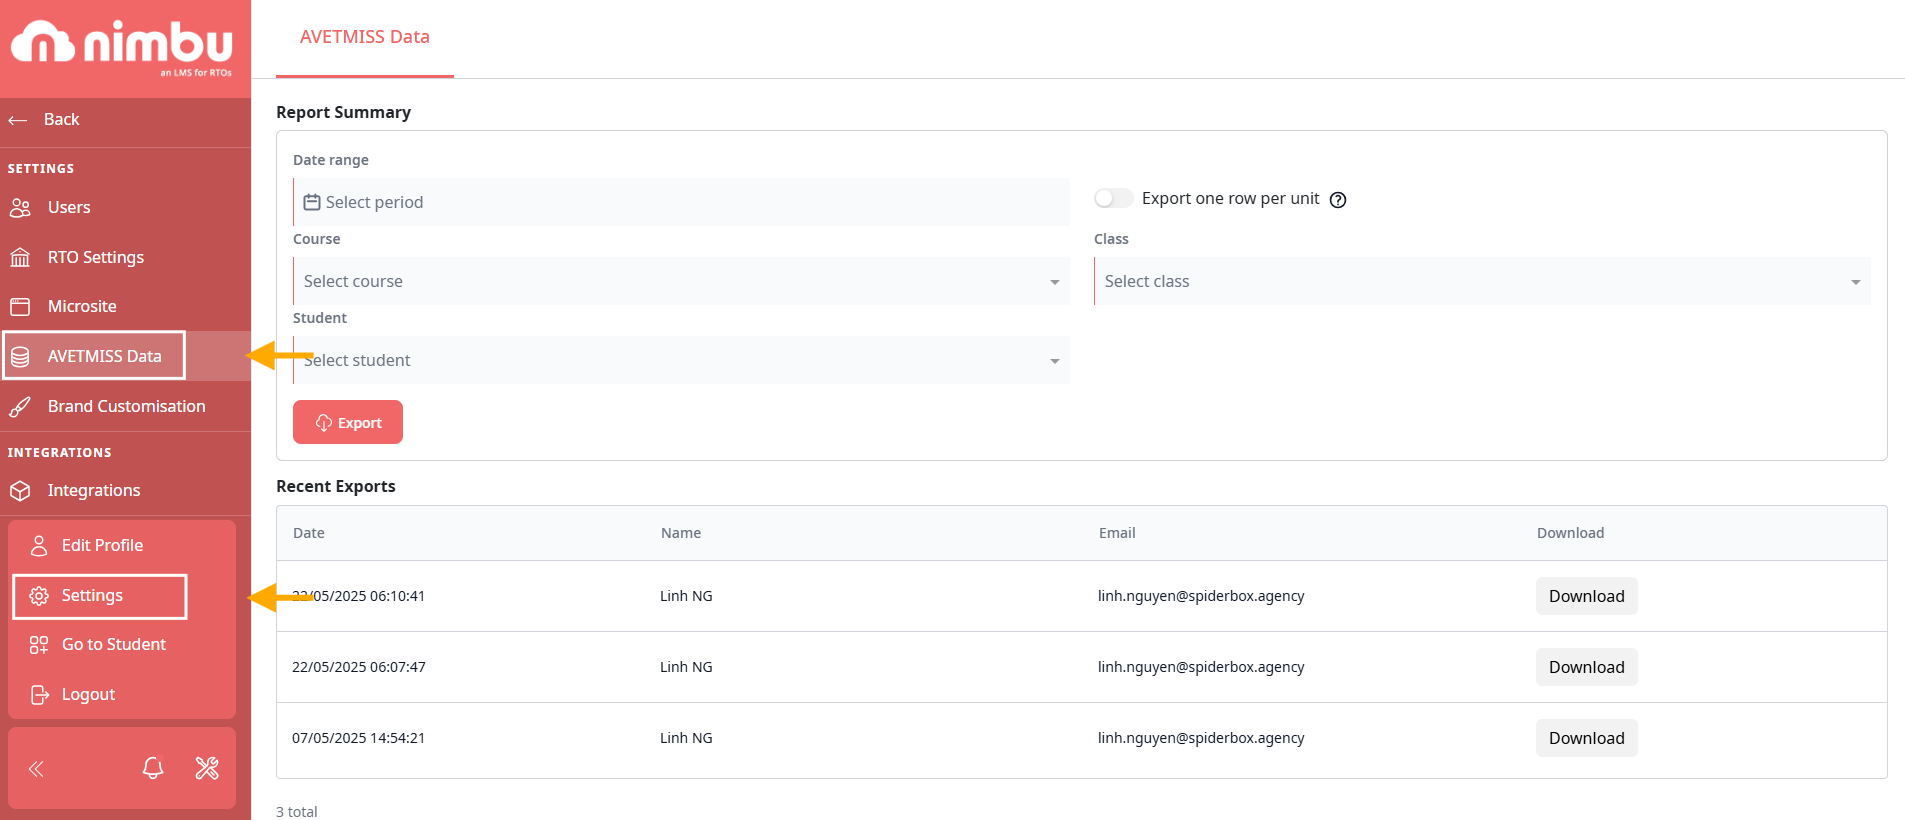
For AVETMISS Data settings:
From the left side navigation panel, click on the AVETMISS Data option to export your data.
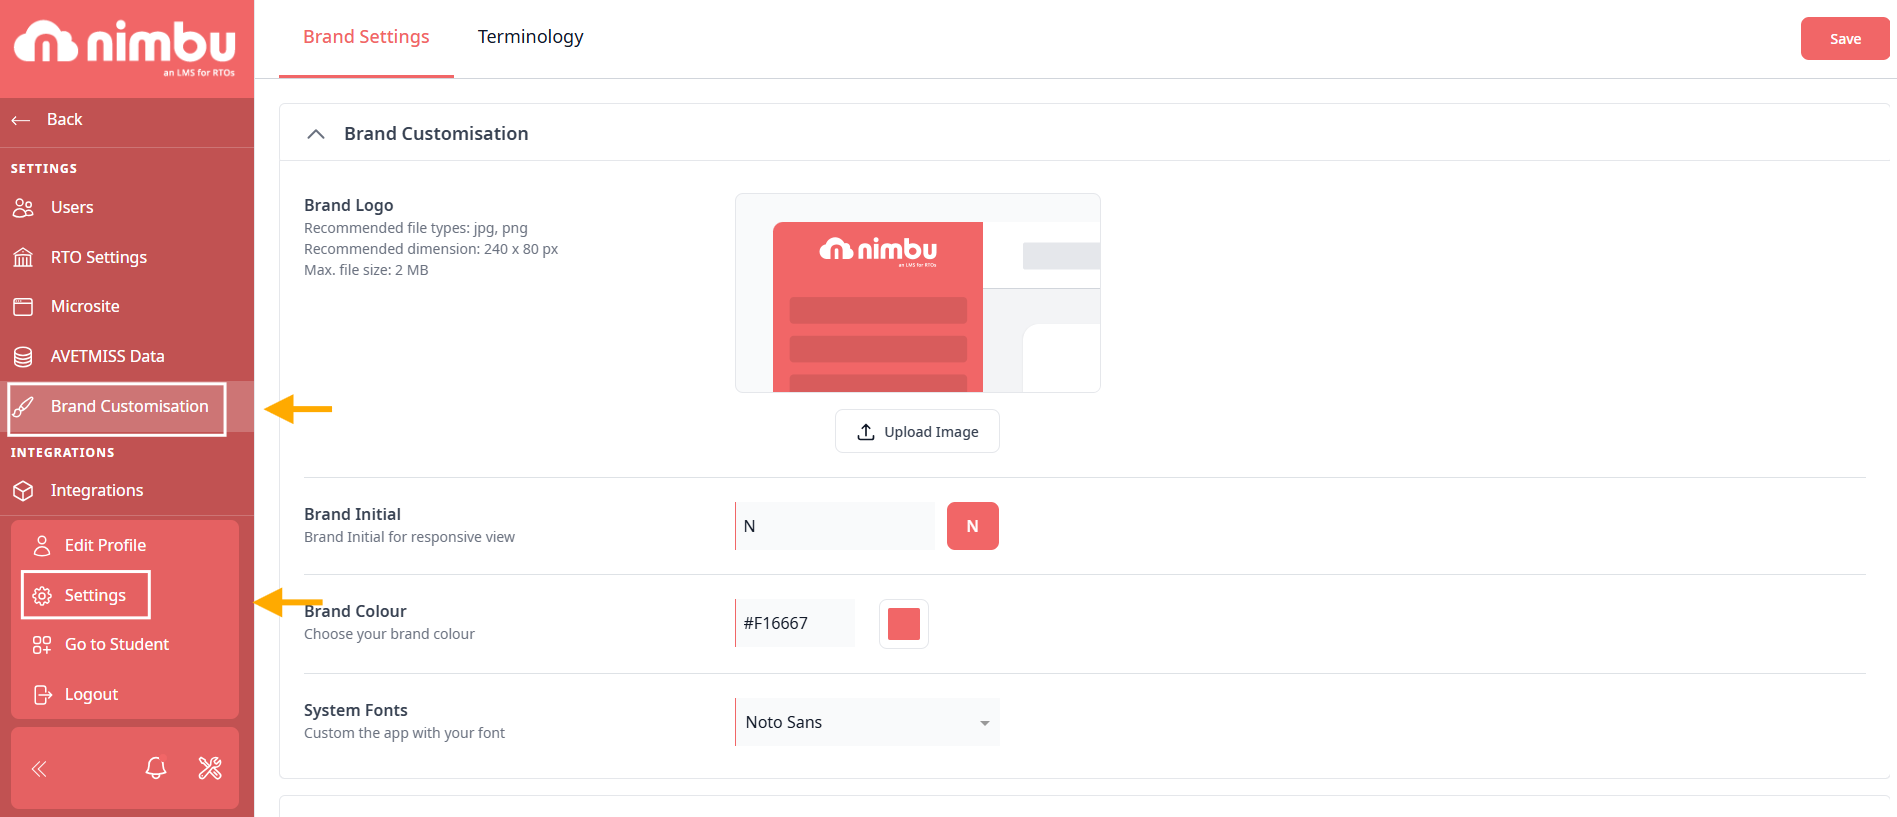
For Brand Customisation settings:
From the left side navigation panel, click on the Brand Settings option to set up and configure your brand.
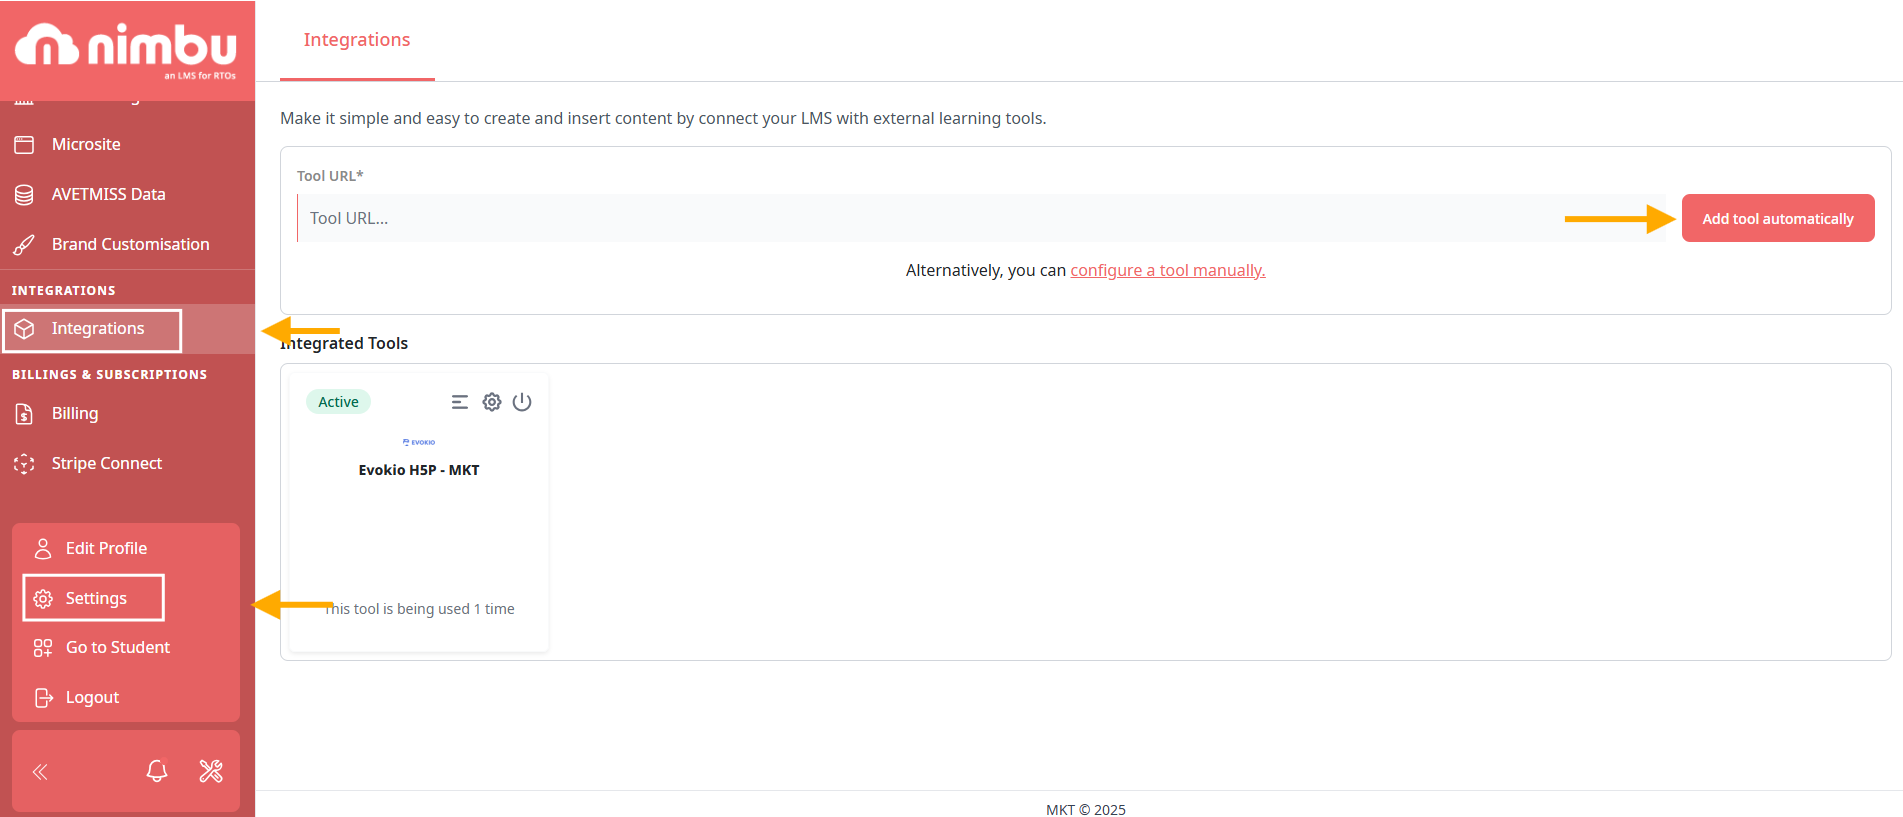
For Integration settings:
From the left side navigation panel, click on the Integrations option to set up and configure your LMS with external learning tools
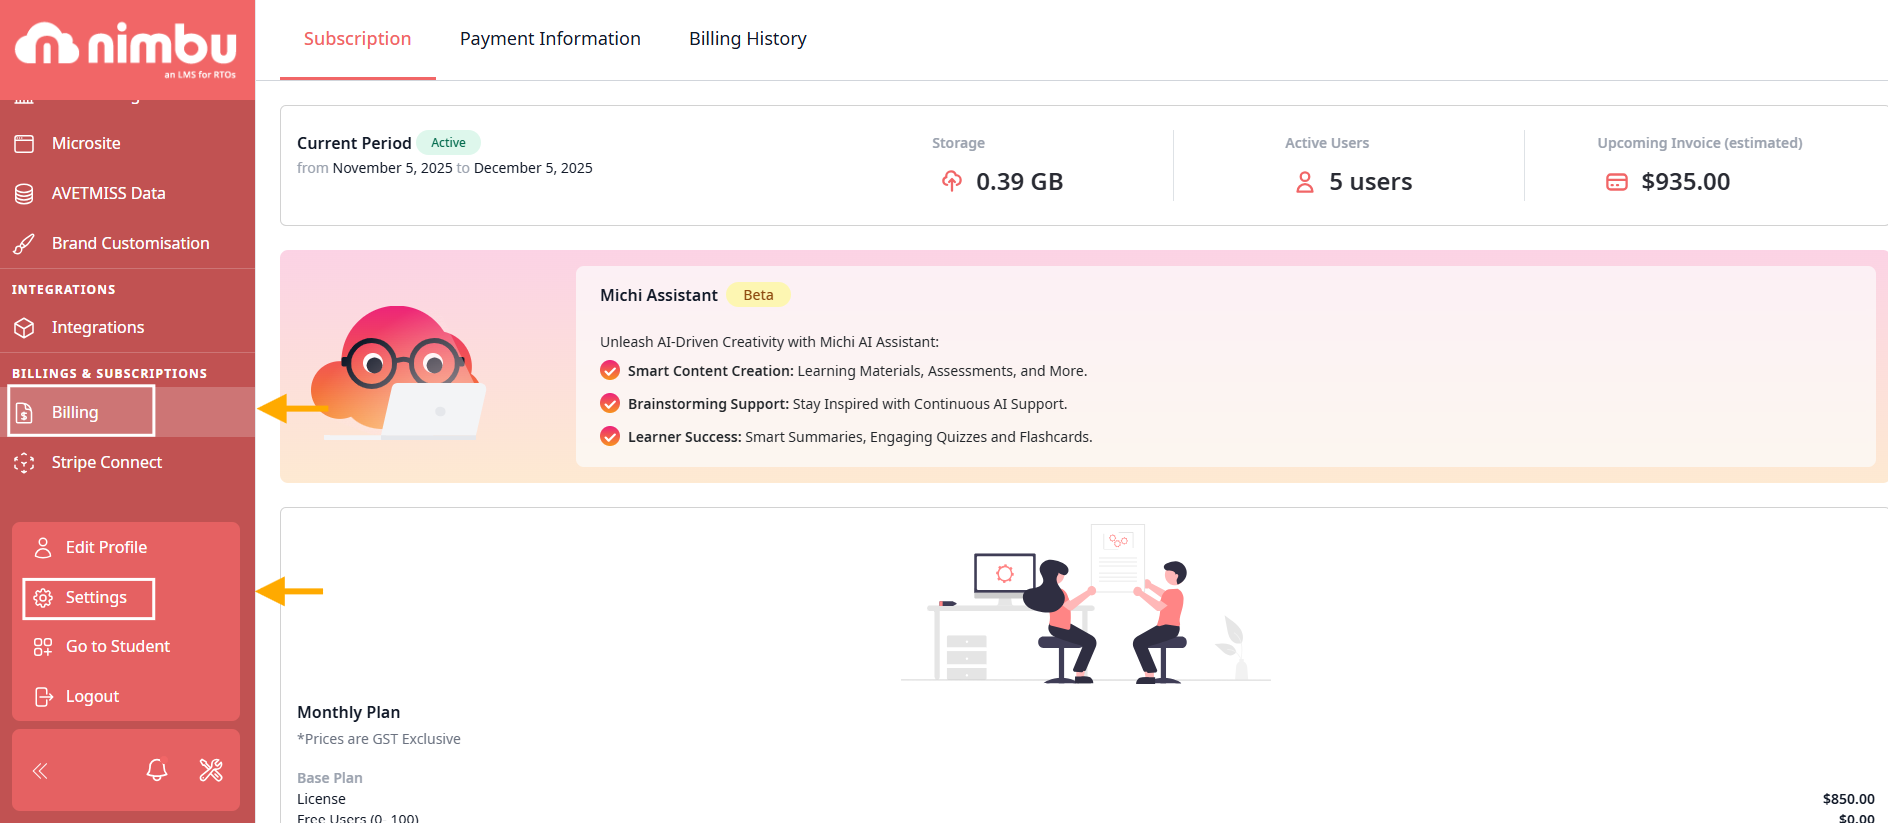
For Billing settings:
From the left side navigation panel, click on the Billing option to access and edit your billing and payment info.
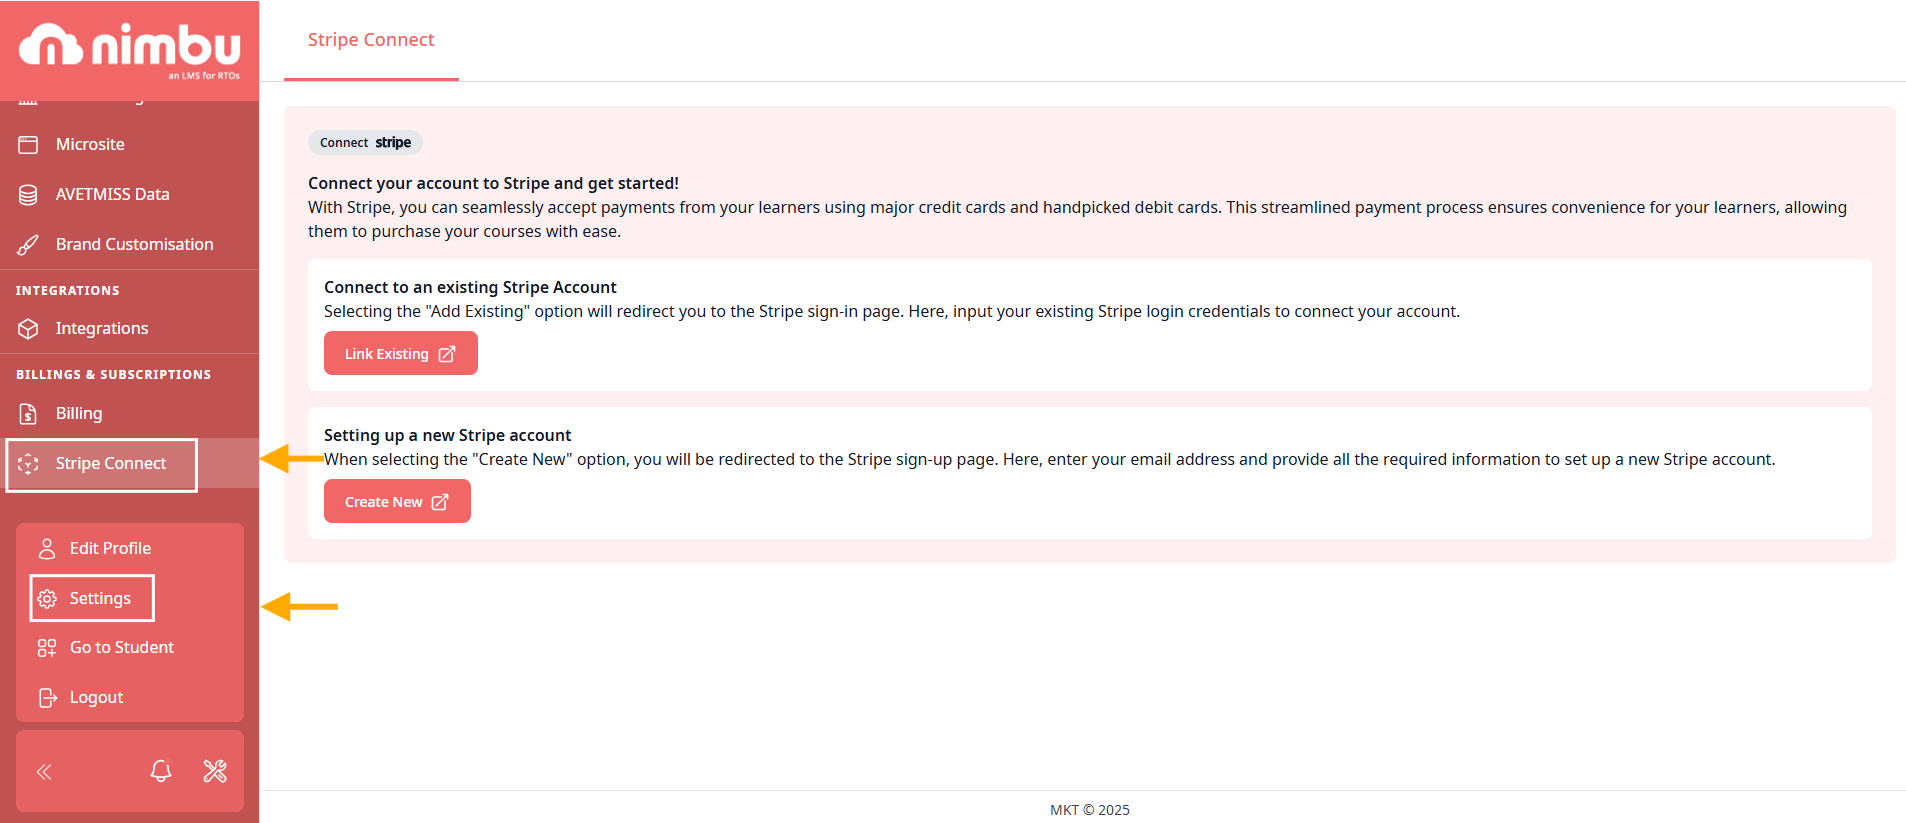
For Stripe Connect settings:
From the left side navigation panel, click on the Stripe Connect to provides the tools to manage complex payment flows, onboard and verify users, and facilitate payouts
If you have any further questions about account settings, please don't hesitate to contact us. Our support team will happily assist you with all your concerns.